Breaking the Nanogram Barrier: Advanced Strategies for Ultra-Sensitive Detection of Emerging Contaminants
This article provides a comprehensive analysis of cutting-edge methodologies and technologies aimed at enhancing the detection limits for emerging contaminants (ECs) in complex environmental matrices.
Breaking the Nanogram Barrier: Advanced Strategies for Ultra-Sensitive Detection of Emerging Contaminants
Abstract
This article provides a comprehensive analysis of cutting-edge methodologies and technologies aimed at enhancing the detection limits for emerging contaminants (ECs) in complex environmental matrices. Tailored for researchers, scientists, and drug development professionals, it explores the foundational challenges of detecting trace-level ECs, evaluates innovative sample preparation techniques leveraging nanomaterials and automation, and discusses advanced instrumental approaches like LC-MS/MS and electrochemical sensors. The content further addresses critical troubleshooting for matrix effects, outlines rigorous validation protocols, and offers a comparative assessment of analytical techniques. The goal is to equip the scientific community with the knowledge to achieve unprecedented sensitivity and reliability in environmental monitoring, thereby supporting accurate risk assessment and public health protection.
The Unseen Threat: Understanding Emerging Contaminants and the Imperative for Lower Detection Limits
Frequently Asked Questions (FAQs)
What are Emerging Contaminants (ECs)?
Emerging Contaminants (ECs), also known as contaminants of emerging concern, are a diverse group of synthetic or naturally occurring chemicals or biological agents that are newly detected in the environment or are of recent scientific concern [1] [2] [3]. The term "emerging" can refer to:
- Newly introduced chemicals, such as industrial additives or new pharmaceuticals [2].
- Chemicals present for a long time but whose environmental persistence and risks were only recently recognized due to advances in analytical techniques [2] [3].
- Chemicals known for a long time but with newly discovered negative impacts on humans or ecosystems [2].
A key characteristic is that most ECs are not currently subject to routine monitoring or regulatory standards under existing environmental laws, though they may be candidates for future regulation [1] [2] [3].
What are the major classes of ECs?
ECs encompass a wide and growing variety of substances. The main classes include [4] [1] [2]:
- Pharmaceuticals and Personal Care Products (PPCPs): Includes prescription and over-the-counter drugs, cosmetics, fragrances, sunscreens, and disinfectants [2] [3].
- Endocrine-Disrupting Chemicals (EDCs): Synthetic chemicals that can interfere with the hormonal systems of humans and wildlife, even at very low doses [1] [2].
- Per- and Polyfluoroalkyl Substances (PFAS): A large group of human-made chemicals used in many industrial and consumer products for their resistance to heat, stains, and water. They are often called "forever chemicals" due to their extreme persistence [5] [6].
- Micro- and Nano-plastics (MNPs): Small plastic particles resulting from the breakdown of larger plastic waste or from consumer products [2].
- Industrial Chemicals and Byproducts: Includes flame retardants, plasticizers, volatile organic compounds (VOCs), and non-regulated industrial chemicals [4] [1].
- Antibiotic Resistance Genes (ARGs): Genetic material that can spread resistance to antibiotics among microbial populations in the environment [7].
Why are ECs particularly challenging for environmental research and analysis?
ECs present a unique set of challenges that complicate their detection, risk assessment, and management [4] [5]:
- Diversity and Constant Innovation: There are over 350,000 chemicals and chemical mixtures registered for commercial use globally, with thousands of new substances introduced regularly, making it impossible to monitor them all [7] [5].
- Low Environmental Concentrations: ECs are often present in the environment at trace levels (nanograms to micrograms per liter), requiring highly sensitive and advanced analytical instruments for their detection [8].
- Complex Mixtures and Transformation Products: ECs are rarely found alone; they exist as complex mixtures whose combined effects are poorly understood. They can also break down or transform into other compounds, which may be more persistent or toxic than the parent substance [7] [5].
- Lack of Standardized Methods: For many ECs, standardized protocols for detection, quantification, and toxicity testing are either underdeveloped or nonexistent, making it difficult to compare results across studies and establish regulatory limits [4] [5].
- Data Gaps: There is a significant lack of data on the ecological and human health effects of long-term, low-dose exposure to most ECs [4].
Troubleshooting Common Experimental Challenges
Challenge: Overcoming Matrix Interference in Complex Environmental Samples
Problem: Accurate detection and quantification of ECs at trace levels are hampered by complex sample matrices (e.g., wastewater, sludge, soil), which can cause signal suppression or enhancement during analysis.
Solution Strategy: Advanced Sample Preparation Innovative sample preparation is crucial for isolating and preconcentrating target analytes, thereby improving detection limits and accuracy [9].
- Recommended Protocols:
- Solid-Phase Extraction (SPE): A widely used technique for extracting and concentrating organic compounds from liquid samples. The use of novel functional materials (e.g., molecularly imprinted polymers, carbon nanotubes) in SPE can enhance selectivity for specific ECs [9].
- Microextraction Methods: Techniques such as solid-phase microextraction (SPME) can minimize solvent use and integrate sampling, extraction, and concentration into a single step, which is advantageous for complex matrices [9].
- Enzymatic Hydrolysis: For analyzing contaminants like Bisphenols (BPs) in biological tissues, enzymatic hydrolysis is essential to break down bound forms of the contaminants, revealing the total bioavailable concentration and preventing significant underestimation [1].
Troubleshooting Tip: If recovery rates during extraction are low or inconsistent, investigate the use of isotopically labeled internal standards for each target analyte. These standards correct for losses during sample preparation and matrix effects during instrumental analysis, greatly improving quantitative accuracy.
Challenge: Predicting the Fate and Risk of Unmonitored ECs
Problem: Monitoring all potential ECs in the environment is prohibitively expensive and time-consuming. Researchers need tools to predict the behavior, distribution, and potential risk of chemicals for which little empirical data exists.
Solution Strategy: Leveraging Computational Models Mathematical models are efficient tools for simulating and predicting the transport, behavior, and risk of ECs in aquatic environments, helping to prioritize chemicals for further experimental study [8].
- Recommended Model Types:
- Machine Learning (ML) Models: ML models are becoming a hotspot in EC research. They can be applied to diverse scenarios beyond concentration prediction, including contaminant identification, screening, and toxicity/risk assessment based on chemical properties and existing data [8].
- Multimedia Fugacity Models: These models are excellent for simulating how contaminants transport and partition between different environmental compartments (e.g., water, air, soil, sediment), providing a holistic view of their fate [8].
- Conventional Water Quality Models: These models have high prediction accuracy and spatial resolution for simulating contaminant concentrations within a specific water body, such as a river or lake [8].
Troubleshooting Tip: The outcomes of ML models can sometimes be difficult to interpret ("black box" problem). To enhance the practical value of your model, combine its predictions with mechanistic understanding from fugacity or water quality models to build confidence in the results.
The Researcher's Toolkit: Essential Reagents & Materials
The following table details key reagents, materials, and technologies essential for research focused on the detection and analysis of Emerging Contaminants.
Table 1: Key Research Reagents and Solutions for EC Analysis
| Item Name | Function/Brief Explanation | Example Application |
|---|---|---|
| Molecularly Imprinted Polymers (MIPs) | Synthetic polymers with cavities tailored to a specific target molecule. Used as selective sorbents in sample preparation to isolate analytes from complex matrices. | Solid-phase extraction (SPE) cartridges for selective extraction of specific pharmaceuticals from wastewater [9]. |
| Enzymatic Hydrolysis Reagents | Enzymes (e.g., β-glucuronidase/sulfatase) used to cleave conjugated (bound) forms of contaminants, converting them back to their free form for accurate total concentration measurement. | Sample pre-treatment for analyzing bisphenols and pharmaceuticals in aquatic products or biosolids to assess total bioavailable contamination [1]. |
| Isotopically Labeled Internal Standards | Chemical analogs of the target analytes where some atoms are replaced by stable isotopes (e.g., ^13^C, ^2^H). They are added to samples to correct for matrix effects and analyte loss during preparation. | Quantification of PFAS, pharmaceuticals, and pesticides via LC-MS/MS to ensure high-precision and accurate results [9]. |
| Carbon Aerogels (CAs) | Highly porous, lightweight materials with a large surface area. Used as advanced adsorbents for the removal and extraction of contaminants from water and air samples. | Adsorption and removal of volatile organic compounds (VOCs) or other industrial chemicals like 1,4-dioxane from water samples [1]. |
| LC-MS/MS & GC-MS Columns | The core separation components for liquid/gas chromatography coupled with mass spectrometry. The stationary phase chemistry (e.g., C18, phenyl) determines the separation efficiency of different ECs. | Core component of analytical instruments for separating, identifying, and quantifying a wide range of ECs, from PPCPs to PFAS, in environmental extracts [1] [3]. |
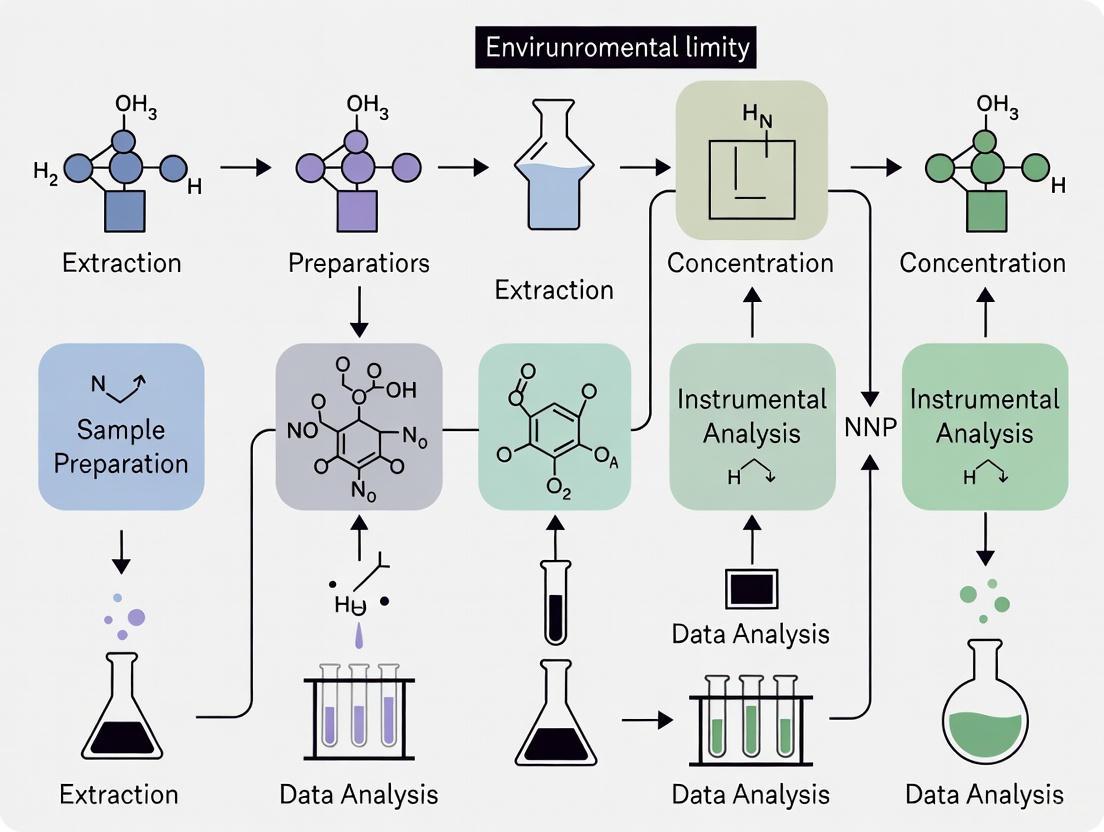
Workflow: From Sample to Data in EC Analysis
The diagram below outlines a generalized experimental workflow for the detection and analysis of emerging contaminants in environmental samples, highlighting key steps where the troubleshooting guides and reagent solutions are most applicable.
The analysis of emerging contaminants (ECs)—a diverse group of synthetic or naturally occurring chemicals not commonly monitored in the environment—is a critical frontier in environmental science. These contaminants, which include pharmaceuticals, personal care products (PPCPs), endocrine-disrupting chemicals (EDCs), and per- and polyfluoroalkyl substances (PFAS), are increasingly detected in various environmental matrices due to anthropogenic activities [2]. The primary challenge in their analysis stems from the exceptionally low concentrations at which they occur and exert biological effects, typically in the range of nanograms per liter (ng/L) to micrograms per liter (µg/L) [2]. At this trace level, conventional analytical methods often fail to deliver reliable identification and quantification, demanding advanced instrumentation and sophisticated troubleshooting approaches to achieve the necessary low limits of detection (LOD) and quantification (LOQ). This technical support center is designed to help researchers navigate the complex process of developing and troubleshooting methods for the accurate analysis of ECs.
Understanding the Units: ng/L and µg/L
A fundamental step in trace analysis is understanding the units of measurement. Conversions between nanograms per liter (ng/L) and micrograms per liter (µg/L) are frequently required for data reporting and interpretation.
- Nanogram per liter (ng/L): A unit of concentration representing one billionth of a gram (10⁻⁹ g) of a substance per liter of liquid. It is used for extremely small amounts, such as trace pollutants in water [10].
- Microgram per liter (µg/L): A unit of concentration representing one millionth of a gram (10⁻⁶ g) of a substance per liter of liquid. It is more commonly used for reporting environmental regulations [10].
The conversion between these units is straightforward, as summarized in the table below.
Table 1: Conversion between Nanogram/Liter and Microgram/Liter
| Nanogram/Liter (ng/L) | Microgram/Liter (µg/L) |
|---|---|
| 1 ng/L | 0.001 µg/L |
| 10 ng/L | 0.01 µg/L |
| 100 ng/L | 0.1 µg/L |
| 1,000 ng/L | 1 µg/L |
| 10,000 ng/L | 10 µg/L |
| 100,000 ng/L | 100 µg/L |
Source: Adapted from unit conversion resources [11] [10] [12].
Troubleshooting Guides for Low-Level Detection
Effective troubleshooting is a systematic process. The following guides adapt a general troubleshooting framework to the specific challenges of achieving low detection limits for ECs [13].
General Troubleshooting Framework
Title: Systematic Troubleshooting Workflow
Specific Problem Scenarios and Solutions
Table 2: Common Problems and Solutions in Trace Analysis
| Problem Scenario | Possible Causes | Investigation & Data Collection | Proposed Solutions & Experiments |
|---|---|---|---|
| High Background/Noise obscures the target signal, increasing LOD. | - Contaminated solvents or reagents.- Impurities in sample containers.- Carryover from the LC-MS/MS system.- Non-specific binding in sample preparation. | - Run a procedural blank.- Check instrument background noise without injection.- Inspect maintenance logs for source cleaning and column aging. | - Use higher purity solvents (LC-MS grade).- Rinse containers with sample solvent.- Perform intensive system wash with strong solvents.- Include additional clean-up steps (e.g., solid-phase extraction). |
| Poor Chromatographic Peak Shape (tailing or broadening) affects integration. | - Incompatible column chemistry.- Column degradation.- Inappropriate mobile phase pH or buffer concentration.- Secondary interactions with hardware. | - Inject a known standard to assess column performance.- Check system pressure against baseline.- Review mobile phase preparation logs. | - Replace the analytical column.- Use a guard column.- Adjust mobile phase composition (e.g., add modifier like formic acid).- Passivate the LC system (e.g., use chelators for metal-sensitive analytes). |
| Low or Inconsistent Recovery in spike-and-recovery tests. | - Losses during sample extraction/clean-up.- Incomplete protein precipitation.- Analyte degradation during sample processing.- Strong matrix binding. | - Compare recovery at different stages (pre- and post-extraction).- Check sample pH and stability.- Assess matrix effects using post-column infusion. | - Optimize extraction protocol (pH, solvent volume, time).- Change extraction sorbent (e.g., different SPE phases).- Add internal standards (especially isotope-labeled).- Use matrix-matched calibration curves to compensate for effects. |
| Insufficient Sensitivity to reach required LOD/LOQ. | - Inefficient ionization in the source.- Suboptimal mass transition selection.- Ion suppression from co-eluting matrix.- Inadequate instrument detection capability. | - Check source cleanliness and needle position.- Re-optimize MRM transitions and collision energies.- Analyze a pure standard to establish baseline. | - Change ionization mode (e.g., ESI+ to ESI-).- Employ sample concentration techniques.- Use a more advanced instrument (e.g., triple quadrupole for targeted work, Orbitrap for untargeted).- Implement heart-cutting or 2D-LC to reduce matrix interference. |
Frequently Asked Questions (FAQs)
Q1: What are the key figures of merit for evaluating method performance at trace levels? The two most critical figures of merit are the Limit of Detection (LOD) and Limit of Quantification (LOQ). The LOD is the lowest concentration at which an analyte can be detected but not necessarily quantified, while the LOQ is the lowest concentration that can be quantitatively measured with acceptable precision and accuracy [14]. For context, a study aiming to detect halogens in coal via laser-induced breakdown spectroscopy achieved LODs of 0.04 wt% for fluorine and 0.06 wt% for chlorine, demonstrating the push for lower and lower limits [15].
Q2: Why can't I simply concentrate my sample to achieve a lower LOD? While sample concentration is a valid strategy, it often concentrates the chemical matrix alongside the target analytes. This can lead to ion suppression in mass spectrometry or other matrix effects that interfere with the detection of the analyte itself, potentially negating the benefits of concentration and introducing quantitative inaccuracies [16]. A spike-and-recovery test should always be performed after a concentration step to validate the method.
Q3: What is the fundamental difference between targeted and untargeted analysis for emerging contaminants? Targeted analysis methods, such as those using triple quadrupole mass spectrometers in Selected Reaction Monitoring (SRM) mode, are highly sensitive and precise for detecting a pre-defined list of compounds [16]. In contrast, untargeted analysis aims to screen for a wide range of unknown compounds. This requires high-resolution accurate-mass (HRAM) instruments, like Orbitrap MS, which can provide precise molecular formulae and elucidate structures of previously unidentified contaminants [16].
Q4: My calibration curve is linear in solvent but non-linear in the matrix. What should I do? This is a classic sign of matrix effects. The first step is to use a matrix-matched calibration curve, where standards are prepared in a blank sample matrix that is free of the target analytes. Secondly, the use of a stable isotope-labeled internal standard for each analyte is the most effective way to correct for ionization suppression or enhancement within the mass spectrometer source [16].
Advanced Experimental Protocols for Pushing Detection Limits
Solid-Phase Extraction (SPE) for Water Samples
This protocol is designed for the extraction and concentration of pharmaceutical ECs from wastewater effluent.
- Sample Pre-treatment: Adjust the pH of the water sample (typically 500 mL to 1 L) to a value optimal for the target analytes (e.g., pH 7 for many pharmaceuticals). Filter through a 0.7 µm glass fiber filter to remove suspended particulates.
- SPE Sorbent Conditioning: Condition a reversed-phase C18 SPE cartridge (500 mg) with 5-10 mL of methanol followed by 5-10 mL of reagent water. Do not allow the sorbent to dry out.
- Sample Loading: Pass the pre-treated water sample through the SPE cartridge at a controlled flow rate of 5-10 mL per minute using a vacuum manifold.
- Cartridge Washing: Wash the cartridge with 5-10 mL of a mild solvent (e.g., 5% methanol in water) to remove weakly retained interferences.
- Analyte Elution: Elute the target analytes into a clean collection tube using 2 x 5 mL of a strong organic solvent (e.g., methanol or acetonitrile). A small amount of a modifier like 2% formic acid may be added to improve elution efficiency for certain compounds.
- Sample Reconstitution: Gently evaporate the eluent to complete dryness under a stream of nitrogen. Reconstitute the dried extract in 100 µL of a solvent compatible with the initial mobile phase (e.g., 10% methanol in water). Vortex thoroughly before analysis.
Method for Estimating LOD and LOQ
This method outlines a standard approach for determining LOD and LOQ based on signal-to-noise ratio and calibration curve statistics [14].
- Preparation of Low-Level Standards: Prepare a series of standard solutions at concentrations near the expected detection limit.
- Signal-to-Noise (S/N) Measurement: Inject the lowest concentration standard multiple times (n≥7). Calculate the LOD as the concentration that yields a signal-to-noise ratio of 3:1. The LOQ is typically defined as the concentration yielding a signal-to-noise ratio of 10:1.
- Calibration Curve Method: Alternatively, based on a calibration curve, the LOD can be calculated as 3.3 * σ / S, and the LOQ as 10 * σ / S, where σ is the standard deviation of the response (y-intercept) and S is the slope of the calibration curve.
- Application to Multidimensional Data: For instruments like electronic noses (eNoses) that produce multidimensional data, LOD estimation requires multivariate regression techniques like Principal Component Regression (PCR) or Partial Least Squares (PLSR) to relate the complex sensor response to concentration [14].
Title: Trace Analysis Workflow from Sample to Result
The Scientist's Toolkit: Essential Research Reagents and Materials
Table 3: Key Reagents and Materials for Advanced Contaminant Analysis
| Item Category | Specific Examples | Critical Function |
|---|---|---|
| High-Purity Solvents | LC-MS Grade Methanol, Acetonitrile, Water | Minimize chemical noise and background interference, which is crucial for achieving low LODs in mass spectrometry. |
| Solid-Phase Extraction (SPE) Sorbents | Reversed-Phase (C18), Mixed-Mode (C18/SCX), Hydrophilic-Lipophilic Balanced (HLB) | Extract, clean up, and concentrate target analytes from complex aqueous samples, improving sensitivity and reducing matrix effects. |
| Stable Isotope-Labeled Internal Standards | ¹³C- or ²H-labeled analogs of target pharmaceuticals (e.g., ¹³C-Caffeine) | Correct for analyte loss during sample preparation and compensate for matrix-induced ionization suppression/enhancement in mass spectrometry, ensuring quantitative accuracy. |
| Mass Spectrometry Tuning and Calibration Solutions | ESI Tuning Mix (e.g., from Agilent or Thermo Fisher) | Optimize instrument parameters (ion optics, collision energy) for maximum sensitivity and stability specific to the analytes of interest. |
| Analytical Columns | C18 columns with small particle sizes (e.g., 1.8 µm) and specialized phases (e.g., for polar compounds) | Provide high chromatographic resolution to separate target analytes from matrix interferences, which is essential for reducing ion suppression and improving peak shape. |
Frequently Asked Questions (FAQs)
Q1: What are the main classes of Contaminants of Emerging Concern (CECs)? CECs are a diverse class of chemical substances newly detected or monitored in water systems. The main classes include:
- Pharmaceuticals and Personal Care Products (PPCPs): Originating from medications, cosmetics, and cleaning agents.
- Per- and Polyfluoroalkyl Substances (PFAS): Synthetic "forever chemicals" known for their environmental persistence.
- Pesticides: Including herbicides and insecticides from agricultural runoff.
- Microplastics: Small plastic particles from synthetic fabrics and degrading plastic waste. These contaminants enter the environment through domestic sewage, industrial discharges, hospital effluents, and agricultural runoff [17].
Q2: Why is improving the Limit of Detection (LOD) critical for analyzing CECs? The Limit of Detection (LOD) is the lowest concentration at which a measurement has a 95% probability of being greater than zero [18]. Improving the LOD is crucial because:
- CECs often exert biological effects even at trace concentrations [17]. A lower LOD allows scientists to detect these harmful compounds at environmentally relevant levels, enabling more accurate risk assessments.
- It provides a more complete picture of contamination, as early monitoring efforts might have reported values as "< LOD" due to less sensitive analytical methods [18].
Q3: What are the primary analytical techniques for measuring human exposure to CECs? Two primary approaches are used to measure human exposure to environmental contaminants [19]:
- Ambient Concentration Measurements: Measuring contaminant levels in the environment (air, water, soil). This does not directly measure human contact but provides foundational data for regulatory actions.
- Biomonitoring: A more direct method that measures the contaminants or their metabolites in human tissues or fluids, such as blood or urine. This technique accounts for the body's absorption and metabolism of the chemicals [19].
Troubleshooting Guides for Analytical Experiments
Issue 1: High Proportion of Samples Below the Limit of Detection (LOD)
Problem Statement: A large percentage of your experimental results for a target contaminant are below the method's LOD, making data analysis and interpretation difficult.
Symptoms:
- Laboratory results are reported as "< LOD" for many samples.
- Inability to calculate reliable geometric means or percentile distributions for the dataset.
Possible Causes:
- The analytical method's sensitivity is insufficient for the expected environmental concentration levels.
- Sample degradation or contamination occurred during collection, storage, or preparation.
- The sample matrix is causing interference with the analytical instrument.
Step-by-Step Resolution Process:
- Verify Sample Handling: Review all protocols for sample collection, preservation, and storage to ensure they were followed and prevent degradation.
- Concentrate the Sample: If analytically permitted, use sample pre-concentration techniques (e.g., solid-phase extraction) to increase the analyte level before injection.
- Optimize the Method: Work with your lab to adjust instrument parameters (e.g., lower detector noise, improve separation) to enhance sensitivity and lower the LOD.
- Explore Advanced Techniques: Investigate if more sensitive instrumentation is available and suitable for your analysis.
Data Analysis for Values < LOD: When a high proportion of data is below the LOD, specific statistical techniques must be applied [18]:
- For Geometric Mean Calculation: Concentrations less than the LOD can be assigned a value of
LOD / √2to include them in the calculation. - Reporting Percentiles: If the percentile estimate itself is below the LOD, it should be reported as "< LOD" [18].
- Calculation Note: If more than 40% of results are below the LOD, geometric means are generally not calculated as they become statistically unreliable [18].
Escalation Path: Consult with a statistician or senior method developer to ensure the chosen approach for handling non-detect values is statistically sound for your specific study design.
Issue 2: Inefficient Extraction of CECs from Complex Environmental Samples
Problem Statement: Recovery rates for target CECs from solid environmental samples (e.g., biosolids, sediment) are low and inconsistent.
Symptoms:
- Low calculated extraction efficiency during method validation.
- High variability in replicate sample analyses.
- Inability to detect contaminants known to be present in the sample.
Possible Causes:
- The extraction solvent or technique is not effectively breaking the bond between the contaminant and the sample matrix.
- The complex matrix is causing strong adsorption of analytes.
- Sample homogenization is insufficient.
Step-by-Step Resolution Process:
- Review Literature: Investigate published methods for extracting your specific contaminant class (e.g., PFAS, PPCPs) from a similar matrix.
- Optimize Solvent System: Systematically test different solvent mixtures (e.g., varying polarity, pH) to find the most efficient one.
- Increase Extraction Efficiency: Evaluate the use of assisted extraction techniques like ultrasonication, accelerated solvent extraction (ASE), or microwave-assisted extraction.
- Include a Clean-up Step: Introduce a sample clean-up step (e.g., using a sorbent like QuEChERS) to remove co-extracted matrix interferents that can affect the analysis.
Validation or Confirmation Step: Validate the improved method by spiking a blank sample matrix with a known concentration of the target analyte and calculating the percentage recovery. Consistent recovery rates of 70-120% are typically desirable.
Experimental Workflow for Analyzing CECs in Biosolids
The following diagram illustrates a high-level workflow for analyzing and treating CECs in biosolid samples, from preparation to data interpretation and a potential treatment solution.
Research Reagent & Technology Solutions
The following table details key technologies and their functions in the context of researching and mitigating CECs, based on current studies.
| Technology / Reagent | Primary Function in CEC Research/Mitigation | Key Considerations |
|---|---|---|
| LC-MS/MS / GC-MS/MS | High-sensitivity instrumental analysis for identifying and quantifying trace levels of CECs and their metabolites in environmental and biomonitoring samples [19]. | The gold standard for targeted analysis; requires method optimization for different compound classes. |
| Advanced Oxidation Processes (AOPs) | A destructive technology that generates hydroxyl radicals to break down persistent organic pollutants (PFAS, PPCPs) into harmless end products [17]. | Effective for destruction but can be energy/chemical-intensive; may form by-products if not controlled [17]. |
| Pyrolysis | A thermal process (tested at 400-700°C) that eliminates >99% of PFAS, microplastics, and PPCPs from biosolids, converting them into stable biochar [20]. | A promising disposal method that destroys contaminants and produces a potentially valuable by-product (biochar) [20]. |
| Granular Activated Carbon (GAC) | An adsorption technology used to remove a broad range of CECs (e.g., PFAS, solvents) from water streams by trapping them on the carbon surface [17]. | Does not destroy contaminants; produces spent carbon that requires reactivation or disposal, creating a secondary waste stream [17]. |
| Reverse Osmosis (RO) | A separation technology using a semi-permeable membrane to remove a broad range of micropollutants and salts from water [17]. | Creates a concentrated brine stream rich in CECs that requires costly management; not a destructive technique [17]. |
Technical Support Center: Troubleshooting Guides and FAQs
This technical support center provides troubleshooting guidance for researchers working on the advanced detection of emerging contaminants. The FAQs below address specific experimental challenges within the context of a broader thesis aimed at improving detection limits in environmental samples.
Endocrine Disrupting Chemicals (EDCs)
FAQ 1: Our current methods for detecting multi-component EDCs in water are time-consuming and costly. What innovative approaches can we use to increase throughput and lower detection limits?
Challenge: Traditional chromatography and mass spectrometry methods for EDCs like Bisphenol A (BPA), 4-tert-octylphenol (4-t-OP), and 4-nonylphenol (4-NP) involve complex pretreatments, require significant instrumentation, and have long turnaround times, hindering high-frequency monitoring [21].
Solution: Integrate chemical machine vision with convolutional neural networks (CNNs) for rapid, simultaneous detection.
Recommended Protocol: Holographic Spectral Detection with CNN Analysis
- Apparatus Setup: Employ a long-path holographic spectrometer (LHS) with a visible light source (380–780 nm), a diffusing plate for uniform illumination, and a high-resolution imaging spectrometer [21].
- Sample Preparation: Prepare standard solutions of target EDCs (BPA, 4-t-OP, 4-NP) at varying concentrations. For environmental samples, minimal pre-processing is required [21].
- Data Acquisition: Use the LHS to capture the absorbance spectra of the prepared solutions. Translate the spectral data into chemically informative feature images [21].
- Model Training & Prediction: Train a CNN model (e.g., based on the ResNet-50 architecture) on a comprehensive database of these spectral images. The refined model can then identify and quantify the EDCs in unknown samples based on their spectral signatures [21].
Expected Outcomes: This method can reduce detection time from 30 minutes (via HPLC) to approximately 40 seconds and achieve detection limits as low as 3.34 μg/L for BPA, 3.71 μg/L for 4-t-OP, and 4.36 μg/L for 4-NP [21].
FAQ 2: How can we better establish the ecological risk of EDCs when current tests are resource-intensive and have uncertain linkages to adverse outcomes?
Challenge: Standard in vivo tests for endocrine activity are resource-intensive and the connection between mechanistic responses (e.g., receptor binding) and adverse apical outcomes (e.g., reproductive effects) can be uncertain [22].
Solution: A tiered testing strategy that prioritizes high-throughput in vitro and in silico methods.
- Recommended Protocol: Tiered Assessment for Ecological Hazard
- Tier 1: Prioritization & Screening: Use high-throughput in vitro assays (e.g., ER/AR binding, transcriptional activation, steroidogenesis) and in silico tools (e.g., QSAR models from the OECD Toolbox or Danish QSAR Database) to prioritize chemicals with potential endocrine activity [22].
- Tier 2: Mechanistic & Apical Linkage: For chemicals of concern, proceed to targeted in vivo tests. To reduce uncertainty, consider adding specific biochemical endpoints that are diagnostic for endocrine pathways, such as vitellogenin in fish, to better connect mechanistic effects to adverse outcomes [22].
- Data Integration: Use a weight-of-evidence approach to interpret data from all tiers, which helps inform the need for higher-tier, more definitive testing [22].
Antimicrobial Resistance (AMR)
FAQ 3: How can we move beyond slow, phenotypic antibiotic susceptibility testing to gain a faster, mechanistic understanding of resistance in bacterial isolates?
Challenge: Conventional phenotypic methods like disk diffusion and broth microdilution, while reliable, can take 24-48 hours, delaying critical therapy decisions and contributing to AMR spread [23].
Solution: Implement next-generation sequencing (NGS) to detect genomic determinants of resistance directly from bacterial isolates or complex samples.
Recommended Protocol: Genomic AMR Detection via Whole-Genome Sequencing (WGS)
- DNA Extraction: Use a versatile DNA extraction kit (e.g., Illumina DNA Prep) to obtain high-quality genomic DNA from bacterial cultures or directly from clinical/environmental samples [24].
- Library Preparation & Sequencing: Prepare sequencing libraries and perform Whole-Genome Sequencing on a high-throughput platform. For a more targeted approach, use panels like the AmpliSeq for Illumina Antimicrobial Resistance Panel to enrich for 478 known AMR genes [24].
- Bioinformatic Analysis: Process WGS data using specialized bioinformatic tools and databases (e.g., ARG-ANNOT, CARD) to identify resistance genes, point mutations, and plasmid-borne resistance elements [24].
- Validation: Correlate genomic findings with traditional phenotypic susceptibility results to build a robust database and validate the predictive power of genetic markers [24].
Advantages: WGS provides high-resolution data on the resistome, enables tracking of transmission routes during outbreaks, and detects low-frequency variants and novel resistance mechanisms that phenotypic tests may miss [24].
FAQ 4: What are the best practices for detecting AMR in complex environmental samples, such as wastewater, where culture-based methods may miss unculturable bacteria?
Challenge: Monitoring AMR in environmental reservoirs like wastewater is crucial for public health surveillance, but culture-based methods fail to capture the full diversity of resistance, including from unculturable organisms [24].
Solution: Employ shotgun metagenomics to profile the entire complement of ARGs in a sample without the need for cultivation.
- Recommended Protocol: Wastewater Resistome Monitoring
- Sample Collection & Concentration: Collect wastewater samples and concentrate microbial biomass via filtration or centrifugation.
- Metagenomic DNA Extraction: Extract total community DNA from the concentrated biomass, ensuring representative lysis of diverse bacterial taxa [24].
- Sequencing & Analysis: Perform shotgun metagenomic sequencing. The resulting data allows for the simultaneous detection and characterization of a vast array of ARGs and the bacterial pathogens carrying them, providing a holistic view of the "resistome" [24].
- Data Interpretation: Use statistical modeling and comparative analysis to study the abundance, diversity, and potential for horizontal gene transfer of AMR genes in the environment [24].
Bioaccumulation and Biomarker Response
FAQ 5: We need sensitive biomarkers to assess the sublethal effects and bioaccumulation potential of contaminants like heavy metals and microplastics. Which biomarkers are most reliable?
Challenge: Selecting sensitive and specific biomarkers that can serve as early warning signals for contaminant exposure and effect in organisms, particularly at low, environmentally relevant concentrations [25].
Solution: A meta-analysis of biomarker studies indicates that oxidative stress markers are consistently sensitive indicators.
- Recommended Protocol: Assessing Oxidative Stress from Contaminant Exposure
- Organism Selection: Choose relevant sentinel species for the ecosystem under study (e.g., fish for aquatic systems, earthworms or snails for soil systems) [26] [25].
- Tissue Sampling & Analysis: After a controlled exposure period, dissect key tissues (liver, gills, digestive tract). Homogenize tissues and use standardized spectrophotometric or fluorometric assays to measure:
- Malondialdehyde (MDA): A marker of lipid peroxidation and oxidative damage. A meta-analysis showed concentrations can increase by 145% in contaminated groups [25]. In fish, MDA levels in plasma and liver have been shown to respond to microplastic ingestion [26].
- Antioxidant Enzymes: Catalase (CAT), superoxide dismutase (SOD), peroxidase (POD), and glutathione-S-transferase (GST). Meta-analysis shows these activities can change significantly (e.g., GST increased in fish with microplastic exposure, while detoxification enzymes like EROD decreased) [26] [25].
- Data Interpretation: A decision framework that considers contaminant type (e.g., cadmium significantly increases CAT, SOD, POD, and MDA) and species-specific responses is recommended for reliable ecological risk assessment [25].
The following table summarizes key quantitative data on biomarker responses to heavy metal exposure from the meta-analysis [25].
Table 1: Sensitivity of Key Biomarkers to Heavy Metal Contamination in Soil Organisms
| Biomarker | Function | Reported Change vs. Control | Notable Contaminant Effects |
|---|---|---|---|
| Malondialdehyde (MDA) | Marker of lipid peroxidation and oxidative damage | +145% [25] | Cadmium exposure significantly increased levels (Hedges' g = +2.80) [25] |
| Catalase (CAT) | Antioxidant enzyme that decomposes hydrogen peroxide | +180% [25] | Cadmium exposure significantly increased activity (Hedges' g = +2.26) [25] |
| Peroxidase (POD) | Antioxidant enzyme | +150% [25] | Cadmium exposure significantly increased activity (Hedges' g = +3.44) [25] |
| Superoxide Dismutase (SOD) | Key antioxidant enzyme | Data Available [25] | Cadmium exposure significantly increased activity (Hedges' g = +3.46) [25] |
| Glutathione-S-Transferase (GST) | Phase II detoxification enzyme | Variable Response [25] | Activity can be induced or inhibited depending on metal and organism; showed correlation with heavy metal levels in snail tissues [25] |
The Scientist's Toolkit: Essential Research Reagents and Materials
This table lists key reagents, tools, and their functions for experiments in detecting emerging contaminants.
Table 2: Key Research Reagent Solutions for Advanced Contaminant Detection
| Item Name | Function/Application | Specific Use Case |
|---|---|---|
| AmpliSeq for Illumina Antimicrobial Resistance Panel | Targeted enrichment for AMR gene sequencing [24] | Evaluates antibiotic treatment efficacy by targeting 478 AMR genes across 28 antibiotic classes [24]. |
| OECD QSAR Toolbox | In silico prediction of chemical toxicity and activity [22] | Used for preliminary data collection and grouping of substances into categories to guide endocrine activity testing [22]. |
| Illumina DNA Prep | A fast, versatile library preparation solution [24] | Used for whole-genome sequencing of microbes or metagenomic DNA from diverse sample types for AMR studies [24]. |
| Respiratory Pathogen ID/AMR Enrichment Panel | Target enrichment NGS workflow [24] | Identifies respiratory pathogens and associated antimicrobial resistance alleles from complex samples [24]. |
| Convolutional Neural Network (CNN) Models (e.g., ResNet-50) | AI for spectral image analysis [21] | Enables rapid, simultaneous identification and quantification of multiple EDCs from holographic spectral data [21]. |
| Long-Path Holographic Spectrometer (LHS) | Captures high-resolution absorbance spectra [21] | Core component of a chemical machine vision system for rapid EDC detection in water samples [21]. |
Experimental Workflows and Signaling Pathways
The following diagrams illustrate key experimental workflows and a conserved signaling pathway relevant to the detection of emerging contaminants.
Diagram 1: AMR detection via WGS.
Diagram 2: Rapid EDC detection workflow.
Diagram 3: Conserved endocrine HPG/T axis.
Technical Support Center
FAQs: Addressing Core Challenges in EC Research
1. What are the most significant challenges in analyzing Emerging Contaminants (ECs) today? The primary challenges in EC analysis can be categorized into three main areas, as identified by recent comprehensive reviews [4]:
- Complex Structures: ECs constitute a diverse group of unregulated pollutants from various sources (pharmaceuticals, personal care products, industrial chemicals), each with unique chemical characteristics.
- Lack of Standard Methods: A major hurdle is the absence of standardized, universally accepted methods for detection and analysis.
- Matrix Complexity: Environmental samples (e.g., water, soil) contain a complex mix of interfering substances, making it difficult to isolate and accurately measure low concentrations of ECs. This complexity demands advanced technologies and is compounded by a need for better predictive models [4].
2. How does the lack of standard methods impact the comparability of microplastic research data? The non-alignment of methods severely limits progress and data comparability. Key issues include [27]:
- Size Range Differences: Studies use different lower and upper size limits to define microplastics (e.g., 1 μm, 20 μm, or 333 μm). Since smaller particles are far more abundant, methods with finer detection limits will report much higher number concentrations.
- Incompatible Metrics: Converting between number, volume, and mass concentrations is often done incorrectly by assuming fixed particle shapes and densities, rather than using environmentally realistic distributions.
- Misaligned Effect and Exposure Data: Ecotoxicological studies often use mono-dispersed particles of a single polymer, which do not represent the diverse mixtures of sizes, shapes, and polymers found in environmental samples. This makes it difficult to conduct a meaningful risk assessment.
3. What are some proposed solutions to overcome the hurdle of non-standardized methods? Pragmatic rescaling methods have been proposed to translate disparate data into a common currency for risk assessment [27]:
- Size Range Correction: Data from any measured size range can be translated to a default range (e.g., 1–5000 μm) using a power-law correction factor based on known environmental microplastic size distributions.
- Probabilistic Conversion: Using probability density functions that represent the actual heterogeneity of environmental microplastic (varying shapes, densities) to accurately convert between number, volume, and mass concentrations.
- Aligning Effect Studies: Correcting species sensitivity distributions (SSDs) by accounting for the differences between the microplastic types used in lab effect studies and those found in nature.
4. Can you provide an example of an advanced technique for detecting particle-based contaminants in complex matrices? Real-time autoradiography using a gaseous detector (like the BeaQuant system with a Parallel Ionization Multiplier) is a state-of-the-art technique for screening radioactive particles. It addresses several limitations of traditional methods [28]:
- Real-Time Analysis: It eliminates the trial-and-error process and long exposure times (days) associated with phosphor screen autoradiography or solid-state nuclear track detection.
- Spatial Resolution & Spectrometry: The technique provides a spatial resolution of less than 100 μm, suitable for locating individual particles, and can differentiate between particles emitting alpha and beta radiation.
- Application in Complex Samples: It has been successfully used to accurately detect cesium-rich microparticles from the Fukushima Daiichi exclusion zone within a heterogeneous, less radioactive mineral background, demonstrating a high success rate and low false positives [28].
Troubleshooting Guides
Problem: Inconsistent or Incomparable Microplastic Concentration Data This problem arises when data from different studies, using different methods, cannot be directly compared.
Solution: Apply Data Rescaling Protocols
| Step | Action | Description & Consideration |
|---|---|---|
| 1 | Identify Size Ranges | Determine the minimum and maximum particle sizes (x1M, x2M) measured in your study and the desired default range (x1D, x2D) for comparison (e.g., 1–5000 μm). |
| 2 | Apply Power-Law Correction | Use the correction factor formula: CF = (x1M^(1-α) - x2M^(1-α)) / (x1D^(1-α) - x2D^(1-α)). A default exponent of α = 1.6 is recommended based on environmental data [27]. |
| 3 | Rescale Concentration | Multiply your measured number concentration by the calculated CF to estimate the concentration within the default size range. |
| 4 | Convert Metrics Accurately | When converting number to mass, use probability density functions that reflect the diverse shapes and densities of environmental microplastic, not assumed spheres [27]. |
Problem: Difficulty Detecting Target Contaminant Particles in a Complex Sample Matrix High background interference from a heterogeneous sample matrix can mask the signal of target particles.
Solution: Implement Real-Time Autoradiography Screening
This guide is based on methods for radioactive particle detection [28] but illustrates a general approach for particle isolation.
| Step | Action | Description & Consideration |
|---|---|---|
| 1 | System Calibration | Assess detector capabilities using standard particles with known properties. Quantify spatial resolution and characterize energy spectra for different emission types (alpha/beta). |
| 2 | Artefact Library Creation | Analyze samples with known defects (e.g., dust, air pockets) to create a library of false-positive signals. This allows for differentiation between detector artefacts and real particle signals [28]. |
| 3 | Complex Sample Analysis | Run the environmental sample. The real-time function allows for immediate assessment, avoiding wasted time on samples without target particles. |
| 4 | Particle Identification | Use the established spatial and spectral data to identify "hot spots." Cross-reference signals against the artefact library to minimize false positives. |
| 5 | Validation | For the case of radionuclides, validate findings with subsequent techniques like gamma spectroscopy or mass spectrometry for isotopic information [28]. |
The Scientist's Toolkit: Essential Reagents & Materials
Key Research Reagent Solutions for EC Analysis
| Item | Function in Analysis |
|---|---|
| Standard Reference Particles | Used to calibrate detection instruments, quantify spatial resolution, and characterize signal spectra for both alpha and beta emissions [28]. |
| Power-Law Parameters (α, b) | Default fitting parameters (e.g., α = 1.6) used in rescaling equations to correct microplastic data for differences in analyzed size ranges, enabling data comparability [27]. |
| Probabilistic Density Functions | Mathematical functions that represent the real-world heterogeneity of environmental microplastic, allowing for accurate conversion between number, volume, and mass concentrations [27]. |
| Real-Time Autoradiography Gaseous Detector | A detection system (e.g., with a PIM structure) that provides immediate, high-resolution spatial and spectral data for radioactive particle screening in complex samples [28]. |
Experimental Protocol: Workflow for Advanced Particle Screening
The following diagram illustrates the core experimental workflow for screening and isolating radioactive particles from a complex environmental sample using real-time autoradiography, as described in the research [28].
Diagram Title: Radioactive Particle Screening Workflow
Next-Generation Tools and Techniques: Pushing the Boundaries of Sensitivity and Selectivity
The accurate monitoring of emerging micropollutants in environmental samples is crucial for public health and ecological safety. However, their low concentrations and the complexity of environmental matrices present significant analytical challenges. This technical support center provides troubleshooting and methodological guidance for researchers employing modern sample preparation techniques, specifically miniaturized sorbent-based extraction (SBE) utilizing nanomaterials (NMs), to overcome these hurdles and achieve lower detection limits in their thesis research. These advanced approaches are at the forefront of green sample preparation, reducing solvent use and waste while improving efficiency and sensitivity [29].
Research Reagent Solutions: Essential Materials and Their Functions
The following table details key nanomaterials used as extractive phases in miniaturized SBE techniques.
Table 1: Key Nanomaterials in Miniaturized Sorbent-Based Extraction
| Material Category | Examples | Primary Function & Properties |
|---|---|---|
| Carbon-Based Nanostructures | Carbon nanotubes, Graphene | High surface area; strong adsorption for a wide range of organic pollutants; tunable surface chemistry [29]. |
| Metal/Metal Oxide Nanoparticles | Magnetic iron oxide nanoparticles (e.g., Fe₃O₄) | Ease of recovery using an external magnet; core for functionalized coatings for selective extraction [29]. |
| Metal-Organic Composites | Metal-Organic Frameworks (MOFs) | Exceptionally high surface area; highly tunable pore size and functionality for target-specific adsorption [29]. |
| Green Nanosorbents | Materials derived from sustainable sources | Aim to reduce environmental footprint of synthesis; often possess competitive extraction efficiency [29]. |
Experimental Workflows for Miniaturized Sorbent-Based Extraction
The integration of nanomaterials and automation has streamlined sample preparation. The diagrams below outline the core general workflow and a specific automated approach.
General Workflow for Nanomaterial-Based Extraction
This diagram illustrates the logical sequence of steps, from sorbent selection to final analysis, which forms the basis for most methodologies in this field.
Automated and High-Throughput Workflow
Semi or fully automated platforms integrate these steps, significantly enhancing reproducibility and throughput while minimizing manual labor and human error [29].
Frequently Asked Questions (FAQs)
Q1: What are the primary advantages of using nanomaterials over conventional sorbents like C18 in sample preparation? Nanomaterials offer significantly higher surface-to-volume ratios, leading to greater extraction capacity and efficiency. Their surfaces can be easily functionalized to enhance selectivity for specific target contaminants, and they are particularly well-suited for miniaturized, solvent-efficient protocols [29].
Q2: My research involves a complex wastewater matrix. How can I improve the selectivity of my extraction for a specific emerging contaminant? Selectivity can be enhanced by using functionalized nanomaterials. For instance, you can use molecularly imprinted polymers (MIPs) tailored to your target analyte or metal-organic frameworks (MOFs) with pore sizes designed to selectively trap the molecule of interest. This reduces interference from co-extracted compounds in the complex matrix [29].
Q3: How does automation contribute to greener sample preparation? Automation directly supports the principles of Green Sample Preparation (GSP). It drastically reduces the consumption of organic solvents and other reagents, minimizes manual labor, increases sample throughput, and improves the reproducibility and robustness of your methods by standardizing every processing step [29].
Q4: Are there any emerging technologies that could further modernize this field? Yes, 3D printing is an emerging technology being explored for the fabrication of custom, low-cost microfluidic devices and extraction devices that incorporate nanostructured sorbents. This allows for highly customized and integrated sample preparation platforms [29].
Troubleshooting Guides
Problem 1: Low Extraction Recovery
- Observed Symptom: Low analyte signal after extraction, leading to poor sensitivity.
- Potential Causes & Solutions:
- Cause: Incompatibility between the nanosorbent surface chemistry and the target analyte.
- Solution: Select a different functionalized nanosorbent (e.g., switch from a hydrophobic C18-functionalized NM to a polar-functionalized one for your analyte).
- Cause: Inefficient elution solvent or protocol.
- Solution: Optimize the elution step by testing stronger or more compatible solvents, increasing elution volume, or using multiple small-volume elution steps.
- Cause: Sorbent fouling from the sample matrix.
- Solution: Incorporate a pre-washing step or use a more selective sorbent to reduce non-specific binding.
- Cause: Incompatibility between the nanosorbent surface chemistry and the target analyte.
Problem 2: Poor Reproducibility
- Observed Symptom: High variability in recovery rates between replicate samples.
- Potential Causes & Solutions:
- Cause: Inconsistent packing or dispersion of the nanomaterial in the extraction device.
- Solution: Ensure a homogeneous suspension of the nanosorbent during device preparation. Consider using commercial pre-packed devices if available.
- Cause: Manual handling errors during multi-step procedures.
- Solution: Transition to a semi-automated or automated platform to standardize sample loading, washing, and elution times and volumes [29].
- Cause: Batch-to-batch variation in synthesized nanomaterials.
- Solution: Thoroughly characterize each new batch of nanomaterial. Source materials from reputable suppliers with strict quality control.
- Cause: Inconsistent packing or dispersion of the nanomaterial in the extraction device.
Problem 3: Analyte Carry-Over
- Observed Symptom: Detection of analytes in a blank sample run after a high-concentration sample.
- Potential Causes & Solutions:
- Cause: Incomplete elution in the previous run.
- Solution: Implement a stronger or more thorough elution procedure. Follow with a blank run to confirm the absence of carry-over.
- Cause: Strong,近乎 irreversible binding to specific active sites on the nanomaterial.
- Solution: Use a nanosorbent with milder interaction mechanisms or include a cleaning-in-place step with a strong solvent between samples.
- Cause: Incomplete elution in the previous run.
Technical Support Center
Frequently Asked Questions (FAQs)
Q1: Our automated system is showing inconsistent results between runs. What are the first things we should check? Start with the simplest explanations first. Verify that all power sources are on and no fuses are blown. Then, ensure the machine is starting from a known good state, such as a home position with no parts, which is akin to rebooting a computer to clear its memory [30]. Examine the system for any visual signs of problems, such as leaking fluids or unusual wear on tooling [30].
Q2: How can we quickly identify which component in a high-throughput workflow is failing? A technique called "half-splitting" is highly effective. Divide your series of connections or sequential functions in half to check for a loss of signal or voltage. This allows you to isolate the faulty section quickly, then repeat the process within that section to pinpoint the failed component [30].
Q3: What are the most common sources of contamination in automated liquid handling systems, and how can we avoid them? Contamination often arises from sample matrices and non-volatile mobile phase additives. To reduce contamination:
- Use a divert valve to direct only the peaks of interest into the mass spectrometer, sending the void volume and high organic solvent portions to waste [31].
- Perform robust sample preparation, such as solid-phase extraction (SPE), to remove dissolved contaminants before injection [31].
Q4: Our automated platform is experiencing frequent instrument faults. How can we determine if the problem is with our method or the instrument itself? Implement a benchmarking method. When the instrument is working correctly, run five replicate injections of a standard compound like reserpine to establish baseline performance for retention time, repeatability, and peak height. At the first sign of problems, run this benchmark. If it works, the issue is with your method or samples; if it fails, the problem is with the instrument [31].
Q5: How does automation specifically address the challenge of reproducibility in environmental sample analysis? Automation enhances reproducibility by removing human-introduced variability. Automated systems perform tasks like pipetting and sampling with high precision every time, unaffected by fatigue or distractions [32]. They also create digital traceability through automatic timestamps and calibration records, providing a verifiable audit trail for reviewers [32] [33].
Troubleshooting Guides
Problem 1: Gradual Degradation of Signal in LC-MS Analysis
| # | Step | Action | Expected Outcome |
|---|---|---|---|
| 1 | Check for Source Contamination | Inspect the ion source for buildup. Clean according to manufacturer specifications. | Reduced chemical noise and improved signal stability. |
| 2 | Verify Mobile Phase | Ensure all mobile phase additives (e.g., formic acid, ammonium formate) are fresh, volatile, and of high purity. | Lower background noise and prevention of new contamination. |
| 3 | Run Benchmarking Method | Inject a standard compound to compare against baseline performance. | Confirms whether the issue is instrument-wide or method-specific. |
Problem 2: Intermittent or Inconsistent Operation of an Automated Platform
| # | Step | Action | Expected Outcome |
|---|---|---|---|
| 1 | Use Your Senses | Look for loose connections, listen for unusual sounds (e.g., grinding), and check for error messages on the HMI. | Identification of obvious physical or operational faults. |
| 2 | Start from a Known State | Return the machine to its home position and clear any jammed parts. | Establishes a baseline for normal operation and can clear soft errors. |
| 3 | Reproduce the Symptom | Attempt to recreate the fault condition. Note any specific steps or environmental factors (e.g., temperature) that trigger it. | Makes an intermittent problem consistent, allowing for isolation. |
Problem 3: High Error Rates in a High-Throughput Screening Assay
| # | Step | Action | Expected Outcome |
|---|---|---|---|
| 1 | Check Data Logs | Review system logs for performance degradation or failure patterns in specific modules. | Identifies trends and pinpoints sub-systems with high failure rates. |
| 2 | Substitute Components (Judiciously) | Replace suspected components (e.g., a peristaltic pump tube) one at a time with known good parts. | Isolates the faulty hardware component. Use as a last resort to avoid cost [30]. |
| 3 | Perform Root Cause Analysis (RCA) | Investigate the origin of the failure beyond the immediate symptom. Ask "why" repeatedly until the fundamental process or part failure is found. | Prevents problem recurrence by addressing the underlying cause [30]. |
Quantitative Data on Automation Benefits
The following table summarizes key performance metrics enhanced by the adoption of automation, which is critical for managing growing sample volumes and complexity in environmental analysis [33].
Table 1: Measurable Benefits of Laboratory Automation
| Metric | Improvement with Automation | Context & Notes |
|---|---|---|
| Operational Efficiency | Enables 24/7 operations; streamlines tasks from sample to result [33]. | Removes manual handoffs and bottlenecks, reducing turnaround time. |
| Process Consistency | Ensures every sample is processed the same way, every time [33]. | Directly enhances data reproducibility and confidence in findings. |
| Cost Reduction | Minimizes labor costs, error-related expenses, and reagent waste [33]. | Manages increasing volumes with fewer new hires and fewer re-runs. |
| Data Integrity | Enhances traceability and helps maintain regulatory compliance [33]. | Automated logs provide timestamps and calibration records. |
Experimental Protocol: Automated Solid-Phase Extraction (SPE) for Emerging Contaminants
This protocol is designed for a robotic liquid handling platform to prepare water samples for the analysis of emerging contaminants (ECs) such as pharmaceuticals and endocrine disruptors [4].
1. Reagents and Materials
- Samples: Environmental water samples (e.g., river, wastewater), filtered through a 0.45 µm glass fiber filter.
- SPE Cartridges: C18 or mixed-mode reversed-phase cartridges.
- Solvents: HPLC-grade Methanol, Acetonitrile, and Water. Volatile additives: Formic Acid and Ammonium Formate.
- Internal Standard Solution: A deuterated or otherwise isotopically labeled analog of the target analytes.
2. Automated Workflow
- Conditioning: Dispense 5 mL of Methanol followed by 5 mL of reagent water through the SPE cartridge at a flow rate of 5 mL/min. Do not allow the sorbent to dry out.
- Loading: Acidify the 100 mL water sample with 0.1% formic acid. Using the robotic arm, transfer and load the entire sample onto the cartridge at a flow rate of 5-10 mL/min.
- Washing: Wash the cartridge with 5 mL of a solution of 5% Methanol in reagent water (acidified with 0.1% formic acid) to remove weakly retained interferences.
- Drying: Activate the vacuum manifold for 10-15 minutes to dry the sorbent completely.
- Elution: Elute the target analytes into a clean collection tube using 2 x 5 mL of Methanol. The divert valve should be programmed to collect this eluate.
3. Post-Extraction and Analysis
- Evaporation: Evaporate the eluate to dryness under a gentle stream of nitrogen gas using an automated evaporator.
- Reconstitution: Reconstitute the dried extract in 200 µL of a mobile phase starting solvent (e.g., 95:5 Water:Methanol with 0.1% formic acid).
- Analysis: Inject into the LC-MS system for analysis.
The Scientist's Toolkit: Essential Research Reagents & Materials
Table 2: Key Reagent Solutions for Emerging Contaminant Analysis
| Item | Function | Technical Notes |
|---|---|---|
| Volatile Buffers (e.g., Ammonium Formate/Acetate) | Controls mobile phase pH for predictable LC separation and ionization; avoids source contamination [31]. | Use at ~10 mM concentration. Prefer over non-volatile salts like phosphate. |
| High-Purity Solvents (HPLC-MS Grade) | Serves as the foundation for mobile phases and sample preparation to minimize background noise. | Essential for maintaining low baseline and preventing signal suppression. |
| Solid-Phase Extraction (SPE) Cartridges | Concentrates trace-level emerging contaminants and removes interfering matrix components from samples [31]. | Select sorbent chemistry (e.g., C18, HLB) based on the polarity of target ECs. |
| Isotopically Labeled Internal Standards | Corrects for analyte loss during sample preparation and signal variation in the MS source. | Crucial for achieving accurate quantification, especially in complex matrices. |
Automated Workflow for Emerging Contaminant Analysis
The following diagram illustrates the end-to-end automated process for sample preparation and analysis, highlighting critical control points.
Automated Analysis Workflow
Systematic Troubleshooting Logic
Adopt this logical decision tree to efficiently resolve issues with automated platforms.
Troubleshooting Decision Tree
Troubleshooting Guides
Sensitivity Issues: Boosting Signal-to-Noise Ratio
| Optimization Strategy | Specific Action | Expected Benefit |
|---|---|---|
| Sample Preparation | Use selective SPE cartridges (e.g., C18, EMR-lipid) for clean-up [34] [35] | Reduces matrix effects, improves recovery [36] |
| LC Conditions | Reduce column internal diameter; use nano-LC or micro-LC [36] | Increases analyte concentration, enhances ionization [36] [37] |
| Mobile Phase | Use volatile additives (e.g., formic acid, ammonium acetate); avoid non-volatile buffers [38] [39] | Prevents source contamination and signal suppression [38] |
| MS Source | Optimize desolvation temperature, gas flows, and capillary voltage for your analyte [37] | Can yield 2- to 3-fold sensitivity gains [37] |
| System Maintenance | Use LC-MS grade solvents and regularly replace pump inlet filters [38] | Reduces background noise and contamination [38] |
Managing Matrix Effects in Complex Samples
| Problem | Possible Cause | Solution |
|---|---|---|
| Poor Recovery & Precision | Co-extraction of fats, lipids, and proteins causing ion suppression [34] | Optimize SPE clean-up (e.g., C18 was most suitable for meat samples) [34] |
| Signal Suppression | Charge competition from endogenous compounds in ESI [37] | Use APCI for moderately polar, thermally stable analytes [37] |
| Inaccurate Quantification | Matrix effects (ME) vary widely between sample types [34] | Use matrix-matched calibration or isotope-labeled internal standards [34] |
Chromatographic Problems: Peak Shape and Retention
| Issue | Diagnostic Check | Corrective Action |
|---|---|---|
| Broad or Tailing Peaks | Check for excessive system dead volume [38] | Minimize tubing length; use appropriate fittings [38] |
| Ghost Peaks | Run a blank gradient [38] | Use high-purity solvents; shorten column equilibration [38] |
| Retention Time Shift | Check mobile phase pH and buffer concentration [39] | Use volatile buffers at consistent concentrations (e.g., 10 mM) [39] |
Frequently Asked Questions (FAQs)
Q1: What is the most critical factor for achieving low detection limits in multi-residue analysis? A holistic approach is essential. However, effective sample clean-up to reduce matrix effects is often the most critical for complex environmental samples. Matrix effects can vary significantly (e.g., 20.1–64.8% in different meat products) and severely impact recovery and precision, especially in fatty matrices [34]. Using selective sorbents like EMR-lipid in a µSPE format can efficiently remove lipids, simplifying the process and improving reproducibility [35].
Q2: How can I reduce matrix effects without using expensive internal standards? While internal standards are best, several practical strategies exist:
- Dilute and re-inject: A simple dilution can reduce matrix concentration and its effects.
- Enhanced clean-up: Optimize your SPE or d-SPE protocol. For instance, one study found C18 SPE superior to florisil or NH2 for pesticide analysis in meat [34].
- Change ionization modes: Switching from Electrospray Ionization (ESI) to Atmospheric Pressure Chemical Ionization (APCI) can reduce matrix effects, as ionization occurs in the gas phase rather than in the liquid droplet [37].
Q3: My LC-MS/MS signal drops over time. What should I check first? Run a benchmarking method with a standard compound like reserpine. If the benchmark fails, the problem is instrument-related [39]. The most common causes are:
- Contaminated ion source: Due to matrix buildup. Regular maintenance and using a divert valve to direct only analyte peaks to the MS are crucial [39].
- Clogged sample capillary or orifice: From non-volatile buffers or dirty samples.
- Deteriorated mobile phase: Always use fresh, LC-MS grade solvents.
Q4: When should I use QuEChERS versus SPE for sample preparation? The choice depends on your application:
- QuEChERS is quick, easy, and effective for a wide range of multi-residue methods. It is highly suited for screening a large number of samples [40]. However, its purification efficiency can be lower than SPE, potentially leading to more matrix effects [34].
- SPE offers more selective and rigorous clean-up, which is often necessary for complex, fatty matrices like milk, meat, or sludge to achieve lower detection limits and better reproducibility [34] [35]. New formats like µSPE in 96-well plates also enable high-throughput analysis [35].
Q5: What are the best practices for storing mobile phases and samples to prevent contamination?
- Solvents: Store in the manufacturer's original, sealed bottles. Avoid transferring to other containers and using plastic devices that can leach plasticizers [38].
- Water: Use bottled LC-MS grade water or water from a well-maintained Milli-Q system. For low consumption, bottled water is preferable to avoid microbial growth in the system [38].
- Samples: Use amber glass vials with certified low-leachability caps and septa. Avoid plastic consumables unless tested for leachables [38].
Experimental Protocols & Data
Detailed Methodology: Optimized QuEChERS for Aquaculture Products
This protocol is adapted from a study analyzing 52 contaminants in aquaculture products [40].
1. Sample Preparation:
- Homogenize the sample (e.g., flatfish, eel, oyster).
- Accurately weigh 2.0 ± 0.1 g of the homogenized sample into a 50 mL centrifuge tube.
2. Extraction:
- Add 10 mL of acetonitrile (ACN) with 1% formic acid.
- Add 10 mL of distilled water to improve extraction efficiency.
- Add the surrogate standard (e.g., atrazine-d5) at this stage.
- Vortex vigorously for 1 minute.
- Add a commercial QuEChERS salts packet (e.g., containing MgSO₄ and NaCl).
- Shake immediately and vigorously for 1 minute.
- Centrifuge at 4000 rpm for 5 minutes.
3. Clean-up (d-SPE):
- Transfer the upper ACN layer (about 1 mL) into a d-SPE tube containing sorbents (e.g., PSA and C18).
- Vortex for 1 minute.
- Centrifuge at 4000 rpm for 5 minutes.
- Filter the supernatant through a 0.2 µm syringe filter into an LC vial for analysis.
4. LC-HRMS Analysis:
- Column: C18 column (e.g., 100 mm x 2.1 mm, 1.7 µm).
- Mobile Phase: (A) Water with 0.1% formic acid, (B) Methanol with 0.1% formic acid.
- Gradient: 5% B to 100% B over a suitable runtime.
- Detection: High-Resolution Mass Spectrometry (HRMS) in positive/negative switching mode.
Method Validation Data for Multi-Residue Analysis
The table below summarizes validation data from two independent studies on complex matrices, demonstrating achievable performance [34] [40].
| Matrix | Number of Analytes | Average/Reported Recovery (%) | Precision (RSD, %) | LOQ (mg/kg) | Reference |
|---|---|---|---|---|---|
| Aquaculture Products | 52 | 70 - 120 | ≤ 20 | 0.0005 - 0.005 | [40] |
| Beef, Pork, Chicken | 27 | 70 - 120 | ≤ 20 | ≤ 0.01 (for 25/32 comp.) | [34] |
| Lard and Tallow | 21 | 70 - 120 | ≤ 20 | Varies | [34] |
Workflow and Troubleshooting Visualizations
The Scientist's Toolkit: Research Reagent Solutions
| Reagent / Material | Function in LC-MS/MS Analysis | Example Use Case |
|---|---|---|
| C18 SPE Cartridge | Reversed-phase sorbent for purifying samples; retains non-polar analytes and impurities [34] | Deemed most suitable for clean-up of pesticides in meat products [34] |
| EMR-Lipid Sorbent | Selectively removes lipid matrix components from fatty samples [35] | Clean-up of 250 pesticides in cow's milk using a µSPE 96-well plate format [35] |
| QuEChERS Kits | Provides salts and sorbents for quick, easy, and effective extraction and clean-up [40] | Simultaneous extraction of 52 pesticides and pharmaceuticals from aquaculture products [40] |
| LC-MS Grade Solvents | Ultra-pure solvents (water, ACN, MeOH) to minimize background noise and contamination [38] | Essential for all mobile phase preparation to maintain sensitivity and system health [38] |
| Volatile Additives | Formic acid, ammonium formate/acetate; promote ionization without source contamination [38] [39] | Used in mobile phase for analysis of pharmaceuticals and pesticides [40] [37] |
Technical Support Center
Troubleshooting Guides
Issue 1: Low or Inconsistent Sensor Sensitivity
Problem: The boron-doped diamond (BDD) sensor is not achieving the expected low detection limits for target contaminants.
- Potential Cause A: Non-uniform boron doping distribution in the electrode.
- Potential Cause B: Inappropriate surface termination.
- Potential Cause C: Insufficient surface area or poor electron transfer kinetics.
- Solution: Modify the BDD surface with nanomaterials. Decorate the electrode with gold nanoparticles, carbon nanotubes, or graphene to increase the active surface area and accelerate electron transfer, thereby enhancing sensitivity [42].
Issue 2: Signal Interference from Complex Sample Matrices
Problem: The sensor signal is affected by fouling from proteins or other organic matter, or by overlapping signals from non-target compounds in environmental samples.
- Potential Cause A: Biofouling or adsorption of matrix components.
- Potential Cause B: Overlapping voltammetric peaks from multiple electroactive species.
- Solution: Utilize the wide potential window of BDD to employ techniques like Differential Pulse Voltammetry (DPV). DPV enhances selectivity by minimizing background current from capacitive charging, helping to resolve overlapping signals [43].
Issue 3: Poor Reproducibility Between Measurements or Electrodes
Problem: Results are not repeatable across multiple tests or with different BDD electrodes.
- Potential Cause A: Variations in electrode surface morphology or boron doping levels between batches.
- Potential Cause B: Inconsistent surface modification procedures.
- Solution: Develop and adhere to a standardized protocol for nanomaterial deposition (e.g., drop-casting, electrodeposition), including precise concentration, volume, and drying conditions [42].
Frequently Asked Questions (FAQs)
Q1: What are the key advantages of using BDD electrodes over traditional glassy carbon or metal electrodes for environmental sensing?
A1: BDD electrodes offer a unique combination of properties ideal for environmental monitoring [41] [43] [42]:
- Wide Potential Window: Allows detection of analytes that oxidize/reduce at high potentials without interference from water electrolysis.
- Low Background Current: Results in a high signal-to-noise ratio, enabling lower detection limits.
- Excellent Fouling Resistance: More stable performance in complex samples like wastewater.
- Superior Physical and Chemical Robustness: Suitable for use in harsh environments and for long-term monitoring.
Q2: How can I enhance the selectivity of my BDD sensor for a specific emerging contaminant, such as a pesticide or pharmaceutical?
A2: Selectivity can be engineered through several strategies:
- Surface Functionalization: Immobilize biological recognition elements (e.g., antibodies, enzymes, DNA aptamers) onto the BDD surface to create a specific binding interface for the target analyte [41].
- Nanomaterial Composites: Use nanomaterials that have selective affinity or catalytic activity toward your target. For example, specific metal oxides can preferentially adsorb heavy metals [44] [42].
- Optimized Electrochemical Technique: Combine BDD with selective pulse voltammetric techniques like DPV to distinguish targets based on their distinct redox potentials [43].
Q3: My sensor works well in buffer solutions but fails in real water samples. What steps should I take?
A3: This is common due to matrix effects. Implement the following:
- Sample Pre-concentration: Use low-volume Solid-Phase Extraction (SPE) to concentrate the target analyte and remove interfering salts or organic matter [45].
- Standard Addition Method: Use this calibration technique to account for the matrix's effect on the analytical signal.
- Platform Calibration: Calibrate the sensor specifically for different water matrices (e.g., groundwater, wastewater) to account for variability [46].
Q4: What are the future research directions for improving BDD-based sensors?
A4: Current open challenges and research frontiers include [41] [42]:
- Synthesis Standardization: Developing more reproducible and scalable CVD methods for uniform boron doping.
- Miniaturization: Creating compact, portable BDD sensor systems for true on-site deployment.
- Multiplexing: Designing arrays for simultaneous detection of multiple contaminants.
- Advanced Data Handling: Integrating machine learning for data analysis to improve identification in complex mixtures.
Experimental Protocols for Enhanced Detection
Protocol 1: Fabrication of a Nanomaterial-Modified BDD Electrode for Heavy Metal Detection
This protocol details the creation of a sensor for trace heavy metals (e.g., Pb²⁺, Cd²⁺) in water.
1. Electrode Pretreatment:
- Clean the BDD electrode sequentially in Al₂O₃ slurry, deionized water, and ethanol under sonication.
- Perform electrochemical activation by cycling the electrode potential in 0.5 M H₂SO₄ between -1.0 V and +1.5 V (vs. Ag/AgCl) at 50 mV/s for 20 cycles [43].
2. Nanomaterial Modification (e.g., Bismuth Film Deposition):
- Prepare a deaerated solution containing 400 µg/L Bi³⁺ in 0.1 M acetate buffer (pH 4.5).
- Deposit a bismuth film onto the pre-treated BDD surface by applying a potential of -1.0 V for 60-120 seconds under constant stirring [43].
3. Analysis via Anodic Stripping Voltammetry (ASV):
- Pre-concentration: Immerse the modified electrode in the water sample. Apply a deposition potential of -1.2 V for 120-300 seconds under stirring to reduce and deposit heavy metals onto the Bi/BDD surface.
- Stripping: After a quiet time of 10 seconds, scan the potential in the positive direction using DPV mode (e.g., from -1.2 V to -0.2 V). The oxidation (stripping) of each metal produces a distinct current peak.
- Quantification: Measure the peak current, which is proportional to the concentration of the metal ion in the sample.
Table 1: Exemplary Performance of BDD-Based Sensors for Environmental Contaminants
| Target Analyte | Sensor Modification | Detection Technique | Achieved Detection Limit | Sample Matrix |
|---|---|---|---|---|
| Heavy Metals (Pb²⁺, Cd²⁺) | Bismuth Film | Anodic Stripping Voltammetry | Low µg/L range [43] | Groundwater |
| Pharmaceuticals | Not Specified | Fluorescence Spectroscopy | 14 µg/L (benchtop) [45] | Groundwater |
| Pesticides/Industrial Pollutants | Nanostructuring | Differential Pulse Voltammetry | Varies by compound [44] | Surface Water, Wastewater |
| PFAS-class surfactants | Proprietary Platform | Electrochemical / Optical | Reported as PFOS-equivalents [46] | Diverse Water Types |
Protocol 2: Developing an Enzymatic BDD Biosensor for Organic Pollutants
This protocol outlines a general method for detecting contaminants using enzyme-based catalysis.
1. BDD Surface Activation:
- Create oxygen-terminated functional groups on the BDD surface using anodic polarization or oxygen plasma treatment. This creates a hydrophilic surface favorable for biomolecule immobilization [47] [42].
2. Enzyme Immobilization:
- Prepare a solution of the specific enzyme (e.g., acetylcholinesterase for organophosphate pesticide detection, or oxidase enzyme for its substrate) in a suitable pH buffer.
- Deposit a precise volume (e.g., 5 µL) of the enzyme solution onto the activated BDD surface and allow it to dry at 4°C.
- Cross-link the enzyme layer by exposing it to a glutaraldehyde vapor phase for a short period to enhance stability.
3. Amperometric Detection:
- Immerse the biosensor in a stirred buffer solution containing the sample.
- Apply a constant detection potential (e.g., +0.7 V vs. Ag/AgCl for H₂O₂ detection from oxidase enzymes).
- Monitor the current response before and after the addition of the sample. The change in current is related to the enzymatic reaction rate and the concentration of the target inhibitor or substrate [47].
Table 2: Key Research Reagent Solutions for BDD Sensor Development
| Reagent / Material | Function / Explanation |
|---|---|
| Boron-Doped Diamond Electrode | The core transducer; provides a stable, low-noise, and fouling-resistant platform for sensing [41] [42]. |
| Nanomaterials (AuNPs, CNTs, Graphene) | Enhance surface area and electron transfer kinetics; can be modified for specific recognition [42]. |
| Biological Elements (Antibodies, Enzymes, Aptamers) | Provide high selectivity by binding specifically to the target analyte (e.g., a pesticide, toxin, or protein biomarker) [41]. |
| Solid-Phase Extraction (SPE) Cartridges | Pre-concentrate target analytes from large sample volumes and remove matrix interferents, lowering the practical detection limit [45]. |
Workflow and Signaling Diagrams
Diagram 1: BDD Sensor Modification and Sensing Workflow
BDD Sensor Fabrication and Operation Flow
Diagram 2: Heavy Metal Detection Signaling Pathway
Heavy Metal Sensing Mechanism
Welcome to the Green Sample Preparation Technical Support Center
This resource is designed to support researchers and scientists in the implementation of sustainable and efficient Electrophoretic Concentration (EC) and other green sample preparation techniques. The content is framed within a research context focused on improving detection limits for emerging contaminants in environmental samples.
Frequently Asked Questions (FAQs)
Q1: What makes a sample preparation method "green"? Green sample preparation is guided by principles that aim to make analytical procedures more sustainable. Key tenets include minimizing or eliminating hazardous solvent use, reducing energy consumption, using renewable or recycled materials, minimizing waste generation, and ensuring operator safety. These principles help align your laboratory work with the broader goals of sustainable development [48].
Q2: Why is Electrophoretic Concentration (EC) considered a green technique? EC is an electric field-driven, off-line sample preparation technique for charged analytes. Its green credentials come from being an environmentally friendly approach that often uses aqueous-based solutions, minimizes organic solvent consumption, and can achieve high concentration factors without generating large volumes of harmful waste [49].
Q3: My EC recovery rates are low for complex environmental water samples. What could be the cause? Low recovery in complex matrices like wastewater is often due to high sample conductivity, which competes with and reduces the effective electric field for your target analytes. This is a common issue, as evidenced by CFs dropping to just 1–3 in undiluted wastewater compared to 12–243 in purified water. In such cases, EC primarily serves as a rapid sample clean-up step, and you may need to couple it with an additional on-line concentration technique like sweeping for sufficient enrichment [49].
Q4: How can I simultaneously pre-concentrate both cationic and anionic contaminants from a single sample? The Simultaneous Electrophoretic Concentration and Separation (SECS) setup is designed for this purpose. It modifies the basic EC device by incorporating an additional assembly of a micropipette and hydrogel. This allows for the concurrent enrichment and clean-up of both positively and negatively charged analytes, as demonstrated for herbicides, with concentration factors ranging from 18 to 337 within 30 minutes [49].
Q5: What are some common green alternatives to traditional liquid-liquid extraction? Several miniaturized, solvent-minimized techniques are available:
- Solid-Phase Microextraction (SPME): A solvent-less technique that integrates sampling, extraction, and concentration [50].
- QuEChERS: Known for being Quick, Easy, Cheap, Effective, Rugged, and Safe, it uses small volumes of solvent [51].
- Dispersive Liquid-Liquid Microextraction (DLLME): Uses microliter volumes of extraction solvent [50].
- Fabric-Phase Sorptive Extraction (FPSE): Uses a fabric substrate coated with a sol-gel sorbent, minimizing sample pretreatment [50].
Troubleshooting Guides
Issue 1: Low Concentration Factor (CF) in Electrophoretic Concentration
Problem: The achieved analyte concentration factor is lower than expected.
| Possible Cause | Diagnostic Steps | Solution |
|---|---|---|
| Excessive voltage application time | Analyze CF at different time points (e.g., 5, 15, 50, 55 min). A sharp drop in CF after an optimal time indicates analytes are migrating out of the acceptor phase [49]. | Optimize and strictly control the voltage application time. For cationic drugs, CF peaked at 50 min and dropped significantly by 55 min [49]. |
| High sample conductivity | Measure the conductivity of your environmental sample (e.g., wastewater). Compare CFs between diluted and undiluted samples [49]. | For high-conductivity matrices, dilute the sample or use EC primarily for clean-up, and couple it with a subsequent on-line concentration method like sweeping in MEKC [49]. |
| Inappropriate acceptor electrolyte | Experiment with different types and concentrations of acceptor electrolytes (e.g., 50 mM Ammonium Acetate at pH 5.0 or 8.3) [49]. | Systematically optimize the type and concentration of the acceptor electrolyte to achieve the highest conductivity ratio between the sample and acceptor phase [49]. |
| Presence of electroosmotic flow (EOF) | Check if your setup includes a component to suppress fluid flow. | Use a conductive hydrogel polymerized inside a syringe barrel. This creates a zero net-flow condition inside the pipette, preventing EOF from adversely affecting enrichment [49]. |
Issue 2: Managing Matrix Effects in Complex Environmental Samples
Problem: Sample matrix interferes with the pre-concentration or subsequent analysis of target contaminants.
| Possible Cause | Diagnostic Steps | Solution |
|---|---|---|
| Carry-over of interfering matrix components | Perform a blank run after a high-concentration sample to check for memory effects [52]. | Implement a cleaning step between analyses. For example, flush the system with a cleaning solution (e.g., acetonitrile:water:acetic acid:TFA) to reduce memory effects to below 0.1% [52]. |
| Complex sample composition | Compare the analytical signal from a standard solution with that from a spiked sample extract (matrix-matched calibration). | Employ a selective sorbent or extraction phase. Techniques like FPSE or selective SPE sorbents can offer high clean-up efficiency for complex food or environmental matrices [53] [50]. |
Quantitative Performance of Green Pre-concentration Techniques
The table below summarizes performance data for various techniques to aid in method selection and expectation management.
Table 1: Performance Metrics of Green Sample Preparation Techniques
| Technique | Typical Application (Analytes) | Sample Type | Concentration / Enrichment Factor | Time Required | Key Green Advantage |
|---|---|---|---|---|---|
| Electrophoretic Concentration (EC) [49] | Anionic pollutants (e.g., dyes, benzenesulfonates) | Purified, Drinking, River Water | CF: 30–249 | 15–20 min | Electric field-driven; minimal solvent use |
| EC for Cations [49] | Cationic drugs (e.g., promethazine, verapamil) | Purified Water | CF: 12–243 | 50 min | Aqueous-based acceptor phase |
| Simultaneous EC & Separation (SECS) [49] | Cationic & Anionic Herbicides | Water | CF: 18–337 | 30 min | Simultaneously processes cations and anions |
| On-line Pre-concentration [52] | Peptides (Endothelins) | Biological Samples | Recovery: 75–90% | Pre-conc. during previous analysis | Reduces analysis time; uses small sample volumes |
| QuEChERS [51] | Pesticides, various contaminants | Food, Biological, Environmental | N/A (Widely used for extraction/clean-up) | Rapid | Uses small volumes of solvents compared to traditional methods |
Experimental Protocols for Key Techniques
Protocol 1: Standard Electrophoretic Concentration for Anionic Pollutants
This protocol is adapted for the pre-concentration of anionic emerging contaminants from water samples [49].
1. Materials and Reagents
- Acceptor Electrolyte: 50 mM Ammonium Acetate, pH 8.3.
- Micropipettes: Glass micropipettes (e.g., common TLC spotting pipettes) with a capacity of 20 µL.
- Hydrogel Syringe: Polyacrylamide hydrogel prepared inside a disposable syringe barrel via thermal polymerization (60 °C for 10 min) using a mixture of separation electrolyte, acrylamide monomer, and potassium persulfate initiator.
- Sample Vial: Contains 10 mL of the aqueous water sample (purified, drinking, or river water).
- Stir Plate: For mixing the sample during voltage application.
- High-Voltage Power Supply: Eight-channel device recommended for high-throughput.
2. Step-by-Step Procedure
- Step 1: Immobilize 20 µL of the acceptor electrolyte inside the lumen of the glass micropipette.
- Step 2: Dip the ground electrode and the filled micropipette into the 10 mL sample.
- Step 3: Insert the other end of the micropipette into the electrolyte-fortified polyacrylamide hydrogel, which is connected to the HV power supply via a Pt-wire.
- Step 4: Under continuous sample stirring, apply an optimized voltage. For anionic analytes, the anode is placed at the micropipette.
- Purified Water: 1.3 kV for 15 min.
- Drinking Water: 0.6 kV for 20 min.
- River Water: 0.4 kV for 20 min.
- Step 5: After the set time, carefully retract the micropipette.
- Step 6: Transfer the enriched acceptor electrolyte to a vial for subsequent analysis by LC or CE.
3. Optimization Notes
- Voltage: The applied voltage should be maximized but not exceed a level that causes the current to surpass 300 µA after 1 minute, as this can lead to bubble formation.
- Time: The optimal voltage application time is determined by plotting CF versus time and selecting the time point just before the CF begins to drop significantly.
Protocol 2: µQuEChERS for Multi-Residue Pesticide Analysis
This is a miniaturized, greener version of the QuEChERS method for extracting contaminants from complex matrices [50] [51].
1. Materials and Reagents
- Extraction Solvent: Acetonitrile (reduced volume compared to classical methods).
- Salting-Out Reagents: Anhydrous Magnesium Sulfate (MgSO₄) and Sodium Chloride (NaCl).
- Buffer: For protecting base-sensitive analytes (e.g., acetate or citrate buffer).
- dSPE Tubes: Tubes containing sorbents for clean-up, such as PSA (Primary Secondary Amine) for removing fatty acids and other polar interferences.
2. Step-by-Step Procedure
- Step 1: Place a small, homogenized sample (e.g., 1-2 g) into a centrifuge tube.
- Step 2: Add the extraction solvent (e.g., acetonitrile) and shake vigorously.
- Step 3: Add the salts (MgSO₄ and NaCl) and buffer, then shake vigorously again to induce phase separation.
- Step 4: Centrifuge the mixture to achieve complete phase separation.
- Step 5: Transfer an aliquot of the upper organic layer to a dSPE tube containing clean-up sorbents.
- Step 6: Shake and centrifuge the dSPE tube.
- Step 7: Collect the purified extract for analysis.
Research Reagent Solutions & Essential Materials
This table lists key materials used in the featured green extraction techniques.
Table 2: Essential Materials for Green Sample Preparation
| Material / Reagent | Technique(s) | Function & Green Rationale |
|---|---|---|
| Ionic Liquids (ILs) & Deep Eutectic Solvents (DES) [53] [50] | LPME, SDME, DLLME | Serve as green solvent alternatives to volatile organic solvents due to low vapor pressure and tunable properties. |
| Sol-Gel Coated Sorbents [50] | SPME, FPSE, SBSE | Provide a highly stable, porous extraction phase with a strong covalent coating that is chemically robust and efficient. |
| Metal-Organic Frameworks (MOFs) & Covalent-Organic Frameworks (COFs) [53] | SPE, SPME, dSPE | High-surface-area sorbents that offer superior selectivity and extraction capacity, improving efficiency and reducing sorbent amount needed. |
| Polyacrylamide Hydrogel [49] | Electrophoretic Concentration | A conductive medium that prevents hydrodynamic flow and electroosmotic flow in the micropipette, crucial for achieving high concentration factors. |
| MnO₂ Resin (on PAN support) [52] | Solid-Phase Preconcentration | Used for selective preconcentration of specific ions (e.g., radium) from large water volumes, simplifying analysis of low-activity environmental waters. |
Workflow and Technique Selection Diagrams
Diagram 1: Green Sample Preparation Technique Selection Guide
Diagram 2: Electrophoretic Concentration (EC) Workflow
Navigating Analytical Pitfalls: Strategies to Overcome Matrix Effects and Improve Recovery
Mitigating Matrix Interferences in Complex Environmental Samples (Water, Soil, Biological)
Defining the Problem: What Are Matrix Interferences?
What are matrix interferences and how do they affect my environmental analysis?
Matrix interference occurs when non-target components in a sample (the "matrix") disrupt the accurate detection or quantification of your target analytes [54]. In complex environmental samples like water, soil, or biological tissues, these interferences originate from substances such as humic acids, salts, lipids, proteins, and organic matter [55] [56]. The fundamental problem is that these matrix components can alter the detector's response to your analyte, leading to compromised data [57].
For mass spectrometric detection, particularly with electrospray ionization (ESI), the primary mechanism is ionization suppression or enhancement, where matrix components compete with analytes for available charge during the ionization process [58] [57]. In chromatography, interferences can cause co-elution, where matrix components do not fully separate from your target analytes, resulting in poorly shaped or overlapping peaks [59].
The consequences for your data are significant and can include:
- Reduced Accuracy: False positives/negatives or incorrect concentration values.
- Poor Precision: High variability between replicate samples.
- Elevated Detection Limits: Increased background noise or signal suppression forces higher reporting limits [59].
- Instrumental Issues: Contamination of the LC-MS/MS source, leading to frequent downtime and maintenance [55].
Detection and Diagnosis: How to Identify Matrix Effects
How can I check if my samples are suffering from matrix effects?
Before developing mitigation strategies, you must first diagnose the problem. Several established experimental techniques can help you identify and quantify matrix effects.
Infusion Experiment for LC-MS/MS: This is a common approach to visualize ionization suppression/enhancement across the chromatographic run [57].
- Setup: Continuously infuse a dilute solution of your analyte post-column into the MS detector.
- Analysis: Inject a processed blank sample extract (e.g., blank water or soil extract) onto the LC column and run the gradient.
- Diagnosis: A stable signal indicates no matrix effects. A depression or elevation in the baseline signal indicates regions of ionization suppression or enhancement, respectively, caused by co-eluting matrix components [57].
Post-Extraction Spike Experiment: This method quantifies the absolute matrix effect [60].
- Preparation:
- Prepare Sample A: A neat standard of your analyte in a pure solvent.
- Prepare Sample B: A blank sample matrix (e.g., clean water, soil extract) that has been through your entire sample preparation protocol, then spiked with the same amount of analyte as Sample A.
- Analysis: Analyze both samples and compare the peak areas.
- Calculation: Calculate the Matrix Effect (ME) percentage using the formula:
- ME (%) = (Peak Area of Sample B / Peak Area of Sample A) × 100% An ME of 100% means no matrix effect. <100% indicates signal suppression, and >100% indicates signal enhancement. A signal loss of 30% (ME = 70%) is common and considered significant [60].
The following workflow outlines the key steps for assessing matrix effects in your samples:
Mitigation Strategies: Troubleshooting Guide and Protocols
The following table summarizes the most effective strategies to overcome matrix interferences, along with their principles and limitations.
| Mitigation Strategy | Key Principle | Application Notes & Considerations |
|---|---|---|
| Sample Dilution [58] [55] | Reduces concentration of interfering matrix components below a critical level. | Simple and effective first step. May not be feasible for trace analysis if dilution pushes analyte concentration below detection limits. |
| Advanced Sample Preparation (e.g., SPE [58] [56]) | Selectively isolates analytes and removes interfering matrix components. | Solid-phase extraction (SPE) is highly effective for pre-concentrating analytes from aqueous environmental matrices while cleaning up the sample [58]. |
| Internal Standardization [58] [57] [56] | Uses a standard compound added to the sample to correct for signal variations and losses. | Isotopically Labeled Internal Standards are ideal as they co-elute with the analyte and experience nearly identical ionization effects [56]. IS-MIS Strategy is a novel approach using individual sample-matched internal standards for highly variable matrices like urban runoff [58]. |
| Matrix-Matched Calibration [54] | Calibration standards are prepared in a matrix similar to the sample to mimic its effects. | Improves accuracy by accounting for matrix effects during calibration. Can be challenging to obtain a truly blank matrix. |
| Instrumental & Methodological Solutions [55] [61] | Modifies the instrumental setup or analysis parameters to reduce interference. | Includes improved LC-MS/MS source designs, collision/reaction cells in ICP-MS [61], and chromatographic method optimization to improve separation [56]. |
Detailed Experimental Protocol: Individual Sample-Matched Internal Standard (IS-MIS) for Highly Variable Matrices
For heterogeneous environmental samples like urban runoff, where matrix composition varies drastically, a novel IS-MIS strategy has been shown to outperform traditional methods [58].
Objective: To correct for sample-specific matrix effects and instrumental drift in non-target screening (NTS) of highly variable water samples.
Materials and Reagents:
- Internal Standard Mix (ISMix): A mixture of isotopically labeled compounds covering a range of polarities and functional groups. Concentration typically 2–95 μg/L after dilution [58].
- Sample Set: Environmental samples (e.g., urban runoff collected at different time points).
- Instrumentation: LC system coupled to a high-resolution mass spectrometer (e.g., qTOF).
Procedure:
- Sample Preparation: Prepare each sample at multiple Relative Enrichment Factors (REFs, a dilution factor). For example, analyze each sample at REF 50, REF 100, and REF 500 [58].
- Instrumental Analysis: Inject all sample dilutions from the analytical sequence in a randomized order.
- Data Processing and Matching: For each detected feature (unknown compound), the software identifies the best-matched internal standard from the ISMix within the same individual sample injection. The match is based on the behavior of the feature and internal standard across the multiple REFs, ensuring they respond similarly to the specific matrix of that sample [58].
- Quantification: The peak area of the feature is normalized to the peak area of its individually matched internal standard.
Advantages: This method achieves significantly higher precision (<20% RSD for 80% of features in one study) compared to using a pooled sample for internal standard matching (70% of features) [58]. The main trade-off is a ~59% increase in analysis time due to the multiple dilutions analyzed [58].
Frequently Asked Questions (FAQs)
Q1: My lab's QC requires a Laboratory Control Sample (LCS) and a Matrix Spike (MS). What's the difference, and why do I need both?
- Laboratory Control Sample (LCS): A known amount of analyte is spiked into a clean, interference-free matrix (e.g., reagent water). Its purpose is to verify that the laboratory can perform the analytical procedure correctly and that the instrument system is in control.
- Matrix Spike (MS): A known amount of analyte is spiked into the actual environmental sample. Its purpose is to measure the performance of the method and quantify the effect of the specific sample matrix on analyte recovery. Using both helps separate issues related to laboratory performance from those caused by matrix effects [62].
Q2: I'm analyzing for emerging contaminants at low ppt levels. Can't I just dilute my sample to remove matrix effects? Dilution is an excellent first-line strategy, but it has clear limitations for trace analysis. While "clean" water samples might tolerate a 100-fold dilution, "dirty" samples (e.g., runoff after a dry period) may show >50% signal suppression even at low enrichment factors, making excessive dilution impractical as it will push your analyte concentration below the method detection limit [58]. A combination of sample preparation for cleanup and a stable isotopically labeled internal standard is often necessary for accurate ultra-trace analysis.
Q3: What is the biggest mistake analysts make when trying to correct for matrix effects? A common pitfall is assuming that a single internal standard or a pooled sample correction can adequately account for matrix effects across all samples in a batch, especially for highly variable environmental matrices like urban runoff or different soil types. As research shows, sample-specific MEs can vary dramatically, and advanced strategies like IS-MIS that account for this individuality consistently outperform one-size-fits-all approaches [58]. Failing to properly validate the method for the specific matrix being analyzed is another critical error.
The Scientist's Toolkit: Essential Research Reagent Solutions
The following reagents and materials are critical for implementing the mitigation strategies discussed above.
| Research Reagent / Material | Function in Mitigating Matrix Interferences |
|---|---|
| Isotopically Labeled Internal Standards (e.g., ¹³C, ¹⁵N) [56] | Corrects for analyte-specific signal suppression/enhancement during ionization and for losses during sample preparation. Preferred over deuterated standards to avoid chromatographic isotope effects. |
| Solid-Phase Extraction (SPE) Cartridges (e.g., Oasis HLB, ENVI-Carb) [58] [56] | Pre-concentrates target analytes from large sample volumes while removing interfering matrix components (e.g., humic acids, pigments). Multilayer SPE can target a wider range of compound polarities. |
| Total Ionic Strength Adjustment Buffer (TISAB) [63] | Used in potentiometry (e.g., ion-selective electrodes) to maintain constant ionic strength and pH, and to mask the effect of interfering ions in complex samples like wastewater. |
| Matrix-Matched Blank Extracts [60] [54] | Serves as the foundation for preparing calibration standards and quality control samples (e.g., matrix spikes) to ensure the calibration curve experiences the same matrix effects as the real samples. |
| Collision/Reaction Gases (e.g., Helium, Ammonia) [61] | Used in ICP-MS/MS and LC-MS/MS collision cells to eliminate polyatomic spectral interferences through chemical reactions or kinetic energy discrimination. |
This technical support center is framed within a thesis focused on improving the detection limits for emerging contaminants (ECs) in environmental samples. Efficient sample preparation via SPE is critical for isolating and pre-concentrating trace-level ECs, thereby enhancing analytical sensitivity and reliability. The following guides address common challenges in SPE method development.
Troubleshooting Guides
Issue: Poor Recovery of Target Analytes
- Q: I am getting low recoveries for my polar emerging contaminants (e.g., pharmaceuticals, pesticides). What is the most likely cause?
- A: Low recoveries, especially for polar compounds, often stem from inefficient retention during the sample loading step. The sorbent may not be appropriate for the analyte's polarity. For hydrophilic ECs, consider switching from a reversed-phase (C18) sorbent to a mixed-mode or hydrophilic-lipophilic balance (HLB) sorbent, which offers better retention for a wider polarity range.
Issue: High Background Noise/Interference
- Q: My chromatograms show high background interference after SPE, obscuring my target peaks. How can I reduce this?
- A: High background noise typically results from inadequate washing steps. The protocol may not be effectively removing co-extracted matrix components (e.g., humic acids from water, proteins from sludge). Optimize the wash solvent composition and volume to be strong enough to remove interferents but weak enough to not elute your target analytes.
Issue: Inconsistent or Variable Results
- Q: My recovery data shows high variability between replicates. What steps should I check?
- A: Inconsistency often points to improper bed conditioning or uneven flow rates. Ensure the sorbent bed is never allowed to run dry during the conditioning and sample loading steps. Use a vacuum manifold or positive pressure system to maintain a consistent, drop-wise flow rate (e.g., 1-5 mL/min) across all samples. Automated systems can greatly improve reproducibility.
Frequently Asked Questions (FAQs)
Q: Which sorbent should I choose for acidic or basic emerging contaminants?
- A: For ionizable ECs, mixed-mode sorbents containing both reversed-phase and ion-exchange functionalities are superior. They allow you to manipulate retention and selectivity by adjusting the sample pH. For acidic compounds, use an anion-exchange sorbent at high pH; for basic compounds, use a cation-exchange sorbent at low pH.
Q: How do I select the optimal elution solvent?
- A: The elution solvent must be strong enough to disrupt the analyte-sorbent interaction. For reversed-phase SPE, solvents like methanol and acetonitrile are common. A stronger solvent or a mixture (e.g., Methanol with 2-5% Ammonium Hydroxide for basic compounds) can often improve elution efficiency. See Table 2 for a comparison.
Q: What is the most critical step to tune for improving detection limits?
- A: The most critical step is often the pre-concentration factor. After elution, gently evaporating the eluate under a stream of nitrogen and reconstituting it in a smaller volume of a solvent compatible with your LC-MS system can significantly lower detection limits by increasing analyte concentration.
Data Presentation
Table 1: Sorbent Selection Guide for Common Classes of Emerging Contaminants
| Sorbent Type | Mechanism | Ideal for EC Classes | Example Analytes |
|---|---|---|---|
| Reversed-Phase (C18) | Hydrophobic | Non-polar to moderately polar | Polycyclic Aromatic Hydrocarbons (PAHs), Polychlorinated Biphenyls (PCBs) |
| Hydrophilic-Lipophilic Balance (HLB) | Hydrophobic & Polar | Broad spectrum, polar & non-polar | Pharmaceuticals, Pesticides, Steroids |
| Mixed-Mode Cation Exchange (MCX) | Hydrophobic & Cation Exchange | Basic compounds (pKa > 7) | Tricyclic antidepressants, β-blockers |
| Mixed-Mode Anion Exchange (MAX) | Hydrophobic & Anion Exchange | Acidic compounds (pKa < 7) | NSAIDs, Herbicides (e.g., 2,4-D) |
Table 2: Elution Solvent Efficiency for Common Sorbents
| Sorbent | Elution Solvent | Relative Elution Strength | Notes |
|---|---|---|---|
| C18 | Acetonitrile | High | Stronger than methanol, good for non-polar ECs. |
| C18 | Methanol | Medium | Standard solvent, compatible with LC-MS. |
| HLB | Methanol with 2-5% Formic Acid | High (for bases) | Protonates basic compounds to disrupt ionic interactions. |
| HLB | Acetonitrile with 2-5% Ammonium Hydroxide | High (for acids) | Deprotonates acidic compounds to disrupt ionic interactions. |
| MCX | Methanol with 2-5% Ammonium Hydroxide | Required | Alkaline pH neutralizes the sorbent's charge, allowing elution. |
Experimental Protocols
Protocol: Mixed-Mode SPE for Acidic Emerging Contaminants in Water
- Sorbent: Mixed-Mode Anion Exchange (MAX), 60 mg/3 mL.
- Conditioning: Sequentially pass 3 mL of Methanol and 3 mL of deionized water through the cartridge. Do not let the bed run dry.
- Sample Loading: Acidify the water sample (e.g., to pH ~2 with HCl) to protonate acidic ECs. Load the sample at a flow rate of 5-10 mL/min.
- Washing: Wash with 3 mL of a mild acid (e.g., 1% Formic Acid in Water) to remove neutral interferents. Follow with 3 mL of Methanol to remove non-polar interferents.
- Drying: Apply full vacuum for 5-10 minutes to dry the sorbent bed completely.
- Elution: Elute acidic ECs with 2 x 2 mL of a solvent like Acetonitrile with 5% Ammonium Hydroxide. Collect the entire eluate.
- Post-Processing: Evaporate the eluate to dryness under a gentle nitrogen stream at 40°C. Reconstitute the dry residue in 100 µL of LC-MS compatible mobile phase (e.g., Water:Acetonitrile, 95:5) and vortex mix.
Visualization
SPE Workflow for Acidic Contaminants
SPE Troubleshooting Logic
The Scientist's Toolkit
| Research Reagent / Material | Function |
|---|---|
| HLB Sorbent | A copolymer sorbent for the broad-spectrum extraction of acidic, basic, and neutral emerging contaminants. |
| Mixed-Mode (MAX/MCX) Sorbent | Combines reversed-phase and ion-exchange mechanisms for selective retention of ionizable analytes. |
| LC-MS Grade Methanol/Acetonitrile | High-purity solvents for elution and reconstitution to prevent background interference in mass spectrometry. |
| Ammonium Hydroxide / Formic Acid | pH modifiers used in elution solvents to disrupt ionic interactions in mixed-mode SPE. |
| Nitrogen Evaporator | For gentle and rapid concentration of eluates to improve detection limits via pre-concentration. |
| Vacuum Manifold | Provides controlled flow rates and parallel processing of multiple samples for reproducibility. |
The accurate detection and quantification of emerging contaminants (ECs)—such as pharmaceuticals, personal care products, and endocrine disruptors—in environmental samples present significant challenges for researchers. These contaminants are often present at trace levels and within complex sample matrices, pushing traditional analytical techniques to their limits. A comprehensive review highlights that the study of ECs faces hurdles such as their complex structures, a lack of standard analytical methods, and the need for technological advances [4]. This technical support guide is designed to help researchers navigate the common pitfalls of two workhorse techniques: UV-Vis and High-Performance Liquid Chromatography (HPLC). By providing clear troubleshooting guides and FAQs, we aim to enhance the reliability of your data in the critical pursuit of improving detection limits for environmental contaminants.
The Limits of UV-Vis Spectrophotometry
UV-Vis detection is a mainstay in many laboratories due to its simplicity and cost-effectiveness. However, its limitations become starkly apparent in advanced environmental research, particularly when dealing with complex samples like environmental extracts.
Common Scenarios Where UV-Vis Falls Short
- Matrix Interference in Complex Samples: A study analyzing the retinoid-alternative bakuchiol in cosmetic serums found that oil-in-water emulsions (Samples 5 and 6) could not be completely dissolved. This prevented proper extraction and quantification of the active ingredient, despite the UV spectra suggesting its presence [64]. In environmental contexts, similar interference can occur from humic acids, particulate matter, or other co-extracted compounds in water or soil samples.
- Insufficient Selectivity and Structural Information: UV-Vis spectra of many organic molecules are often featureless, providing limited information for confirming the identity of an unknown compound in a complex environmental mixture. This lack of unique spectral fingerprints makes it difficult to distinguish between analytes with similar chromophores [65].
- Low Sensitivity for Trace Analysis: Electronic transitions involving σ or n electrons require high energy, resulting in absorption at low wavelengths (180-240 nm). At these wavelengths, the sensitivity and baseline noise are often worse because many common HPLC solvents and additives also absorb significantly, creating a high background [65]. The following table shows the UV cut-off values for common solvents, indicating the point at which background interference becomes substantial.
Table 1: UV Cut-Off Values for Common HPLC Solvents and Additives [65]
| Solvent / Additive | UV-Cut off (nm) |
|---|---|
| Acetonitrile | 190 |
| Water | 190 |
| Methanol | 205 |
| Trifluoroacetic Acid (TFA) | 210 |
| Phosphate buffer (pH 2-3) | 210 |
| Formic Acid | 210 |
| Acetic Acid | 230 |
| Triethylamine | 235 |
| Acetate Buffer | 240 |
UV-Vis Troubleshooting FAQs
Q1: Why are my UV spectra so featureless, and how do I choose the best wavelength? A: The featureless nature of many UV spectra stems from the broadening of electronic transitions by numerous vibrational and rotational sub-levels. While modern instruments are stable, it is generally good practice to select a wavelength at or near the absorbance maximum (λmax) for quantification. However, be mindful that changes in solvent, additive concentration, or pH can cause the λmax to shift, impacting signal intensity [65].
Q2: My baseline is very noisy at low wavelengths. What should I do? A: Noisy baselines at low wavelengths are frequently caused by the mobile phase. Check the UV cut-off of all your solvents and additives (see Table 1). Ensure you are using high-purity HPLC-grade solvents, degas your mobile phase thoroughly to remove dissolved oxygen, and consider using a different buffer or additive that absorbs less at your chosen detection wavelength [65].
Q3: Can I use UV detection for method development when screening different columns or mobile phases? A: Use with caution. The UV spectrum of a compound, and thus its λmax and signal intensity, can be influenced by the polarity of the solvent (solvatochromism) and the pH of the mobile phase. A wavelength that is optimal in one eluent may not be in another. For instance, the λmax for a carbonyl group can show a large blue shift when the solvent is changed from hexane to water [65].
HPLC as a Complementary Technique: Troubleshooting for Enhanced Reliability
When UV-Vis is insufficient, HPLC provides the necessary separation power and selectivity. However, HPLC systems themselves can be a source of problems that compromise data quality. The following diagram outlines a logical workflow for diagnosing common HPLC issues related to the baseline and peak appearance.
Diagram 1: Logical workflow for diagnosing common HPLC problems with baseline and peak shape.
HPLC Baseline Troubleshooting Guide
A drifting or noisy baseline is one of the most common and disruptive issues in HPLC.
Table 2: HPLC Baseline Issues: Causes and Solutions [66] [67]
| Symptom | Potential Cause | Recommended Solution |
|---|---|---|
| Baseline Drift (Gradient) | Refractive index change; Buffer precipitation; Degrading solvents (e.g., TFA, THF). | Balance absorbance of A and B mobile phases; Use fresh solvents daily; Add a static mixer; Run a blank gradient to characterize drift [66]. |
| Baseline Drift (Isocratic) | Mobile phase contamination; Bacterial growth in water; Column bleed; Temperature fluctuation. | Use fresh, HPLC-grade water and solvents; Clean the system regularly; Thermostat the column and detector [66] [67]. |
| Periodic Baseline Noise | Pump pulsation; Incomplete degassing (bubbles). | Check pump seals and check valves; Use an inline degasser or helium sparging; Add a backpressure restrictor after the detector [66] [67]. |
| High Background Noise (Low Wavelength) | UV-absorbing contaminants in mobile phase; Dirty flow cell. | Use high-purity solvents and additives; Clean the flow cell; If using TFA, try a slightly higher wavelength (e.g., 214 nm) [66]. |
HPLC Peak Shape Troubleshooting Guide
Abnormal peak shapes can lead to inaccurate integration, poor resolution, and incorrect quantification.
Table 3: HPLC Peak Shape Problems: Causes and Solutions [67] [68]
| Symptom | Potential Cause | Recommended Solution |
|---|---|---|
| Peak Tailing | If all peaks tail: Extra-column volume (bad connections), column void [68].If one peak tails: Silanol interaction (for basic compounds), mass overload [67]. | Check and re-make all capillary connections; Replace column. Use high-purity silica columns; Add competing amine (e.g., TEA) to mobile phase; Reduce injection mass [67]. |
| Peak Fronting | Column degradation (channeling); Sample solvent stronger than mobile phase; Nonlinear retention [67] [68]. | Replace column; Dissolve sample in the starting mobile phase; Reduce the amount of sample injected [67]. |
| Split or Shouldering Peaks | Partially blocked inlet frit; Co-elution of two compounds [68]. | Reverse and flush the column (short-term fix); Replace column; Modify method to improve resolution if co-elution is confirmed [67]. |
| Broad Peaks | Large injection volume; Data acquisition rate too slow; Extra-column volume; Column overload [68]. | Reduce injection volume; Increase data acquisition rate; Use shorter, narrower i.d. connection tubing; Use a smaller volume flow cell [67]. |
HPLC Troubleshooting FAQs
Q1: My peaks have suddenly disappeared. What is the first thing I should check? A: First, verify the detector output is not a flat line, which would indicate a detector or data transfer failure. Inject a known test substance without the column to check the detector response. Also, ensure the sample was drawn into the loop and that a pressure drop occurred at injection [67].
Q2: Why are my peaks broader than expected, even on a new column? A: This is often due to extra-column volume. Check that all connection tubing has the correct inner diameter (e.g., 0.005" for UHPLC) and is as short as possible. Also, ensure the detector flow cell volume is appropriate for your column's peak volumes. A slow data acquisition rate can also make peaks appear broader [67] [68].
Q3: My peaks are tailing. How can I tell if it's a chemical or a physical problem? A: A key diagnostic is to look at all peaks in the chromatogram. If all peaks exhibit similar tailing, the cause is likely physical (e.g., a bad connection, column void). If only one or a few peaks are tailing, the cause is likely chemical and specific to that analyte's interaction with the stationary phase [68].
Case Study & Best Practices: RP-HPLC for Contaminants of Emerging Concern
A 2025 study developed and validated a Reversed-Phase HPLC (RP-HPLC) method to simultaneously quantify six different CECs (Paracetamol, Methylparaben, Imidacloprid, Bisphenol A, Triclosan, and Ibuprofen) in the context of microalgae bioremediation [69]. This case exemplifies a robust application where HPLC is essential.
Detailed Experimental Protocol
- Instrumentation: The analysis used a Dionex Ultimate 3000 system with a Diode Array Detector (DAD). The separation was performed on a Kinetex Biphenyl column (Phenomenex) with 5 µm particles, 100 Å pore size, and 4.6 mm internal diameter [69].
- Method Validation: The method was rigorously validated per standard guidelines. The table below summarizes the impressive sensitivity achieved for each contaminant, demonstrating the method's suitability for trace analysis.
Table 4: Validation Data for the RP-HPLC Method Quantifying Six CECs [69]
| Contaminant of Emerging Concern (CEC) | Category | Limit of Detection (LOD) (µg mL⁻¹) | Limit of Quantification (LOQ) (µg mL⁻¹) |
|---|---|---|---|
| Paracetamol (PAR) | Pharmaceutical | 0.017 | 0.051 |
| Methylparaben (MP) | Preservative | 0.024 | 0.072 |
| Imidacloprid (IMID) | Pesticide | 0.008 | 0.027 |
| Bisphenol A (BPA) | Industrial Chemical | 0.014 | 0.041 |
| Triclosan (TCS) | Antimicrobial | 0.023 | 0.069 |
| Ibuprofen (IBU) | Pharmaceutical | 0.016 | 0.048 |
- Sample Preparation: The study exposed Nannochloropsis sp. microalgae to the CECs to assess bioremediation potential. Samples were likely prepared via filtration or centrifugation, though the exact protocol was not detailed in the abstract. The developed method proved linear, precise, and accurate for quantifying the contaminants during the bioremediation process [69].
The Scientist's Toolkit: Key Research Reagent Solutions
Table 5: Essential Materials for HPLC Analysis of Emerging Contaminants
| Item | Function & Importance |
|---|---|
| Kinetex Biphenyl Column | The stationary phase used in the case study; provides different selectivity compared to standard C18 columns, which is crucial for separating complex mixtures [69]. |
| HPLC-Grade Solvents | High-purity acetonitrile, methanol, and water are essential to minimize baseline noise and prevent system contamination, especially at low UV wavelengths [66] [65]. |
| Buffers & Additives | Agents like formic acid, ammonium acetate, or phosphate buffers are used to control pH and ionic strength, improving peak shape and reproducibility [69] [65]. |
| Reference Standards | High-purity certified reference materials for each target analyte are non-negotiable for accurate method development, calibration, and quantification [69]. |
Navigating the limitations of UV-Vis and HPLC is a critical skill for researchers focused on emerging contaminants. By understanding the failure modes of UV-Vis—such as matrix interference and low selectivity—and mastering the troubleshooting of common HPLC problems like baseline drift and peak tailing, scientists can significantly enhance the quality and reliability of their environmental data. The implementation of robust, validated methods, as demonstrated in the RP-HPLC case study, is paramount for generating results that can inform sound scientific conclusions and effective environmental policies.
Technical Support Center
Troubleshooting Guides
Guide 1: Troubleshooting Poor Accuracy Despite Using Deuterated Internal Standards
Problem: Quantitative results remain inaccurate or inconsistent even when using a deuterated internal standard.
| Possible Cause | Diagnostic Steps | Corrective Action |
|---|---|---|
| Incomplete Mixing | Check internal standard recovery and precision; high RSD (>3%) in replicates indicates mixing issues [70]. | Use an automated pump for consistent introduction; ensure thorough manual vortexing and mixing of all samples [70]. |
| H/D Exchange | Look for an unexpected mass shift or peak broadening, especially for analytes with labile protons (e.g., -OH, -NH) [71]. | Use acidic mobile phases to minimize exchange; select a standard with deuterium in non-exchangeable positions (e.g., carbon-bound) [72]. |
| Co-eluting Interference | Inspect the mass spectrum for isobaric interference at the internal standard's m/z channel. | Improve chromatographic separation; confirm the internal standard is not present in the sample matrix [70]. |
| Incorrect Concentration | The internal standard intensity is too low (poor precision) or saturates the detector [70]. | Optimize concentration to ensure good intensity and precision (typically <2% RSD in calibration solutions) [70]. |
| Significant Isotopic Effect | Observe a small but consistent retention time difference between the analyte and the standard [72]. | This is often inherent; verify that the slight RT shift does not occur in a region of significant ion suppression [72]. |
Guide 2: Resolving Signal Suppression and Matrix Effects
Problem: The analyte signal is suppressed or enhanced by the sample matrix, leading to inaccurate quantification.
| Possible Cause | Diagnostic Steps | Corrective Action |
|---|---|---|
| Ion Suppression in Source | Post-column infuse analyte and internal standard to see a drop in signal at the retention time. | Improve sample cleanup to remove interferents; optimize chromatographic separation to move the analyte away from the suppressing region [73]. |
| Incorrect Internal Standard Type | Internal standard recovery is good, but analyte quantification is poor in complex matrices. | Use a stable isotope-labeled internal standard (e.g., deuterated) instead of a structural analog, as it co-elutes and mimics ionization [72] [73]. |
| High Total Dissolved Solids | Observe easily ionized elements (e.g., Na, K) at high concentrations (>1%) in the sample matrix [70]. | Dilute the sample if analyte sensitivity allows; add an ionization buffer; use an internal standard with a similar ionization mode (atom vs. ion) to the analyte [70]. |
Frequently Asked Questions (FAQs)
Q1: Why are deuterated analogs considered the "gold standard" for internal standards in LC-MS? Deuterated analogs are preferred because they are chemically identical to the target analyte, ensuring nearly identical behavior during chromatography and ionization. The key difference is their slightly higher mass, which allows the mass spectrometer to distinguish them. This enables them to correct for matrix effects, ion suppression, and instrumental variability with high reliability, making them the benchmark for precise and accurate quantification [72] [73].
Q2: What minimum isotopic purity should I look for in a deuterated standard? You should select deuterated compounds with at least 98% isotopic enrichment [72]. High purity is critical to minimize background interference at the analyte's mass channel and ensure clear spectral separation for accurate data.
Q3: I've added my deuterated standard, but the precision is still poor. What could be wrong? Poor precision after addition often points to a sample preparation issue. First, check the relative standard deviation (RSD) of your internal standard replicates. An RSD greater than 3% suggests problems with pipetting, incomplete mixing, or inconsistent introduction into the analytical stream. Ensure the internal standard is added at the same concentration to all solutions and that mixing is thorough and consistent [70].
Q4: Can the position of the deuterium atoms on the molecule cause problems? Yes. You should avoid deuterium labels on exchangeable sites like hydroxyl (-OH) or amine (-NH) groups, as the deuterium can swap with hydrogen in the solvent (H/D exchange), leading to an unstable mass signal. Always choose a standard where deuterium is incorporated into stable, carbon-bound positions [72].
Q5: My deuterated standard has a slightly different retention time than my analyte. Is this normal? A minimal retention time shift is a known phenomenon called the isotopic effect. The C-D bond is slightly stronger and shorter than the C-H bond, which can cause the deuterated compound to elute fractionally earlier in reversed-phase chromatography. While usually a minor issue, you should verify that this shift does not place your analyte and standard in different regions of ion suppression/enhancement [72].
Essential Experimental Protocols
Protocol: Using Deuterated Internal Standards for Quantifying Emerging Contaminants
1. Goal To accurately quantify trace levels of emerging contaminants (e.g., PFAS, pharmaceuticals) in complex environmental water samples using LC-MS/MS with deuterated internal standards for correction.
2. Materials and Reagents
- Analytes: Target emerging contaminants (e.g., PFOA, PFOS, carbamazepine).
- Internal Standards: Deuterated analogs of the target analytes (e.g., PFOA-D5, PFOS-D5, carbamazepine-D5), with ≥98% isotopic purity [72].
- Solvents: High-purity methanol, acetonitrile, and water (LC-MS grade).
- Samples: Environmental water samples (surface water, wastewater effluent).
- Equipment: LC-MS/MS system, solid-phase extraction (SPE) apparatus, analytical balance, micropipettes.
3. Step-by-Step Methodology
- Step 1: Sample Preparation
- Spike a known, consistent amount of the deuterated internal standard mixture into every sample, calibration standard, and quality control (QC) sample at the very beginning of the sample preparation process [72] [73]. This corrects for losses during all subsequent steps.
- Proceed with sample extraction and cleanup (e.g., using SPE).
- Step 2: Instrumental Analysis
- Analyze the samples by LC-MS/MS. The method should be optimized to separate the target analytes from potential matrix interferences.
- The mass spectrometer is set to monitor the specific mass-to-charge (m/z) ratios for the native analytes and their heavier deuterated internal standards.
- Step 3: Quantification and Data Processing
- The instrument software calculates the response ratio (area of analyte / area of its deuterated internal standard) for each sample and calibration standard.
- A calibration curve is constructed by plotting this response ratio against the known concentration of the calibration standards.
- The concentration of the analyte in unknown samples is determined from this curve based on its measured response ratio.
Workflow and Relationship Diagrams
DOT Script: LC-MS Quantification with Deuterated Standards
Diagram Title: LC-MS Workflow with Internal Standard
DOT Script: Internal Standard Correction Logic
Diagram Title: Internal Standard Correction Principle
The Scientist's Toolkit: Research Reagent Solutions
Table: Essential Reagents for Accurate Quantification of Emerging Contaminants
| Item | Function & Rationale |
|---|---|
| Stable Isotope-Labeled Internal Standards (Deuterated, ^13C) | The gold standard. Corrects for sample prep losses, matrix effects, and instrument drift by behaving identically to the analyte but being distinguishable by MS [72] [73]. |
| Structural Analogue Internal Standards | A second-choice option if an isotope-labeled standard is unavailable. Less ideal as it may not co-elute or ionize identically to the analyte [73]. |
| LC-MS Grade Solvents | High-purity solvents minimize chemical noise and background interference, which is critical for achieving low detection limits for trace-level contaminants. |
| Solid-Phase Extraction (SPE) Cartridges | Used for sample cleanup and pre-concentration of analytes from large water volumes, improving signal-to-noise ratio and reducing matrix complexity [73]. |
| Certified Reference Materials | Samples with known analyte concentrations, used to validate the accuracy and precision of the entire analytical method. |
The Core Challenge: Matrix Complexity and Its Impact on Method Performance
Developing robust analytical methods for emerging contaminants requires moving from spiked ultrapure water to complex environmental matrices. This transition introduces significant challenges that can drastically affect method accuracy, precision, and detection limits.
Key Matrix Effects and Contaminant Recovery
The complexity of an environmental sample, or "matrix," directly influences how well you can extract and measure a target contaminant. The following table summarizes the profound effect different matrices have on the recovery of microplastics, a common emerging contaminant, illustrating a challenge applicable to many analytes [74].
Table 1: Microplastic Percent Recovery by Matrix and Particle Size
| Matrix | Particle Size >212 μm | Particle Size <20 μm |
|---|---|---|
| Drinking Water | ~60-70% | As low as 2% |
| Surface Water | Reduced by ~4x processing time vs. drinking water | As low as 2% |
| Fish Tissue | Reduced by ~9x processing time vs. drinking water | As low as 2% |
| Sediment | ~33% lower recovery than drinking water | As low as 2% |
The data shows that particle size is a critical factor, with recovery rates for smaller particles being unacceptably low across all matrices [74]. Furthermore, sample processing times skyrocket for complex matrices like sediment and tissue, increasing the cost and labor of analysis [74].
Troubleshooting Guides & FAQs
This section addresses specific, high-impact problems researchers encounter when developing methods for real-world samples.
FAQ 1: My method works perfectly in spiked ultrapure water, but recovery plummets in environmental surface water. What are the primary culprits?
The drop in performance is typically due to two main factors:
- Matrix-Induced Interference: Natural organic matter (NOM), including humic acids and algogenic organic matter, can act as a radical scavenger in advanced oxidation processes (AOPs) or compete with the target analyte during extraction and detection [75]. This can reduce degradation efficiency or cause false positives/negatives.
- Complex Binding and Interaction: Contaminants can adsorb onto or interact with suspended solids, colloidal material, or dissolved organic carbon in the sample. Standard extraction procedures may fail to release the analyte efficiently, leading to low recovery [74].
FAQ 2: For trace-level analysis of contaminants like PFAS or nanoplastics, how can I improve my method's sensitivity and reliability in complex matrices like soil or sediment?
Improving sensitivity requires a multi-pronged approach focusing on sample cleanup and advanced instrumentation:
- Implement Robust Cleanup Steps: Techniques like hydrogen peroxide digestion to remove organic interference or density separation with high-salinity solutions (e.g., CaCl₂) to isolate particles are often essential for complex matrices like sediment and tissue [74] [76].
- Utilize Highly Specific Detection Techniques: For ultratrace analysis, rely on mass spectrometry-based techniques. For example, Pyrolysis-Gas Chromatography-Mass Spectrometry (Pyr-GC/MS) has been successfully validated for the quantification of nanoplastics like PE, PET, and PS in environmental waters at mass concentrations as low as 0.04 to 1.17 µg/L [76].
- Increase Pre-concentration: Employ pre-concentration steps such as ultrafiltration (e.g., using a 100 kDa/10 nm filter) to enrich nanoparticles from large water volumes before analysis, thereby improving the limit of quantification [76].
Troubleshooting Guide: Low Analytic Recovery
| Observed Problem | Potential Root Cause | Systematic Diagnostic Steps | Proven Solutions & Workarounds |
|---|---|---|---|
| Low recovery in solid matrices (e.g., sediment, tissue). | Inefficient extraction from the complex matrix; analyte binding. | 1. Spike a sample with a known amount of analyte and run the full method to determine recovery [74]. 2. Compare results to a simpler matrix (e.g., water) [74]. 3. Vary digestion or density separation parameters one at a time. | • For tissues: Use a chemical digestion (e.g., 20% KOH at 45°C) to break down organic material [74]. • For sediments: Employ density separation (e.g., using CaCl₂ solution) to float microplastics away from denser mineral matter [74]. |
| High background interference during analysis. | Co-extraction of natural organic matter (NOM) or humic substances. | 1. Analyze a matrix blank. 2. Test the effect of adding scavengers like methanol or AOM to your process [75]. | • Incorporate a cleanup step like oxidation with Fenton's reagent (H₂O₂/Fe²⁺) to degrade organic interferents [75]. • Use a selective detector (e.g., mass spectrometer) to distinguish the target analyte from background noise [76] [4]. |
| Poor method precision and accuracy. | Uncontrolled variable in the multi-step sample preparation process. | 1. Isolate the issue by checking precision at each major step (extraction, cleanup, analysis) [74]. 2. Ensure all steps are performed exactly the same way each time. | • Strictly adhere to a detailed, written Standard Operating Procedure (SOP) [74]. • Introduce internal standards to correct for losses during sample preparation [76]. |
Detailed Experimental Protocols
Protocol 1: Extraction of Microplastics from Complex Matrices
This protocol, derived from a multi-laboratory validation study, outlines the core steps for extracting microplastics from various environmental samples [74].
Diagram: Microplastic Extraction Workflow
Materials:
- Pre-ashed glass sample jars
- Sieve stack (1 µm to 5 mm)
- Vacuum filtration system
- Chemical fume hood
- Reagents: Potassium Hydroxide (KOH), Calcium Chloride (CaCl₂), Hydrogen Peroxide (H₂O₂), Ferrous Sulfate (FeSO₄), Alcojet detergent [74].
Step-by-Step Method:
- Sample Preparation: Minimize background contamination by working in a HEPA-filtered environment and wearing cotton lab coats. Analyze matrix materials for inherent contamination prior to use [74].
- Matrix-Specific Extraction:
- Fish Tissue: Digest sample in 20% KOH in a polypropylene jar at 45°C for up to 48 hours. Soak in a 10% detergent solution to remove fatty residues [74].
- Sediment: Density-separate by vigorously stirring the sample with a CaCl₂ solution (1.4 g/mL) and let settle for 12-24 hours. Collect floating particles from the surface [74].
- Surface Water: Sieve sample into large size fractions (e.g., >212 µm). Digest organic matter using wet peroxide oxidation with Fenton's reagent (FeSO₄ + H₂O₂). Repeat digestion until organic matter is removed [74].
- Final Filtration: Regardless of the matrix, the final step is sieving and vacuum filtration into defined size fractions (e.g., 1–20 µm, 20–212 µm, 212–500 µm, and >500 µm) for subsequent microscopy and spectroscopy [74].
Protocol 2: Fenton Process for Degrading Cyanotoxins in Natural Water
This protocol is effective for degrading extracellular cyanotoxins like cylindrospermopsin (CYN) in natural water, where conventional treatments fail [75].
Materials:
- Cylindrospermopsin (CYN) standard
- Hydrogen Peroxide (H₂O₂)
- Iron (II) sulfate heptahydrate (FeSO₄·7H₂O)
- pH meter and adjusters (H₂SO₄, NaOH)
Step-by-Step Method:
- Spike Natural Water: Spike a known concentration of CYN (e.g., 0.05-0.2 µM) into a natural water sample (e.g., lake water) [75].
- Adjust pH: Adjust the initial pH of the solution to an acidic range (optimum is typically pH ~3) [75].
- Apply Fenton Reagents: Add Fe(II) and H₂O2 to the solution. The optimal H₂O₂/Fe(II) molar ratio is 0.4 (e.g., 75 µM H₂O₂ and 187.5 µM Fe(II)) for efficient CYN degradation [75].
- React: Allow the reaction to proceed for a set time (e.g., 30 minutes) with stirring.
- Quench and Analyze: Quench the reaction and analyze the remaining CYN concentration. Under optimal conditions, degradation efficiencies of 97.8% can be achieved in natural water [75].
The Scientist's Toolkit: Essential Research Reagents & Materials
Table 2: Key Reagents and Materials for Environmental Contaminant Analysis
| Item | Function in Method Development | Example Use Case |
|---|---|---|
| Potassium Hydroxide (KOH) | Chemical digestion of organic biological material. | Digesting fish tissue to release embedded microplastics or other contaminants [74]. |
| Calcium Chloride (CaCl₂) | High-density salt solution for density separation. | Separating microplastics from denser mineral particles in sediment samples [74]. |
| Fenton's Reagents (H₂O₂/Fe²⁺) | Advanced Oxidation Process (AOP) to generate hydroxyl radicals for degradation or cleanup. | Degrading organic interferents in surface water or breaking down cyanotoxins like CYN [75]. |
| Hydrogen Peroxide (H₂O₂) | Oxidizing agent for digestion. | Digesting natural organic matter during nanoplastic extraction to reduce matrix interference [76]. |
| Ultrafiltration Membranes | Size-based separation and pre-concentration of nanoparticles. | Concentrating nanoplastics from large water volumes using a 100 kDa (∼10 nm) filter cell [76]. |
Ensuring Data Integrity: Validation Protocols and a Cross-Technology Technique Assessment
For researchers focused on detecting emerging contaminants in environmental samples, establishing a robust analytical method is paramount. The reliability of your data, and consequently the soundness of your scientific conclusions, depends on a rigorously validated method. This technical support guide outlines the key parameters—LOD, LOQ, Recovery, Precision, and Accuracy—within a modern, science- and risk-based framework as defined by international guidelines like ICH Q2(R2) and ICH Q14 [77] [78]. The following troubleshooting guides and FAQs are designed to help you identify, resolve, and prevent common issues encountered during method validation experiments for complex environmental matrices.
Core Parameter Definitions & Troubleshooting FAQs
This section breaks down the essential validation parameters, providing clear methodologies and solutions to typical problems.
Accuracy (Recovery)
Definition: Accuracy expresses the closeness of agreement between the test result and the accepted reference value (true value) [79] [78]. It is typically assessed through recovery experiments and expressed as a percentage.
Experimental Protocol:
- Prepare your environmental sample matrix (e.g., water, soil) free of the target analyte.
- Spike the matrix with known quantities of the analyte at a minimum of three concentration levels (e.g., low, medium, high) covering the intended range [79] [80].
- Analyze each concentration level with at least three replicates (a total of 9 determinations is a common minimum) [79].
- Calculate the percent recovery for each sample:
(Measured Concentration / Spiked Concentration) * 100. - Report the mean recovery and relative standard deviation (RSD) across all replicates at each level.
FAQ 1: We are observing consistently low recovery rates for our target contaminant in soil samples. What could be the cause?
- Potential Cause: Inefficient extraction from the complex soil matrix or analyte degradation during sample preparation.
- Troubleshooting Guide:
- Investigate Extraction Efficiency: Review your extraction procedure. Consider adjusting parameters such as extraction time, solvent type and volume, or using multiple extraction cycles [80].
- Check for Degradation: Perform a stability study on the analyte in the extraction solvent and under preparation conditions (e.g., exposure to light, heat). You may need to add stabilizers or reduce processing time.
- Verify Standard Preparation: Ensure your calibration standards are prepared correctly and are stable. A fresh batch of standards from a different stock solution can help rule out this variable.
FAQ 2: Recovery is acceptable at high and medium concentrations but unacceptably low near the LOQ. How can we improve this?
- Potential Cause: The method lacks sufficient sensitivity or the sample matrix is causing interference at low levels.
- Troubleshooting Guide:
- Enhance Pre-concentration: Incorporate a pre-concentration or clean-up step in your sample preparation to increase the analyte signal relative to the matrix noise.
- Optimize Instrument Sensitivity: Tune your instrument (e.g., MS/MS detector) for lower detection limits. This may involve optimizing source temperatures, gas flows, or transition voltages.
- Re-evaluate Sample Matrix: The matrix effect might be pronounced at low levels. Try a different sample preparation technique or a more selective detector to mitigate this.
Precision
Definition: Precision is the closeness of agreement between a series of measurements obtained from multiple sampling of the same homogeneous sample under specified conditions [78]. It is evaluated at three levels and expressed as Relative Standard Deviation (RSD) or Coefficient of Variation (CV).
- Repeatability (Intra-assay Precision): Precision under the same operating conditions over a short interval (e.g., same day, same analyst) [79] [80].
- Intermediate Precision: Precision within the same laboratory, capturing variations like different days, different analysts, or different equipment [77] [78].
- Reproducibility (Inter-laboratory Precision): Precision between different laboratories [81].
Experimental Protocol for Repeatability:
- Prepare a homogeneous sample at 100% of the test concentration.
- Analyze the sample using the complete method a minimum of 6 times [80].
- Calculate the mean, standard deviation, and RSD (%) of the results.
FAQ: Our method shows good repeatability but fails intermediate precision when a different analyst performs the test. What should we examine?
- Potential Cause: The method is too sensitive to minor variations in technique, or the procedure lacks sufficient detail to ensure consistency.
- Troubleshooting Guide:
- Review Method Documentation: Ensure the Standard Operating Procedure (SOP) is extremely detailed, leaving no room for interpretation. Include specifics on pipetting techniques, mixing times, sonication power, and exact mobile phase preparation.
- Conduct Robustness Testing: Proactively test the method's reliability by deliberately varying parameters like pH, mobile phase composition, flow rate, or column temperature within small, realistic ranges [79] [82]. This helps identify critical parameters that need tight control.
- Enhanced Training: Implement hands-on training and certification for all analysts to ensure technique is standardized.
Linearity & Range
Definition:
- Linearity is the ability of the method to obtain test results that are directly proportional to the concentration of the analyte [77] [78].
- Range is the interval between the upper and lower concentrations for which linearity, accuracy, and precision have been demonstrated [78].
Experimental Protocol:
- Prepare a minimum of five concentration levels across the expected range (e.g., 50%, 75%, 100%, 125%, 150% of the target concentration) [80].
- Analyze each level, preferably in triplicate.
- Plot the mean response against the concentration and perform linear regression analysis.
- The correlation coefficient (r) should typically be ≥ 0.995 [79]. Also, inspect the residual plot to detect any bias or non-linear patterns.
Limit of Detection (LOD) and Limit of Quantification (LOQ)
Definition:
- LOD: The lowest amount of analyte in a sample that can be detected, but not necessarily quantified, under the stated experimental conditions [79] [78].
- LOQ: The lowest amount of analyte in a sample that can be quantitatively determined with acceptable accuracy and precision [79] [78].
Experimental Protocols: 1. Signal-to-Noise Ratio (Best for chromatographic methods)
- Compare measured signals from known low-concentration samples with those of blank samples.
- LOD is typically a signal-to-noise ratio of 3:1.
- LOQ is typically a signal-to-noise ratio of 10:1 [79] [80].
2. Standard Deviation of the Response and Slope
- Analyze multiple (e.g., n=10) blank or very low concentration samples.
- Calculate the standard deviation (σ) of the response.
- LOD =
3.3 * σ / S(where S is the slope of the calibration curve). - LOQ =
10 * σ / S[79].
FAQ: How can we reliably distinguish a true analyte signal from baseline noise near the LOD?
- Potential Cause: High background noise or insufficient method specificity at low concentrations.
- Troubleshooting Guide:
- Noise Reduction Strategies: Ensure proper instrument grounding, use high-purity solvents and reagents, and maintain consistent temperature conditions to minimize baseline noise [79].
- Improve Specificity: Optimize chromatographic separation (e.g., adjust gradient, change column) or use a more selective detector (e.g., MS/MS) to better distinguish the analyte peak from matrix interferences.
- Blank Analysis: Run multiple method blanks to characterize the noise and ensure the analyte signal in samples is significantly distinct.
Experimental Workflow & Troubleshooting Logic
The following diagrams illustrate the key workflows for method validation and systematic troubleshooting.
Diagram 1: Analytical Method Validation Workflow
Diagram 2: Systematic Troubleshooting Logic
The table below summarizes the core parameters, their definitions, and typical acceptance criteria for a quantitative assay, serving as a quick reference.
| Parameter | Definition | Typical Acceptance Criteria |
|---|---|---|
| Accuracy (Recovery) [80] | Closeness of results to the true value. | Recovery of 80-110% (varies by analyte and level). |
| Precision (Repeatability) [79] [82] | Consistency under the same conditions. | RSD < 2% for assay methods. |
| Linearity [79] | Proportional relationship between concentration and response. | Correlation coefficient (r) ≥ 0.995. |
| Range [79] | Interval where linearity, accuracy, and precision are acceptable. | From LOQ to 120% of specification (e.g., 80-120% for assay). |
| LOD [79] [80] | Lowest detectable amount. | Signal-to-noise ratio ≥ 3:1. |
| LOQ [79] [80] | Lowest quantifiable amount with accuracy and precision. | Signal-to-noise ratio ≥ 10:1; Accuracy/Precision at LOQ should be defined. |
| Specificity [79] [77] | Ability to measure analyte unequivocally amidst interference. | No interference from blank, placebo, or known impurities. |
| Robustness [79] [78] | Reliability under deliberate, small parameter changes. | Method meets system suitability despite variations. |
The Scientist's Toolkit: Essential Research Reagent Solutions
This table lists key materials and reagents critical for successfully conducting method validation experiments, especially in the context of chromatographic analysis of environmental contaminants.
| Item | Function / Purpose |
|---|---|
| Certified Reference Materials (CRMs) | Provide a traceable and definitive value for the analyte, essential for establishing method Accuracy [80]. |
| High-Purity Solvents (HPLC/MS Grade) | Minimize baseline noise and ghost peaks, crucial for achieving low LOD/LOQ and clean chromatograms [82]. |
| Buffer Salts (e.g., Potassium Dihydrogen Phosphate) | Used in mobile phase preparation to control pH, which affects retention time, peak shape, and method Robustness [82]. |
| Characterized Impurity/Purity Standards | Used to challenge the method and demonstrate Specificity by proving the analyte can be distinguished from interferents [77]. |
| System Suitability Test Mix | A standardized mixture used to verify that the entire analytical system (instrument, column, conditions) is performing adequately before validation runs [79]. |
Technical Support Center: Troubleshooting Guides and FAQs
Frequently Asked Questions (FAQs)
1. How do I choose the correct ionization mode for my LC-MS/MS analysis? The choice of ionization mode is compound-dependent. The general rule is that electrospray ionization (ESI) works best for higher-molecular-weight, polar, or ionizable compounds, while atmospheric pressure chemical ionization (APCI) is better for lower-molecular-weight, less-polar compounds [83]. For definitive results, perform an infusion experiment of your standard using a tee piece with a 50:50 mix of organic-buffer at both pH 8.2 and 2.8, testing both positive and negative ionization modes to select the one providing the optimum signal [83] [39].
2. What is the best way to prevent contamination in my LC-MS/MS system? Contamination affects both method performance and instrument maintenance. Key strategies include:
- Using a divert valve to introduce only peaks of interest into the MS and divert the void volume (t0) and high-organic portions of the gradient [39].
- Implementing sufficient sample preparation (e.g., filtration, solid-phase extraction) to remove dissolved contaminants and matrix components [39].
- Using volatile mobile-phase additives (e.g., formate or acetate buffers) instead of non-volatile ones (e.g., phosphate) to avoid source contamination [39].
3. My sensitivity has dropped suddenly. How can I troubleshoot whether the problem is with my instrument or my method? Your first step should be to run a benchmarking method [39]. Inject five replicates of a standard compound like reserpine. If the benchmarking method performs as expected (stable retention time, repeatability, and peak height), the problem likely lies with your analytical method or samples. If the benchmark fails, the problem is with the instrument itself [39].
4. What does a high background signal indicate, and how can I reduce it? A high background signal is often due to mobile phase contaminants or ion suppression from co-eluting compounds. To reduce it:
- Use the highest purity solvents and additives available [39].
- Employ the lowest effective amount of additive (e.g., 10 mM or 0.05% v/v is a good starting point) [39].
- Improve the chromatographic separation or sample clean-up to resolve your analyte from matrix components that cause ion suppression [83].
5. How are Limits of Detection (LOD) and Quantification (LOQ) determined for complex environmental samples? The calculation of LOD and LOQ is not unique and can vary based on the guideline used (IUPAC, USEPA, EURACHEM). For complex samples, the sample matrix critically influences these limits [84]. A common workflow involves:
- First estimating LOD/LOQ using a signal-to-noise (S/N) approach.
- Refining the calculation using guidelines that often rely on data from blank samples (if an analyte-free matrix exists) or the calibration curve, specifically the standard error of the regression (s y/x) and the slope (b) [84]. It is crucial to report which criterion was used for calculation.
Troubleshooting Guide: Common LC-MS/MS Issues
| Problem | Potential Causes | Recommended Solutions |
|---|---|---|
| Low Signal/ Sensitivity | - Incorrect ionization mode/polarity- Suboptimal source parameters- Mobile phase pH not optimal- Source contamination | - Perform infusion tune for your analyte [83]- Manually tune source voltages, gas flows, and temperature [39]- Test mobile phase at pH 2.8 and 8.2 [83]- Clean ion source according to manufacturer instructions |
| High Background Noise | - Contaminated mobile phase/solvents- Ion suppression from sample matrix- Non-volatile mobile phase additives | - Use high-purity solvents and additives [39]- Improve sample preparation (e.g., SPE) [39]- Use volatile buffers (ammonium formate/acetate) [39] |
| Unstable Signal / Retention Time Drift | - Unbuffered mobile phase- Inadequate column equilibration- Leaks or pump issues | - Use a volatile buffer (e.g., 10 mM ammonium formate) for pH control [39]- Ensure sufficient re-equilibration time between runs- Check system for leaks and ensure pump is operating correctly |
| Poor Chromatographic Peaks | - Co-elution with matrix components- Inappropriate LC method- Column degradation | - Run a full scan acquisition to check for coelution [83]- Re-optimize the gradient to improve separation [83]- Replace or regenerate the LC column |
Comparative Analysis of Instrumental Techniques
The following table summarizes the key characteristics of LC-MS/MS, electroanalysis, and spectrophotometry for the analysis of emerging contaminants in environmental samples.
Table 1: Comparative Analysis of Instrumental Techniques for Environmental Contaminants
| Parameter | LC-MS/MS | Electroanalysis | Spectrophotometry (UV-Vis) |
|---|---|---|---|
| Typical Detection Limits | Picogram to femtogram levels (ultra-trace) [85] | Varies widely (e.g., ppm to ppb) | Milligram to microgram per liter (less sensitive) |
| Selectivity | Very High (double mass filtering in MRM mode) [86] | Moderate to High (depends on electrode material and potential) | Low to Moderate (susceptible to matrix interference) |
| Analyte Type | Nonvolatile, polar, thermally labile compounds; broad range [85] [86] | Electroactive species (e.g., heavy metals, nitrates, phenols) | Chromophores (molecules that absorb light) |
| Sample Throughput | Moderate to High (with modern UHPLC and automation) | Potentially High (rapid measurements) | High |
| Quantitation Capability | Excellent (high dynamic range, uses internal standards) | Good | Moderate (can be affected by matrix) |
| Structural Information | Yes (via MS/MS fragmentation) [85] | No | No |
| Cost of Ownership | High (capital and maintenance) | Low | Low |
| Key Strength | Unmatched sensitivity and selectivity for targeted quantitation and non-targeted screening [86] | Portability for field analysis, cost-effectiveness for specific ions | Simplicity, wide availability, suitability for high-throughput screening |
| Key Weakness | High instrument cost, complex operation, requires skilled personnel | Limited to electroactive analytes, electrode fouling | Poor selectivity and sensitivity for trace analysis |
Essential Experimental Protocols
Protocol 1: LC-MS/MS Method Development for Targeted Contaminants
- Sample Preparation: For complex matrices like food or soil, use a validated sample preparation technique such as QuEChERS (Quick, Easy, Cheap, Effective, Rugged, Safe) to extract analytes and remove matrix interferents [86].
- LC Conditions:
- MS/MS Conditions:
- Ionization: Electrospray Ionization (ESI), polarity determined by infusion experiment [83].
- Data Acquisition: Multiple Reaction Monitoring (MRM). For each compound, optimize the collision energy (CE) to generate product ions, aiming to leave 10-15% of the parent ion [83]. Use two MRM transitions per compound (a quantifier and a qualifier) for confident identification [86].
Protocol 2: General Unknown Screening (GUS) using LC-HRMS
- Principle: This nontargeted approach is used to find unanticipated contaminants [86].
- Workflow:
- Sample Analysis: Analyze samples using High-Resolution Mass Spectrometry (HRMS, e.g., Q-TOF) in full-scan mode to detect all ions.
- Peak Finding: Use specialized software algorithms to find all chromatographic peaks and their associated mass-retention time pairs [86].
- Statistical Analysis: Apply statistical tools like Principal Component Analysis (PCA) to find characteristic marker ions that differentiate sample groups [86].
- Identification: Acquire MS/MS spectra for unknown markers and search them against mass spectral libraries for identification [86].
Workflow and Relationship Diagrams
Diagram 1: Instrument Selection Workflow
Diagram 2: LC-MS/MS Targeted Workflow
The Scientist's Toolkit: Research Reagent Solutions
Table 2: Essential Materials for LC-MS/MS Analysis of Environmental Contaminants
| Item | Function / Purpose | Technical Notes |
|---|---|---|
| Ammonium Formate / Acetate | Volatile buffer for mobile phase | Provides pH control without source contamination; typically used at ~10 mM concentration [83] [39]. |
| Formic Acid | Mobile phase additive | Volatile acid for pH adjustment in positive ion mode; use high purity at 0.05-0.1% [39]. |
| Solid-Phase Extraction (SPE) Cartridges | Sample clean-up and pre-concentration | Removes matrix interferents; choice of sorbent (C18, HLB, etc.) depends on target analytes. |
| QuEChERS Kits | Sample preparation for complex matrices | Standardized extraction protocol for pesticides, mycotoxins, etc., in food and environmental samples [86]. |
| Divert Valve | LC-MS/MS system component | Protects mass spectrometer by diverting non-analyte portions of the eluent (e.g., solvent front) to waste [39]. |
| Sterile Swabs & Neutralizing Buffer | Environmental surface sampling | Pre-moistened swabs used to collect residues from surfaces for microbiological or chemical testing; neutralizing buffer inactivates residual disinfectants [87]. |
Technical Support Center
Frequently Asked Questions (FAQs)
Q1: What are the primary sources of measurement uncertainty when analyzing emerging contaminants in complex water samples?
Measurement uncertainty in environmental analysis stems from multiple stages of the analytical process. Key sources include the sample preparation method (e.g., potential breakthrough in Solid-Phase Extraction or emulsion formation in Liquid-Liquid Extraction), matrix effects from the sample itself that can interfere with ionization during mass spectrometry, and instrumental calibration inaccuracies [88]. Proper quantification requires the use of matrix-matched calibration standards and internal standardization to correct for these variations and control uncertainty [88].
Q2: How can I improve the Limit of Detection (LOD) for trace-level pharmaceuticals in wastewater?
Lowering the LOD involves optimizing both the pre-concentration and detection phases of your method. To achieve higher enrichment and thus lower detection limits, you can:
- Increase sample volume during the extraction process, carefully monitoring for potential breakthrough [89] [88].
- Employ highly selective and sensitive detection systems, such as liquid chromatography coupled to tandem mass spectrometry (LC-MS/MS) or high-resolution mass spectrometry (QTOF-HRMS) [89].
- Utilize advanced extraction techniques like Accelerated Solvent Extraction (ASE) or optimized Solid-Phase Extraction (SPE) to improve analyte recovery [89] [88].
Q3: My method validation shows high spike recovery, but I'm getting inconsistent results with real environmental samples. What could be wrong?
High recovery in validation but inconsistency with real samples strongly points to matrix effects [89] [88]. Components in the environmental sample (e.g., dissolved organic matter, salts) can suppress or enhance the signal in your detector. To address this:
- Use matrix-matched calibration curves instead of pure solvent-based curves.
- Incorporate isotope-labeled internal standards for each analyte, which correct for variability during sample preparation and analysis.
- Perform a robust matrix effect assessment as part of your method validation to quantify and correct for this interference [89].
Q4: What quality control measures are essential for reliable data in environmental monitoring studies?
A comprehensive Quality Assurance/Quality Control (QA/QC) plan is critical. Essential measures include:
- Method Blanks: To identify and account for potential contamination [88].
- Spike Recovery Experiments: To evaluate the accuracy and efficiency of the entire analytical process [88].
- Replicate Analyses: To determine the precision of your method.
- Certified Reference Materials (CRMs): To validate method accuracy against a known standard [88].
- Regular Instrument Calibration and Maintenance: To ensure data integrity throughout the analysis.
Troubleshooting Guides
Problem: Poor Chromatographic Peak Shape or Resolution
- Potential Cause: Contamination of the chromatographic column or suboptimal mobile phase composition.
- Solution: Flush and re-condition or replace the column. Adjust the mobile phase gradient, pH, or buffer concentration to improve separation [88].
Problem: High Background Noise in Mass Spectrometry
- Potential Cause: Contamination of the ion source or the sample introduction system.
- Solution: Clean the ion source and sample cone. Ensure that solvents and reagents are of high purity (e.g., LC-MS grade). Re-run method blanks to confirm the source of contamination has been eliminated.
Problem: Low Analytical Recovery During SPE
- Potential Cause: The sorbent in the SPE cartridge is not optimal for the target analytes, or the sample loading/washing/elution conditions are incorrect.
- Solution: Re-evaluate the sorbent chemistry (e.g., switch from C18 to a mixed-mode sorbent). Optimize the solvent strength and volume in the washing and elution steps using an experimental design to evaluate the influencing factors [89].
Problem: Inconsistent Results in Mixture Analysis Using Complex Survey Data (e.g., NHANES)
- Potential Cause: Failure to account for the complex sampling design (e.g., disproportionate sampling based on demographics) in the statistical analysis, leading to biased associations [90].
- Solution: Consult with a statistician to appropriately incorporate sampling weights, clusters, and strata into the mixture analysis model, rather than using unweighted methods [90].
Experimental Protocols & Data Presentation
Detailed Methodology for Analysis of Emerging Contaminants
This protocol is adapted from a validated method for determining pharmaceuticals and tire-related contaminants in wastewater [89].
1. Sample Collection and Preservation:
- Collect wastewater or environmental water samples in pre-cleaned glass or plastic containers.
- Preserve samples immediately after collection, typically by acidification to pH ~2 or by freezing at -20°C, to maintain analyte stability until extraction.
2. Sample Preparation: Solid-Phase Extraction (SPE):
- Conditioning: Condition the SPE sorbent (e.g., a hydrophilic-lipophilic balanced polymer) with an organic solvent (e.g., methanol) followed by ultrapure water at a neutral pH.
- Loading: Pass a measured volume of the filtered water sample (e.g., 100 mL - 1000 mL) through the SPE cartridge at a controlled, slow flow rate (e.g., 5-10 mL/min) to ensure efficient analyte retention.
- Washing: Wash the cartridge with a mild solvent or buffer (e.g., 5% methanol in water) to remove weakly retained matrix interferences.
- Elution: Elute the target analytes using a strong organic solvent (e.g., methanol or acetonitrile), possibly acidified. The eluate is then gently evaporated to near-dryness under a stream of nitrogen.
- Reconstitution: Reconstitute the dry extract in a small volume (e.g., 100 µL) of a solvent compatible with the LC mobile phase to pre-concentrate the sample.
3. Instrumental Analysis: LC-MS/MS:
- Chromatography: Separate the reconstituted extract using a Reverse-Phase C18 column with a gradient elution of water and acetonitrile (both with modifiers like 0.1% formic acid).
- Mass Spectrometry: Analyze the column effluent using a tandem mass spectrometer with Electrospray Ionization (ESI) in positive or negative mode. Use Multiple Reaction Monitoring (MRM) for highly selective and sensitive quantification.
4. Quantification and Validation:
- Calibration: Construct a calibration curve using a series of standard solutions with known concentrations. Using matrix-matched calibration is highly recommended for accurate quantification [88].
- Quality Control: Include procedural blanks, laboratory control samples (spiked blanks), and duplicate samples in each analytical batch to monitor for contamination and assess precision and accuracy.
Table 1: Common Analytical Techniques for Emerging Contaminants and Their Characteristics
| Technique | Typical Applications | Key Strengths | Common Limitations |
|---|---|---|---|
| LC-MS/MS [89] [88] | Pharmaceuticals, personal care products, polar pesticides | High sensitivity and selectivity for non-volatile compounds; capable of structural confirmation | Susceptible to matrix effects; requires skilled operation |
| GC-MS [88] | Pesticides, PCBs, semi-volatile compounds | High resolution for volatile compounds; robust and reproducible | Not suitable for non-volatile or thermally unstable analytes |
| Immunoassays (e.g., ELISA) [88] | Hormones, specific pesticides | High throughput; cost-effective for screening | Potential for cross-reactivity (false positives); lower specificity |
| High-Resolution MS (QTOF) [89] | Suspect screening, non-target analysis | Accurate mass measurement; enables identification of unknown compounds | Higher cost and complexity; requires advanced data processing |
Table 2: Summary of Sample Preparation Methods and Considerations
| Method | Principle | Best For | Practical Considerations |
|---|---|---|---|
| Solid-Phase Extraction (SPE) [89] [88] | Selective adsorption onto a solid sorbent | Pre-concentration and clean-up of a wide range of analytes from liquid samples | Potential for cartridge breakthrough; matrix effects can reduce efficiency |
| Liquid-Liquid Extraction (LLE) [88] | Partitioning between immiscible solvents | Non-polar to semi-polar compounds | Large solvent volumes; risk of emulsion formation |
| QuEChERS [88] | Salting-out extraction with dispersive SPE clean-up | Multi-residue analysis in complex matrices (e.g., pesticides) | May not be optimal for very polar or very non-polar compounds |
The Scientist's Toolkit: Research Reagent Solutions
Table 3: Essential Materials for Analysis of Emerging Contaminants
| Item | Function/Description |
|---|---|
| Solid-Phase Extraction (SPE) Cartridges | Used for sample clean-up and pre-concentration; common sorbents include HLB (hydrophilic-lipophilic balanced) for a broad range of contaminants [89]. |
| LC-MS Grade Solvents | High-purity solvents (e.g., methanol, acetonitrile, water) are essential to minimize background noise and contamination in sensitive mass spectrometry detection [88]. |
| Isotope-Labeled Internal Standards | Analytes labeled with stable isotopes (e.g., ^13^C, ^2^H) are added to the sample to correct for losses during sample preparation and matrix effects during analysis, improving accuracy [88]. |
| Certified Reference Materials (CRMs) | Materials with certified concentrations of analytes, used to validate the accuracy and precision of the analytical method [88]. |
Workflow and Relationship Visualizations
The following diagrams illustrate the core experimental workflow and the relationship between data quality concepts.
Analytical Workflow for Emerging Contaminants
Relationship Between Data Quality Metrics
FAQs: Troubleshooting Common QA/QC Issues
Q1: Our method blanks are showing detectable levels of our target analytes. What could be the cause and how should we respond?
- Potential Causes: Contamination can be introduced from impure reagents, poorly cleaned laboratory equipment, carryover from automated samplers, or even the laboratory environment itself [91].
- Action Plan:
- Halt the analytical run immediately to prevent further use of compromised data [92].
- Investigate the source: Check reagents by analyzing a reagent blank. Review equipment cleaning logs and procedures, especially for automated samplers [91].
- Corrective Action: Replace contaminated reagents, re-clean all laboratory ware and equipment, and ensure proper separation of sample preparation areas from high-concentration standards.
- Re-run affected samples: All samples processed with the contaminated batch must be re-prepared and re-analyzed once the issue is resolved [93].
Q2: We are observing high variability between our sample duplicates. What does this indicate and how can we pinpoint the source of error?
- Interpretation: High relative percent differences (RPD) between duplicates indicate poor precision. The type of duplicate pinpoints where the error occurs [93].
- Troubleshooting by Duplicate Type:
- Field Duplicates: High RPD suggests heterogeneity in the environmental sample itself or inconsistencies in field sampling techniques [93] [91].
- Preparation/Pulp Duplicates: High RPD here points to issues in the laboratory's sample preparation stage, such as inconsistent homogenization, pulverizing, or subsampling [93].
- Instrument Duplicates: High RPD specifically from the analytical instrument indicates instrument instability or problems with the injection system [92].
- Refining Protocols: Use pulp duplicates to isolate and diagnose laboratory analytical error separately from field and preparation errors [93].
Q3: Our standard calibration curves are failing, or the slopes are drifting over time. How do we troubleshoot this?
- Check Standard Preparation: Ensure standards are prepared correctly from certified stock solutions and that serial dilutions are performed accurately using calibrated pipettes and glassware [62].
- Assess Instrument Performance: Check for instrumental issues such as a degrading source in a mass spectrometer, a failing lamp in a spectrophotometer, or a clogged nebulizer in an ICP system. Consistent downward drift in slope often signals a loss of instrumental sensitivity [92].
- Evaluate Solvents and Materials: Verify the purity of solvents and compatibility of all materials (vials, filters, tubing) with the analytes to rule out adsorption or leaching [94].
- Document and Act: Maintain a running record of calibration slopes and factors. A consistent upward or downward trend requires immediate investigation and corrective maintenance [92].
Q4: Our Matrix Spike (MS) recoveries are consistently outside acceptable limits, but the Laboratory Control Sample (LCS) is within range. What does this mean?
- Diagnosis: This pattern strongly indicates matrix effects [62]. The sample's own composition (e.g., high organic content, salinity, turbidity) is interfering with the analysis, even though the method itself is under control.
- Solutions:
- Sample Dilution: Diluting the sample can reduce the interfering matrix, but ensure detection limits are not compromised.
- Alternative Sample Preparation: Implement additional cleanup steps (e.g., solid-phase extraction, gel permeation chromatography) to remove interferents [62].
- Standard Addition: Use the method of standard addition to calibrate directly in the sample matrix, which can compensate for some matrix effects.
- Data Qualification: Report the data with appropriate qualifiers (e.g., "estimated concentration") noting the low spike recovery, as required by your quality project plan [62].
QA/QC Samples: Purposes, Interpretation, and Frequency
The table below summarizes the core QA/QC samples essential for validating data in environmental analysis.
| QA/QC Sample | Primary Purpose | How It's Prepared | Key Interpretation & Acceptance | Typical Frequency |
|---|---|---|---|---|
| Method Blank [91] | Detects contamination introduced during laboratory preparation and analysis. | A contaminant-free matrix (e.g., deionized water) processed alongside field samples. | Ideally, all results should be non-detect. Contamination is likely if blanks show detectable levels of analytes [91]. | Once per batch of 20 samples [62]. |
| Field Duplicate [91] | Assesses precision and variability of the entire sampling and analytical process, including field heterogeneity. | Two samples collected from the same location at the same time. | The Relative Percent Difference (RPD) is calculated. An RPD of <30% is often acceptable for field duplicates, though this is matrix-dependent [93]. | 5-10% of total samples [92]. |
| Laboratory Control Sample (LCS) [62] | Verifies laboratory analytical accuracy in a clean, interference-free matrix. | A clean matrix (e.g., reagent water) spiked with a known concentration of target analytes. | Percent recovery is calculated. Recovery within 80-120% is often a target, but method-specific limits should be followed [92] [62]. | Once per batch of 20 samples [62]. |
| Matrix Spike (MS) / Matrix Spike Duplicate (MSD) [62] | Evaluates method accuracy and precision in the specific sample matrix; identifies matrix effects. | An actual field sample spiked with known analytes (MS). A second, identical spiked sample (MSD) assesses precision. | Percent recovery (accuracy) and RPD between MS and MSD (precision) are calculated. Compare MS recovery to LCS recovery to isolate matrix effects [62]. | Once per batch of 20 samples [62]. |
| Certified Reference Material (CRM) [93] | Unbiased assessment of analytical accuracy against a certified, standard material. | A standard reference material with known, certified concentrations of analytes. | The measured value should fall within the certified range or within two standard deviations of the certified value (µ ± 2σ) [93]. | Inserted at a rate of 5-10% within a sample batch [93]. |
The Scientist's Toolkit: Essential Research Reagent Solutions
| Reagent/Material | Critical Function in QA/QC |
|---|---|
| Certified Reference Material (CRM) [93] | Provides a ground-truth standard with independently certified analyte concentrations to validate methodological accuracy and instrument calibration. |
| High-Purity Solvents [94] | Used for preparing standards, blanks, and sample dilution. Their purity is critical to prevent false positives in method blanks and background noise. |
| Surrogate Standards [91] | Compounds added to every sample prior to extraction. They monitor the efficiency of the sample preparation process for each individual sample. |
| Deionized/Reagent Water [92] [91] | The essential matrix for preparing method blanks, LCS, and for making standard solutions to verify the absence of laboratory-derived contamination. |
| Custom Spike Solutions [92] | Known concentrations of target analytes used to create LCS and Matrix Spikes, allowing for quantitative measurement of accuracy and recovery. |
QA/QC Workflow in Environmental Analysis
The following diagram maps the logical flow and relationships of key QA/QC components within a typical analytical workflow for environmental samples.
Adherence to Regulatory Frameworks and the Path Toward Standardized Methods for ECs
Emerging contaminants (ECs) represent a diverse group of unregulated pollutants increasingly detected in environmental samples, including pharmaceuticals, personal care products, endocrine disruptors, per- and polyfluoroalkyl substances (PFAS), and industrial chemicals [4] [7]. Their detection and quantification present significant analytical challenges due to their typically low concentrations (ng/L to μg/L), complex environmental matrices, and the continuous introduction of new substances [95]. The current lack of universally standardized methods creates variability in data quality, hinders meaningful comparison of results across studies, and ultimately delays evidence-based regulatory decision-making [4].
Adherence to evolving regulatory frameworks is not merely a compliance issue but a fundamental component of robust scientific practice. It ensures that research data is reliable, reproducible, and defensible. This technical support guide is designed to help researchers navigate this complex landscape, overcome common methodological hurdles, and generate high-quality data that can advance our understanding of ECs and protect environmental and public health [96].
Frequently Asked Questions (FAQs) and Troubleshooting Guides
Q1: My analysis of PFAS in water samples is showing inconsistent results and potential contamination. What are the critical steps I might be missing?
A: PFAS are ubiquitous in the environment and common in laboratory supplies, making cross-contamination a pervasive issue. Key troubleshooting steps include:
- Problem: High blanks and inconsistent calibration curves.
- Solution: Meticulously review all materials contacting the sample. Check Safety Data Sheets (SDS) for any equipment or supplies; if PFAS or terms like "fluoro" or "halo" are listed, do not use them [97]. Furthermore, be aware that PFAS may have been used in the manufacturing process of equipment (e.g., as a mold release agent) even if not listed as a component. Use polypropylene (PP) or high-density polyethylene (HDPE) containers instead of fluoropolymer-based plastics where possible.
- Problem: Poor recovery of specific PFAS analytes.
- Solution: Verify sample preservation and holding times. For drinking water methods like EPA 537.1, samples must be chilled and extracted within 14 days of collection. Use laboratory-supplied PFAS-free water for field blanks and verify its purity documentation [97].
Q2: For non-targeted analysis of ECs, what quality control measures are essential to ensure data credibility?
A: Non-targeted screening requires rigorous QC to distinguish true environmental contaminants from artifacts.
- Essential QC Steps:
- Blanks: Include procedural blanks and solvent blanks in every batch to identify background contamination from solvents, reagents, and equipment.
- Controls: Use internal standards to correct for instrument variability and matrix effects. For LC-HRMS, a standardized reference material can help calibrate the mass axis and ensure mass accuracy across sequences.
- Replication: Analyze replicates to assess the precision of the non-targeted workflow.
- Common Pitfall: Misidentification of features due to high background or matrix interference.
- Troubleshooting: Apply blank subtraction algorithms and use confidence levels for identification (e.g., Level 1: Confirmed by reference standard, Level 2: Probable structure based on spectral library data) [95].
Q3: When is environmental sampling for ECs scientifically justified, and when is it considered "routine" and not recommended?
A: Environmental sampling is an expensive and time-consuming process and should be purpose-driven [98].
- Justified Scenarios:
- Investigating an outbreak of disease where environmental reservoirs are implicated.
- Research with well-designed, controlled experimental methods.
- Monitoring a potentially hazardous environmental condition and validating its successful abatement.
- Quality assurance to evaluate a specific change in practice or equipment performance over a finite period.
- Not Recommended: Undirected, routine sampling without a defined protocol or a clear plan for interpreting and acting on the results [98]. The CDC and other bodies have historically advocated against such practices as infection rates have not been linked to general microbial contamination levels.
Q4: What is the minimum acceptable recovery percentage for swab sampling of surface contaminants, and how is it calculated?
A: Recovery percentage evaluates the efficiency of your sampling method.
- Calculation: % recovery = 100 * (Quantity of analyte measured in the swab / Quantity of analyte spiked onto a control surface) [99].
- Acceptance Criteria: A recovery of >80% is considered good, >50% is reasonable, and <50% is questionable [99]. If recovery is used to qualify the sampling method without a correction factor, a higher percentage (e.g., ≥70%) is typically required. If recovery is consistently low, investigate swab material, pre-moistening solvent, and swabbing technique.
Standardized Analytical Methods for Key Emerging Contaminants
The following table summarizes established regulatory methods, which provide a critical foundation for standardized analysis. Adhering to these methods ensures data comparability and regulatory acceptance.
Table 1: Standardized Analytical Methods for Key Emerging Contaminants
| Contaminant Group | Key Standardized Methods | Matrices Covered | Critical Method Specifications |
|---|---|---|---|
| PFAS | EPA Method 1633A [97] | Groundwater, surface water, wastewater, soil, sediment, biosolids, tissue | Prescribes sample containers, preservation (chilling), and holding times. Requires LC-MS/MS. |
| PFAS in Drinking Water | EPA Method 537.1, EPA Method 533 [97] | Drinking water | Prescriptive methods; changes to preservation, extraction, and QC are prohibited. |
| Pharmaceuticals & Personal Care Products | LC-MS/MS, GC-MS/MS [95] | Wastewater, surface water, groundwater | Often requires solid-phase extraction (SPE) for pre-concentration. GC methods may need derivatization. |
| Pesticides/Herbicides | GC-MS, LC-MS/MS [95] | Water, soil | Method 533 also covers some pesticides. High-resolution MS (HRMS) is valuable for non-targeted screening. |
Advanced Techniques for Pushing Detection Limits
To achieve the low detection limits required for ECs (often sub-ppt), researchers are developing and employing advanced techniques and materials. The table below compares the performance of several novel sensing platforms.
Table 2: Advanced Sensing Techniques for Improved Detection of Emerging Contaminants
| Technique | Contaminant Group | Specific Contaminant | Reported Detection Limit | Key Advantage |
|---|---|---|---|---|
| Fluorescent Biosensor (AChE-Carbon Dots) [95] | Organophosphate Pesticides | Chlorpyrifos | 0.14 μg L⁻¹ | High specificity, potential for portability |
| Paper-Based Electrochemical Strips [95] | Herbicides | Atrazine | 0.24 μg L⁻¹ | Low-cost, rapid, disposable |
| 3D-Printed Sensor [95] | Herbicides | Acetochlor | 3.20 μg L⁻¹ | Customizable design, on-site capability |
| Electrochemical Sensor [95] | Various | Varies | As low as 0.001 pg L⁻¹ | Extreme sensitivity, real-time monitoring |
Experimental Protocol: Utilizing a Carbon Dot-Based Biosensor for Pesticide Detection
1. Principle: This protocol uses fluorescent carbon dots conjugated with the enzyme acetylcholinesterase (AChE). The normal activity of AChE hydrolyzes a substrate, producing a change in fluorescence. Organophosphate pesticides inhibit AChE, leading to a measurable decrease in fluorescence signal proportional to the pesticide concentration [95].
2. Reagents and Materials:
- Synthesized fluorescent carbon dots
- Acetylcholinesterase (AChE) enzyme
- Acetylcholine or acetylthiocholine substrate
- Phosphate buffer saline (PBS), pH 7.4
- Standard solutions of target pesticides (e.g., chlorpyrifos)
- Microcentrifuge tubes and a fluorescence spectrophotometer
3. Procedure: 1. Conjugate Preparation: Covalently link the AChE enzyme to the surface of the carbon dots. Purify the conjugate via centrifugation or dialysis. 2. Calibration: Incubate the AChE-carbon dot conjugate with a series of known concentrations of the target pesticide for a fixed time (e.g., 15 minutes). 3. Reaction Initiation: Add the substrate to the mixture and allow the enzymatic reaction to proceed for a precise period. 4. Signal Measurement: Immediately transfer the solution to a cuvette and measure the fluorescence intensity at the appropriate excitation/emission wavelengths. 5. Data Analysis: Plot the fluorescence quenching (I₀/I) against the logarithm of the pesticide concentration to generate a calibration curve.
4. Troubleshooting:
- Low Signal Intensity: Optimize the ratio of enzyme to carbon dots during conjugation. Check enzyme activity.
- High Background: Ensure proper purification of the conjugate to remove unbound enzyme or dots.
- Poor Reproducibility: Strictly control reaction times and temperatures across all samples.
The Researcher's Toolkit: Essential Reagent Solutions
Table 3: Key Research Reagent Solutions for EC Analysis
| Reagent/Material | Function in EC Analysis | Key Considerations |
|---|---|---|
| PFAS-Free Water [97] | Used for preparing calibration standards, blanks, and for moistening swabs. | Must be supplied by the analytical laboratory with documentation verifying it is free of target PFAS analytes. |
| Solid-Phase Extraction (SPE) Cartridges | Pre-concentration and clean-up of water samples to improve detection limits and reduce matrix effects. | Select sorbent chemistry (e.g., C18, HLB, ion-exchange) based on the polarity and charge of the target ECs. |
| Internal Standards (Isotope-Labeled) | Correction for analyte loss during sample preparation and for matrix effects during MS analysis. | Ideally, use stable isotope-labeled analogs of the target analytes (e.g., ¹³C- or ²H-labeled). |
| Certified Reference Materials (CRMs) | Method validation, calibration, and ensuring accuracy and traceability of results. | Use matrix-matched CRMs where available (e.g., sediment, sludge) to account for extraction efficiency. |
Workflow and Regulatory Pathway Diagrams
The following diagrams visualize the critical processes for reliable EC analysis and the journey from detection to regulation.
Diagram 1: Workflow for Reliable EC Analysis
Diagram 2: Path from EC Detection to Regulation
Conclusion
Advancing the detection limits for emerging contaminants is a multifaceted endeavor that hinges on the synergistic integration of foundational science, innovative technology, and rigorous validation. The journey from understanding the nature of trace-level ECs to implementing advanced methodologies like nano-material-based extraction, automated LC-MS/MS, and novel electrochemical sensors has been charted. Success requires not only adopting these sophisticated tools but also mastering the art of troubleshooting complex matrices and committing to uncompromising data validation. Future progress will depend on interdisciplinary collaboration, the continued development of portable and cost-effective solutions, and the translation of scientific research into enforceable regulatory standards. By breaking the nanogram barrier, the scientific community can provide the critical data needed to accurately assess risks, protect public health, and guide the development of safer pharmaceuticals and chemicals.
References
- 1. Emerging Pollutants in the Environment: Occurrence, Fate ... [https://pmc.ncbi.nlm.nih.gov/articles/PMC12300031/]
- 2. A comprehensive review of emerging environmental ... [https://link.springer.com/article/10.1007/s44274-025-00259-x]
- 3. Contaminants of emerging concern [https://en.wikipedia.org/wiki/Contaminants_of_emerging_concern]
- 4. Comprehensive review of emerging contaminants [https://www.sciencedirect.com/science/article/pii/S0147651324004962]
- 5. Time to strengthen the governance of new contaminants in ... [https://www.nature.com/articles/s41467-025-63217-4]
- 6. Contaminants of Emerging Concern - Pollution - NCCOS [https://coastalscience.noaa.gov/science-areas/pollution/modern-use-chemicals/]
- 7. Emerging contaminants: A One Health perspective - PMC [https://pmc.ncbi.nlm.nih.gov/articles/PMC11096751/]
- 8. Current Status of Emerging Contaminant Models and Their ... [https://www.mdpi.com/2073-4441/17/1/85]
- 9. Innovative Sample Preparation Strategies for Emerging ... [https://pubmed.ncbi.nlm.nih.gov/40372816/]
- 10. Nanogram/liter To Microgram/liter Converter [https://newtum.com/converters/density/nanogram-liter-to-microgram-liter-converter]
- 11. Convert Nanogram/liter to Microgram/liter [https://www.unitconverters.net/density/nanogram-liter-to-microgram-liter.htm]
- 12. Convert nanogram/litre to ug/L - Conversion of ... [https://www.convertunits.com/from/nanogram/litre/to/ug/L]
- 13. How to be a Better Troubleshooter in Your Laboratory [https://www.goldbio.com/blogs/articles/how-to-be-a-better-troubleshooter?srsltid=AfmBOoq93LgLRejhWUbKwZ4Lf4r7nyPz9DiJr6sBvoY_LiEhhL-sOnCC]
- 14. Methods for Estimating the Detection and Quantification ... [https://www.mdpi.com/1424-8220/24/11/3520]
- 15. High-precision quantification and low detection limits of ... [https://pubs.rsc.org/en/content/articlelanding/2025/ja/d5ja00199d]
- 16. Emerging Contaminants Analysis [https://www.thermofisher.com/us/en/home/industrial/environmental/environmental-learning-center/contaminant-analysis-information/emerging-contaminants-analysis.html]
- 17. PPCPs, Plastics, Pesticides & PFAS: The New Pollutant ... [https://www.wabag.com/wabag-blogs/emerging-contaminants-ppcps-pfas-pollution-wabag-biozone/]
- 18. Limit of Detection | National Exposure Report [https://www.cdc.gov/environmental-exposure-report/php/about-the-data/limit-of-detection.html]
- 19. Exposure to Environmental Contaminants | US EPA [https://www.epa.gov/report-environment/exposure-environmental-contaminants]
- 20. Elimination of microplastics, PFAS, and PPCPs from ... [https://www.sciencedirect.com/science/article/pii/S0048969724049222]
- 21. An intelligent spectral identification approach for the ... [https://www.sciencedirect.com/science/article/abs/pii/S0013935124022758]
- 22. Current Limitations and Recommendations to Improve ... [https://pmc.ncbi.nlm.nih.gov/articles/PMC6059567/]
- 23. Current and Future Technologies for the Detection of Antibiotic ... [https://pmc.ncbi.nlm.nih.gov/articles/PMC10606640/]
- 24. Antimicrobial Resistance | Detection with NGS [https://www.illumina.com/areas-of-interest/microbiology/public-health-surveillance/antimicrobial-resistance-detection.html]
- 25. Feasibility of Using Biomarkers for Assessing Heavy-Metal ... [https://www.mdpi.com/2077-0472/15/16/1728]
- 26. Quantification of differential tissue biomarker responses to ... [https://pubmed.ncbi.nlm.nih.gov/35271834/]
- 27. Solving the Nonalignment of Methods and Approaches ... [https://pmc.ncbi.nlm.nih.gov/articles/PMC7547870/]
- 28. Detecting radioactive particles in complex environmental ... [https://www.nature.com/articles/s41598-024-52876-w]
- 29. Recent advances in environmental sample preparation [https://www.sciencedirect.com/science/article/pii/S2772582025000245]
- 30. The fundamentals of troubleshooting in industrial automation [https://www.controleng.com/the-fundamentals-of-troubleshooting-in-industrial-automation/]
- 31. How to Avoid Problems in LC–MS | LCGC International [https://www.chromatographyonline.com/view/how-avoid-problems-lc-ms]
- 32. How Automation Improves Reproducibility (and Keeps ... [https://www.tagelabs.com/post/how-automation-improves-reproducibility-and-keeps-reviewers-happy]
- 33. The return on investment of lab automation [https://diagnostics.roche.com/global/en/article-listing/lab-leaders/article/roi-of-automation-lab.html]
- 34. Optimization of a Multi-Residue Analytical Method during ... [https://pmc.ncbi.nlm.nih.gov/articles/PMC9563028/]
- 35. A Simplified Multi-Residue Method Using μSPE Clean-Up ... [https://www.mdpi.com/2227-9040/13/12/405]
- 36. Advanced Strategies to Improve Detection Limits in ... [https://www.organomation.com/advanced-strategies-to-improve-detection-limits-in-chromatography-mass-spectrometry]
- 37. LC–MS Sensitivity: Practical Strategies to Boost Your ... [https://www.chromatographyonline.com/view/lc-ms-sensitivity-practical-strategies-boost-your-signal-and-lower-your-noise]
- 38. How to Maximize Sensitivity in LC-MS [https://www.sigmaaldrich.com/US/en/technical-documents/technical-article/analytical-chemistry/small-molecule-hplc/tips-and-tricks-sensitivity-gains-in-lcms?srsltid=AfmBOoqfRKL-w5kORau9War7OgCitWIskq3eftRKOqxA2ORkGX5LueYs]
- 39. How to Avoid Problems in LC–MS | LCGC International [https://www.chromatographyonline.com/view/how-avoid-problems-lc-ms-0]
- 40. Optimization of the QuEChERS method for multi-residue ... [https://www.sciencedirect.com/science/article/pii/S0308814622019203]
- 41. Boron-doped diamond electrochemical biosensors [https://www.sciencedirect.com/science/article/abs/pii/S0009898125001640]
- 42. Revolutionizing Electrochemical Sensing with ... [https://www.mdpi.com/2227-9040/13/5/183]
- 43. Boron-Doped Diamond Electrodes for Toxins Sensing in ... [https://pmc.ncbi.nlm.nih.gov/articles/PMC11991570/]
- 44. Boron-Doped Diamond Electrodes for Toxins Sensing in ... [https://pubmed.ncbi.nlm.nih.gov/40218850/]
- 45. Fluorescence Spectroscopy Emerges as Rapid Screening ... [https://www.spectroscopyonline.com/view/fluorescence-spectroscopy-emerges-as-rapid-screening-tool-for-groundwater-contamination-in-denmark]
- 46. Wave Lumina - Pfas Testing, Contaminated Water [https://wavelumina.com/our-technology]
- 47. Boron-doped diamond electrodes for electrochemical ... [https://www.sciencedirect.com/science/article/pii/S221418042500100X]
- 48. The ten principles of green sample preparation [https://www.sciencedirect.com/science/article/pii/S0165993622000139]
- 49. Electrophoretic Concentration — A Simple and Green ... [https://www.chromatographyonline.com/view/electrophoretic-concentration-simple-and-green-approach-sample-preparation]
- 50. Green Extraction Techniques as Advanced Sample ... [https://pmc.ncbi.nlm.nih.gov/articles/PMC9101692/]
- 51. Green Approaches to Sample Preparation Based on ... [https://pmc.ncbi.nlm.nih.gov/articles/PMC7180442/]
- 52. Preconcentration - an overview | ScienceDirect Topics [https://www.sciencedirect.com/topics/chemistry/preconcentration]
- 53. Green materials for greener food sample preparation [https://www.sciencedirect.com/science/article/pii/S2772577423000058]
- 54. What is Matrix Interference and How Does It Affect Testing? [https://www.arborassays.com/what-is-matrix-interference/?srsltid=AfmBOoqldK7exPYMAT4bfT_cZricDHHvcvPwP-Xi5v9YaRIAHtpvP15a]
- 55. Overcoming Matrix Interference in LC-MS/MS [https://www.sepscience.com/overcoming-matrix-interference-in-lc-ms-ms-12015]
- 56. Overview of Methods and Considerations for Handling ... [https://www.chromatographyonline.com/view/overview-methods-and-considerations-handling-complex-samples]
- 57. Matrix Effects on Quantitation in Liquid Chromatography [https://www.chromatographyonline.com/view/matrix-effects-on-quantitation-in-liquid-chromatography-sources-and-solutions]
- 58. Overcoming Matrix Effects in Non-Target Screening [https://pmc.ncbi.nlm.nih.gov/articles/PMC12224152/]
- 59. Laboratory Analysis Interference – Part 3 [https://www.suburbantestinglabs.com/laboratory-analysis-interference-part-3/]
- 60. What is matrix effect and how is it quantified? [https://sciex.com/support/knowledge-base-articles/what-is-matrix-effect-how-to-quantify-it_en_us]
- 61. Sample Matrix Effects in ICP-MS: Mitigation Techniques [https://eureka.patsnap.com/report-sample-matrix-effects-in-icp-ms-mitigation-techniques]
- 62. Quality Assurance (QA) - Quality Control (QC) [https://www.epa.gov/hw-sw846/quality-assurance-qa-quality-control-qc]
- 63. Common Troubleshooting Tips [https://chem.libretexts.org/Bookshelves/Analytical_Chemistry/Supplemental_Modules_(Analytical_Chemistry)/Analytical_Sciences_Digital_Library/Courseware/Analytical_Electrochemistry%3A_Potentiometry/07_Common_Troubleshooting_Tips]
- 64. Comparison of Quantification Using UV-Vis, NMR, and ... [https://www.mdpi.com/1422-0067/26/14/6638]
- 65. HPLC UV detection [https://www.elementlabsolutions.com/uk/chromatography-blog/post/hplc-uv-detection]
- 66. Why Your HPLC Baseline Drifts—And How to Stop It [https://www.sepscience.com/why-your-hplc-baseline-drifts-and-how-to-stop-it-11018]
- 67. HPLC Troubleshooting Guide [https://www.thermofisher.com/us/en/home/industrial/chromatography/chromatography-learning-center/high-performance-liquid-chromatography-hplc-support/hplc-troubleshooting.html]
- 68. Essentials of LC Troubleshooting, Part III: Those Peaks ... [https://www.chromatographyonline.com/view/essentials-of-lc-troubleshooting-part-iii-those-peaks-don-t-look-right]
- 69. A Validated RP-HPLC Method for Monitoring Pollutants ... [https://pmc.ncbi.nlm.nih.gov/articles/PMC12307476/]
- 70. Key Points to Remember When Using Internal Standards ... [https://www.spectroscopyonline.com/view/key-points-to-remember-when-using-internal-standards-for-sample-analysis-by-icp-oes]
- 71. Deuterium in analytical mass spectrometry [https://www.sciencedirect.com/science/article/abs/pii/S016599362400325X]
- 72. Deuterated Standards for LC-MS Analysis [https://resolvemass.ca/deuterated-standards-for-lc-ms-analysis/]
- 73. The Role of Internal Standards In Mass Spectrometry [https://scioninstruments.com/us/blog/the-role-of-internal-standards-in-mass-spectrometry/]
- 74. The influence of complex matrices on method performance ... [https://pmc.ncbi.nlm.nih.gov/articles/PMC10441247/]
- 75. Degradation of Cylindrospermopsin Spiked in Natural ... [https://pmc.ncbi.nlm.nih.gov/articles/PMC11679458/]
- 76. Quantitative analysis of nanoplastics in environmental and ... [https://www.sciencedirect.com/science/article/pii/S0304389423022975]
- 77. ICH Guidelines for Analytical Method Validation Explained [https://amsbiopharma.com/ich-guidelines-analytical-method/]
- 78. ICH and FDA Guidelines for Analytical Method Validation [https://www.labmanager.com/ich-and-fda-guidelines-for-analytical-method-validation-34252]
- 79. Key ICH Method Validation Parameters to Know [https://altabrisagroup.com/ich-method-validation-parameters/]
- 80. Key Parameters for Analytical Method Validation [https://altabrisagroup.com/analytical-method-validation-parameters/]
- 81. Method Validation - an overview [https://www.sciencedirect.com/topics/engineering/method-validation]
- 82. Optimization and Validation of an HPLC Method ... [https://pmc.ncbi.nlm.nih.gov/articles/PMC12409534/]
- 83. Tips for Optimizing Key Parameters in LC–MS [https://www.chromatographyonline.com/view/tips-optimizing-key-parameters-lc-ms]
- 84. A tutorial for computing limits of detection and ... [https://www.sciencedirect.com/science/article/abs/pii/S0003267021011685]
- 85. Recent Advances in Liquid Chromatography–Mass ... [https://pmc.ncbi.nlm.nih.gov/articles/PMC12204688/]
- 86. LC–MS-MS-Based Strategies for the Targeted and ... [https://www.spectroscopyonline.com/view/lc-ms-ms-based-strategies-targeted-and-nontargeted-screening-contaminants-food-environmental-and-for]
- 87. FAQs About Environmental Sampling [https://www.mantacc.com/faqs-about-environmental-sampling?srsltid=AfmBOoopyPooG9VXuK0MXx-XeXBqpTdXVU1OxV54EnnX1RQW-ZJT-qfO]
- 88. Analytical Methods for Detecting and Quantifying Emerging ... [https://fiveable.me/environmental-chemistry-ii/unit-11/analytical-methods-detecting-quantifying-emerging-contaminants/study-guide/wkLZoj5VSjpsZFro]
- 89. Development of an analytical method for emerging ... [https://pubmed.ncbi.nlm.nih.gov/41174243/]
- 90. Guide for authors - Environmental Research [https://www.sciencedirect.com/journal/environmental-research/publish/guide-for-authors]
- 91. A Closer Look at the QA/QC Samples That Ensure Data ... [https://www.meritlabs.com/blog/2025/11/6/a-closer-look-at-the-qaqc-samples-that-ensure-data-quality]
- 92. Quality Assurance/Quality Control [https://www.umces.edu/quality-assurancequality-control]
- 93. Quality Assurance/Quality Control (QA/QC) Procedure and ... [https://www.linkedin.com/pulse/quality-assurancequality-control-qaqc-procedure-esmaeel-ashrafpour]
- 94. Identifying and Correcting Quality Control Gaps in Clinical ... [https://blog.sekisuidiagnostics.com/dxdialogue/identifying-and-correcting-quality-control-gaps-in-clinical-chemistry-labs]
- 95. Occurrence, transport, and detection techniques of ... [https://pmc.ncbi.nlm.nih.gov/articles/PMC10122002/]
- 96. CWSRF Emerging Contaminants - Frequent Questions and ... [https://www.epa.gov/cwsrf/cwsrf-emerging-contaminants-frequent-questions-and-answers]
- 97. 11 Sampling and Analytical Methods [https://pfas-1.itrcweb.org/11-sampling-and-analytical-methods/]
- 98. F. Environmental Sampling | Infection Control [https://www.cdc.gov/infection-control/hcp/environmental-control/environmental-sampling.html]
- 99. FAQs About Environmental Sampling [https://www.mantacc.com/faqs-about-environmental-sampling?srsltid=AfmBOorzkKuOEwW3aNZZeyxG0UhLbyUcyE3HzCqn0cyjaNuBRhTyQLFq]