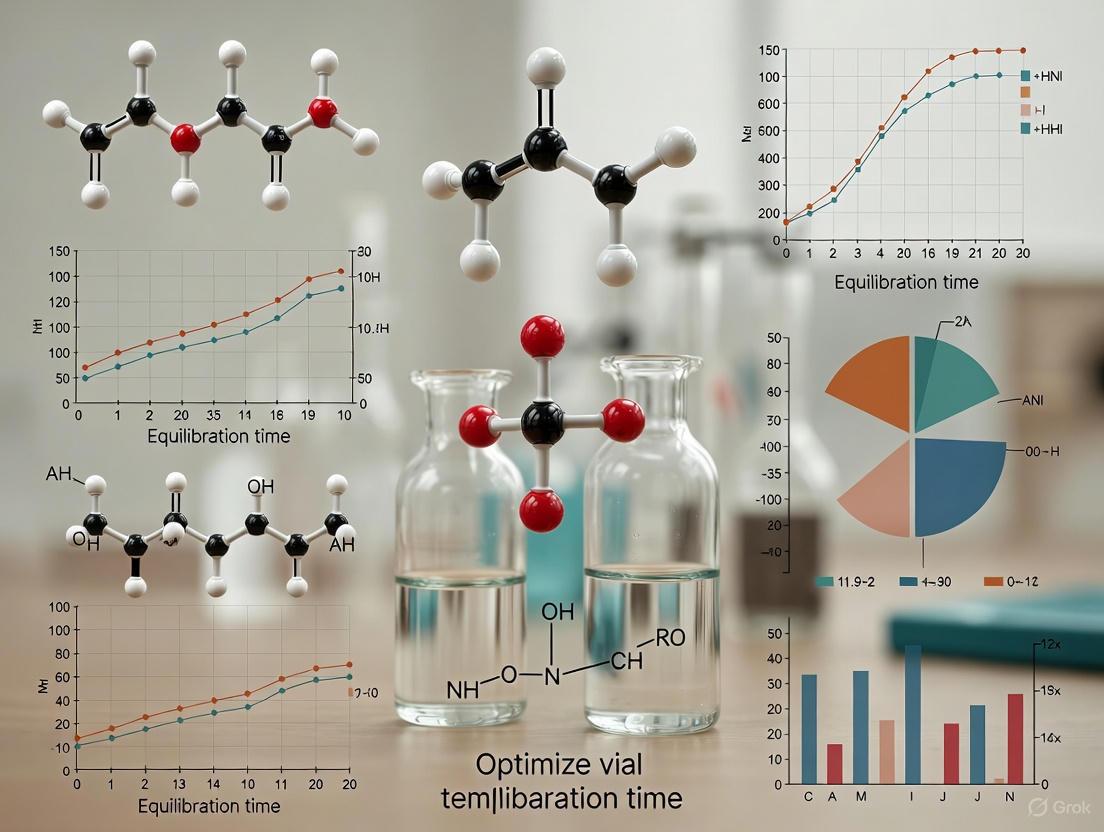
Optimizing Vial Temperature and Equilibration Time: A Scientist's Guide for Robust Results in 2025
This article provides a comprehensive guide for researchers and drug development professionals on optimizing the critical parameters of vial temperature and equilibration time.
Optimizing Vial Temperature and Equilibration Time: A Scientist's Guide for Robust Results in 2025
Abstract
This article provides a comprehensive guide for researchers and drug development professionals on optimizing the critical parameters of vial temperature and equilibration time. Covering foundational principles to advanced validation techniques, it explores the scientific impact of these parameters on analytical precision and process efficiency in applications ranging from chromatography to freeze-drying. The content delivers actionable methodologies for method development, systematic troubleshooting for common issues like ghost peaks and retention time shifts, and strategies for leveraging modern Process Analytical Technology (PAT) and data-driven modeling to ensure robust, transferable, and scalable processes.
The Science of Stability: Why Vial Temperature and Equilibration Time Are Fundamental to Data Integrity
Frequently Asked Questions (FAQs)
Q1: How do I determine the correct incubation temperature and time for my headspace method? The optimal incubation temperature is a balance between maximizing the release of volatiles and avoiding sample degradation. A good starting point is to set the oven temperature to 20 °C below the boiling point of your sample matrix solvent [1]. The precise combination of temperature and equilibration time should be determined experimentally, as these parameters are application-dependent and can interact [2] [1]. Using an experimental design (DoE) approach is efficient for finding this optimum, as it can model these interaction effects [2].
Q2: My analysis shows poor reproducibility. Could the vial seal be the cause? Yes, an inconsistent seal is a common cause of poor reproducibility. Ensure the vial caps are crimped tightly with no leaks, but avoid deforming them [1]. Use a calibrated crimper and be consistent with the crimping force. For methods requiring storage at ultra-low temperatures, confirm that your chosen vial-stopper combination is validated for such conditions, as material contraction can cause transient leaks [3].
Q3: What is the "salting-out" effect and when should I use it? The "salting-out" effect involves saturating an aqueous sample with salt (e.g., sodium chloride) to reduce the solubility of volatile organic compounds in the water, thereby increasing their concentration in the headspace [1]. This is particularly useful for enhancing the sensitivity of analytes that are highly soluble in water [2]. Be aware that this can also drive unwanted compounds into the headspace, so its use is application-dependent [1].
Q4: How does vial headspace volume affect my analysis? For optimal equilibration, the headspace volume should be at least 50% of the total vial volume [1]. Furthermore, the overall sample volume has been identified as a critical parameter, with a strong negative impact on chromatographic response in some systems; larger sample volumes can reduce the peak area signal, and this factor can be more significant than temperature or time [2].
Troubleshooting Guides
Issue: Low Signal for Volatile Analytes in Headspace-GC
Problem: Chromatographic peaks are smaller than expected, leading to poor detection sensitivity.
Investigation and Resolution:
- Check Incubation Temperature: The temperature may be too low. Increase the incubation temperature to shift the partition coefficient (K) of your analytes further into the headspace. Be mindful of the boiling points of your analytes and solvent to avoid degradation [1].
- Review Equilibration Time: The incubation time may be insufficient for the system to reach equilibrium. Methodically test longer equilibration times [2] [1].
- Evaluate Sample Volume: A sample volume that is too large can dilute the headspace concentration of the analyte. Experiment with reducing the sample volume, as this parameter can have a strong negative impact on the signal [2].
- Apply Salting-Out: For aqueous samples, add salt (e.g., sodium chloride) to induce the salting-out effect. In one study, the consistent addition of 1.8 g of NaCl improved partitioning and method reproducibility [2] [1].
- Verify Vial Seals: Ensure crimp caps are applied correctly and consistently to prevent volatile loss [1].
Issue: Container Closure Integrity Failure at Ultra-Low Temperatures
Problem: Drug products stored frozen at -80°C lose sterility due to loss of container closure integrity (CCI).
Investigation and Resolution:
- Confirm Capping Force: The residual seal force (RSF) is critical. One study demonstrated that a capping force of ≥ 27 N (6 lb) was required to maintain CCI at -80°C. Forces below this threshold resulted in leaks [3].
- Inspect Component Compatibility: Use a stack-up tolerance analysis to ensure the vial, stopper, and seal dimensions are compatible. Research shows that with the correct capping force, CCI can be maintained even with dimensional variations at the upper end of the ISO tolerance spec [3].
- Validate the Freezing Process: The cooling rate (e.g., during shipping on dry ice) can stress the seal. Testing under controlled and uncontrolled freezing conditions has shown that with a suitable vial-stopper-seal combination, CCI can be maintained despite thermal contraction [3].
Experimental Protocols & Data
Protocol: Optimizing Headspace Parameters using a Central Composite Design
This methodology is adapted from a study optimizing the extraction of volatile petroleum hydrocarbons from water [2].
1. Objective To systematically optimize critical headspace parameters—sample volume (V), incubation temperature (T), and equilibration time (t)—for maximum chromatographic response.
2. Experimental Design
- Design Type: Central Composite Face-centered (CCF) Design.
- Factors: Three numeric factors (V, T, t).
- Response Variable: Chromatographic peak area per microgram of analyte (Area per μg).
3. Workflow The following diagram illustrates the iterative optimization process.
4. Key Materials
- GC System: Agilent 6890 GC with FID [2].
- Headspace Sampler: Static headspace sampler (e.g., Agilent G1888) [2].
- Column: DB-1 fused-silica capillary column (30 m × 0.25 mm i.d. × 1.0 μm film thickness) [2].
- Vials: 20 mL headspace vials with PTFE/silicone septa and aluminum crimp caps [2].
5. Results and Interpretation Analysis of variance (ANOVA) is used to assess the global significance of the model. A successful model will have a high R² value and a statistically significant p-value (e.g., p < 0.0001). The analysis will reveal the significance of main effects, quadratic effects, and interaction effects between parameters [2].
The table below summarizes quantitative findings from the research.
| Parameter | Effect on Peak Area/µg | Significance & Interactions |
|---|---|---|
| Sample Volume (V) | Strong Negative Impact | The most significant factor in the cited study; larger volumes reduced response [2]. |
| Temperature (T) | Positive Impact | Increases volatility; exhibits positive interaction with time [2]. |
| Equilibration Time (t) | Positive Impact | Allows system to reach equilibrium; effect is synergistic with temperature [2]. |
| Statistical Model | R² = 88.86%, RMSE = 4.997, p < 0.0001 | Confirms model is highly significant and can reliably predict outcomes [2]. |
The Scientist's Toolkit: Essential Research Reagent Solutions
| Item | Function & Application |
|---|---|
| Sodium Chloride (NaCl) | Induces "salting-out" effect in aqueous matrices to improve volatile partitioning into headspace [2] [1]. |
| DB-1 GC Column | A non-polar capillary column suitable for separating volatile hydrocarbon mixtures [2]. |
| PTFE/Silicone Septa | Provides a high-temperature, inert seal for headspace vials to prevent analyte loss and contamination [2]. |
| Helium Leak Detector | Gold-standard equipment for quantitatively assessing container closure integrity, especially under stress conditions [3]. |
| Narrow Bore Liner | GC inlet liner that minimizes band broadening for sharper peaks and improved signal in headspace analysis [1]. |
Frequently Asked Questions (FAQs)
FAQ 1: Why do I get inconsistent gas-liquid partitioning results for my semi-volatile organic compound (SVOC) between different experiment days?
Inconsistent partitioning results are often due to uncontrolled temperature fluctuations. Temperature directly influences a compound's vapor pressure, a key thermodynamic property governing its phase distribution. For instance, a study on atmospheric aerosols found that the partitioning of oxidation products from compounds like m-xylene and naphthalene is significantly enhanced at lower temperatures, which shift the equilibrium towards the condensed (liquid) phase [4]. Even small, unaccounted-for temperature variations in your lab or environmental chamber can alter the measured partitioning coefficient ((K_p)).
FAQ 2: How do I determine the optimal vial equilibration time for a temperature-dependent partitioning experiment?
The optimal equilibration time is not universal; it must be determined empirically for your specific system. It depends on the vial volume, the physicochemical properties of the compound (e.g., molecular weight, diffusivity), and the viscosity of the liquid phase. A general protocol is to conduct a time-series experiment: measure the concentration in one phase over time while holding temperature constant. The point at which the concentration stabilizes is the minimum equilibration time. Remember that at lower temperatures, equilibration may take longer due to reduced molecular motion, especially if the condensed phase becomes more viscous [4].
FAQ 3: My drug formulation requires ultra-low temperature storage (-80°C). How can I ensure the primary container remains intact and stable?
This is a critical consideration for advanced therapies. The integrity of the container at ultra-low temperatures must be verified. Recent studies on prefillable polymer syringes have confirmed their functionality and ability to maintain a sterile barrier at temperatures as low as -180°C [5]. When selecting a vial or syringe, you should review manufacturer data on low-temperature performance, including container closure integrity, leachables, and gliding force of the plunger at your intended storage temperature.
FAQ 4: Why does the pH sensitivity of my ionizable compound's partitioning change with temperature?
Temperature affects both the acid dissociation constant ((pK_a)) and the phase-specific activity coefficients of the ionized and neutral forms of a compound. Research on organic acids and bases in atmospheric aerosols shows that temperature dependence can vary widely between compounds [6] [7]. A change in temperature can alter the pH of the aqueous phase and the solubility of the neutral species. Therefore, the combined effect on the overall partition coefficient can be complex and non-linear, necessitating experimental investigation across your relevant temperature and pH ranges.
Troubleshooting Guides
Problem: Unexpectedly Low Partitioning into the Liquid Phase
- Potential Cause #1: Temperature is too high.
- Solution: Verify and recalibrate your temperature control system (e.g., water bath, incubator). For volatile and semi-volatile compounds, even a 5°C increase can significantly favor the gas phase. Consult literature or models like SIMPOL.1 to estimate the saturation concentration ((C^*)) at your experimental temperature [4].
- Potential Cause #2: The aqueous phase pH is suboptimal for an ionizable compound.
- Solution: For weak acids, lowering the pH will suppress dissociation and increase the fraction of the neutral, more volatile species, driving the compound toward the gas phase. For weak bases, the opposite is true. A study showed that as pH increases from 2 to 6, amines exhibit a significantly increased affinity for the gas phase [6]. Systematically profile partitioning across a pH range to find the optimum.
Problem: Poor Reproducibility of Partitioning Coefficients
- Potential Cause #1: Inadequate vial equilibration time.
- Solution: Perform the time-series experiment described in FAQ #2 to establish a validated, fixed equilibration time for your protocol. Ensure this time is strictly adhered to for all replicates.
- Potential Cause #2: Unaccounted for temperature gradients or drift.
- Solution: Use a calibrated, high-precision thermometer to map the temperature inside your incubator or heating block. Ensure vials are placed in a uniform temperature zone. For critical experiments, use a system with active mixing or agitation to ensure a homogeneous temperature throughout the vial.
Problem: Compound Degradation During Long Equilibration Times
- Potential Cause: Exposure to elevated temperatures or incompatible container surfaces.
- Solution: If a long equilibration time is unavoidable, you must confirm the chemical stability of your compound under those exact conditions. Run a stability study by storing the compound in the liquid phase at the experimental temperature and sampling over time to measure concentration and purity. Consider using inert container materials (e.g., glass with silanized coating) to minimize surface adsorption or catalytic degradation.
Quantitative Data on Temperature-Dependent Partitioning
The following table summarizes experimental data on how temperature influences the partitioning behavior of various compounds, as reported in recent literature.
Table 1: Experimentally Observed Temperature Effects on Gas-Liquid Partitioning
| Compound / System | Temperature Range Studied | Key Observation on Partitioning | Reference |
|---|---|---|---|
| m-Xylene & Naphthalene Oxidation Products | Not specified (lower temps tested) | Lower temperatures significantly enhanced SOA (liquid phase) formation. The effective saturation concentration ((C_i^*)) values shifted towards lower values, indicating stronger partitioning to the particle phase [4]. | [4] |
| Organic Acids and Bases (24 compounds) | Varied | Temperature had a strong but compound-specific influence on partitioning. The analysis was limited by a lack of reliable enthalpy of phase change data for many species [6]. | [6] [7] |
| Lithium in Plagioclase-Rhyolitic Melt | 800°C - 875°C | The plagioclase-melt partition coefficient for Lithium ((K_{Li}^{plag/rhy})) increased with temperature at lower pressures (50-100 MPa), showing temperature dependence is also pressure-sensitive in geologic systems [8]. | [8] |
| Semi-volatile Inorganic Aerosols | Field observations | Warm, dry conditions suppressed aerosol liquid water and elevated H+, lowering pH and influencing the gas-particle partitioning of semi-volatile species like NH₃/NH₄⁺ [9]. | [9] |
Detailed Experimental Protocols
Protocol 1: Determining the Enthalpy of Phase Transfer ((\Delta H_{partition}))
This protocol allows you to quantify the thermodynamic driving force behind temperature-dependent partitioning.
- Preparation: Prepare a standard solution of your analyte in a suitable solvent. Prepare the liquid phase (e.g., buffer at a defined pH) that will be placed in the vial.
- Experimental Setup: Use multiple vials with the same headspace-to-liquid volume ratio. Introduce the same amount of your analyte and liquid phase into each vial.
- Temperature Equilibration: Seal the vials and place them in different, precisely controlled temperature environments (e.g., 4°C, 15°C, 25°C, 37°C). Allow the vials to equilibrate for a pre-determined, sufficient time (see FAQ #2).
- Sampling and Analysis: After equilibration, carefully sample from either the gas phase (e.g., using a gas-tight syringe) or the liquid phase from each vial. Analyze the samples using a calibrated analytical method (e.g., GC-MS, HPLC).
- Data Calculation and Modeling:
- Calculate the partition coefficient, (Kp = C{liquid}/C{gas}), for each temperature.
- Use the van't Hoff equation to relate (Kp) to enthalpy: (\ln(Kp) = -\frac{\Delta H{partition}}{R} \cdot \frac{1}{T} + \text{constant})
- Plot (\ln(Kp)) against (1/T) (in Kelvin). The slope of the linear fit is (-\Delta H{partition}/R), from which you can calculate the enthalpy.
Protocol 2: Optimizing Vial Equilibration Time for a Given Temperature
This is a critical step to ensure your partitioning measurements are made at equilibrium.
- Setup: Prepare a large batch of identical vials containing your compound and liquid phase to ensure uniformity.
- Incubation: Place all vials in a temperature-controlled environment set to your desired experimental temperature.
- Time-Point Sampling: Remove vials from the incubator at a series of time points (e.g., 1h, 2h, 4h, 8h, 24h). Immediately after removal, sample the content and analyze the concentration in one phase.
- Analysis: Plot the measured concentration versus time. The equilibration time is the point after which no significant trend in concentration is observed. Use this time plus a safety margin for all future experiments at that temperature.
Experimental Workflow for Partitioning Studies
The diagram below outlines the logical workflow for designing and troubleshooting a gas-liquid partitioning experiment.
The Scientist's Toolkit: Essential Research Reagents & Materials
Table 2: Key Reagents and Materials for Partitioning Experiments
| Item | Function / Application | Technical Notes |
|---|---|---|
| Prefillable Polymer Syringes | Primary container for sensitive formulations, especially for ultra-low temperature storage. | Select products verified for performance at your target temperature (e.g., -80°C to -180°C). Key parameters include container closure integrity, gliding force, and leachables [5]. |
| Cryoprotectants (e.g., Trehalose, Sucrose) | Stabilizers for lyophilized (freeze-dried) formulations. Protect biomolecules and viral vectors (e.g., AAV) during freezing and drying. | Used in lyophilization formulations for gene therapies to enable storage at 2-8°C by preventing aggregation and maintaining potency [10]. |
| Lipid Nanoparticles (Tristearin, Tripalmitin) | Can be used as tracer systems to monitor the maximum temperature exposure of nanoparticles during processing like spray drying [11]. | Exploits the monotropic polymorphism of triglycerides to indicate if a critical melting temperature was exceeded. |
| Classical Density Functional Theory (cDFT) | A computational modeling approach for predicting phase coexistence and partitioning in complex, multi-component systems [12]. | Useful for exploring the effect of size ratios and affinities between different materials (polymers, colloids) on their distribution between coexisting phases before wet-lab experiments. |
FAQs: Equilibration and Its Impact on Analytical Results
Q1: What is the direct link between improper equilibration and poor repeatability in analytical methods? Improper equilibration directly causes poor repeatability by creating inconsistent starting conditions for each analysis. In techniques like chromatography, failure to re-establish the initial mobile phase composition and stationary phase environment between runs leads to significant retention time shifts. For example, a reader reported a peptide's retention time shifting from 15 minutes in the first run to 5 minutes in subsequent runs due to inadequate re-equilibration, demonstrating severe run-to-run variability [13]. Similarly, in headspace gas chromatography (GC), inconsistent thermostat temperature or insufficient incubation time prevents reproducible gas-liquid phase equilibrium, causing large variability in peak areas for replicate injections [14].
Q2: How can improper equilibration reduce analytical sensitivity? Insufficient equilibration can lower sensitivity by causing system instability that manifests as high background noise or baseline drift, effectively masking the detection of low-concentration analytes. Furthermore, in headspace GC, vial leakage or suboptimal incubation temperature—both equilibration-related issues—can lead to a weak chromatographic signal intensity for volatile compounds [14]. Temperature mismatch during analysis, often stemming from improper eluent pre-heating, can also degrade sensitivity and peak shape [15].
Q3: What are the signs of poor column equilibration in Liquid Chromatography (LC)? The most common symptom is inconsistent retention times between the first injection and subsequent runs, especially after a gradient elution or a change in mobile phase [13]. Other signs include drifting baselines, changes in peak shape (such as peak splitting or fronting), and variations in peak area [15]. These issues occur because the stationary phase has not fully returned to its initial state, altering its interaction with analytes.
Q4: How much equilibration time is typically sufficient for a reversed-phase LC column? A good rule of thumb is to flush the column with 10-15 column volumes of the initial mobile phase composition. The column volume (VM) can be estimated using the formula: VM ≈ (0.5 x 10⁻³) * L * dc², where L is the column length (mm) and dc is the column diameter (mm) [13]. For instance, a 150 x 2.1 mm column has a volume of approximately 0.33 mL, requiring about 3.3 mL of mobile phase for equilibration. The required volume must also account for the system's dwell volume [13].
Q5: In techniques other than LC, what constitutes "equilibration" and how does its failure impact results? Equilibration is a fundamental concept in many analytical techniques:
- Headspace GC: Equilibration involves achieving a stable gas-liquid phase partition of volatiles at a controlled temperature. Failure causes poor repeatability and low sensitivity [14].
- Lyophilization (Freeze-Drying): Equilibration refers to achieving a uniform and stable product temperature below the critical collapse temperature. An uncontrolled freezing step leads to vial-to-vial variability in ice crystal size, which causes uneven drying rates and ultimately results in batch inconsistency with varying residual moisture and stability [16].
- Analytical Ultracentrifugation (AUC): Sedimentation Equilibrium (SE) requires achieving a thermodynamic balance between sedimentation and diffusion. This process is inherently slow, and improper handling of the approach to equilibrium can lead to inaccurate molar mass determinations [17].
Troubleshooting Guide: Poor Repeatability and Sensitivity
Common Symptoms, Causes, and Solutions
| Symptom | Possible Root Cause | Recommended Solution |
|---|---|---|
| Large variability in peak area or retention time (Poor Repeatability) [14] [13] | Inconsistent thermal equilibration in headspace vials; Insufficient column re-equilibration time in LC. | Extend incubation/equilibration time; Standardize sample prep volume and temperature; Use 10-15 column volumes for LC re-equilibration [14] [13]. |
| Low peak area or reduced sensitivity [14] | Leakage from vials (loss of analyte); Suboptimal incubation temperature; Inconsistent injection volume. | Check system for leaks, especially around seals and needles; Optimize incubation temperature; Verify injection system consistency [14]. |
| High background noise or ghost peaks [14] [15] | Contamination of the injection system or column from previous runs; Carryover from poorly cleaned vials. | Run blank samples to identify contamination source; Perform regular cleaning of injection system and use pre-cleaned vials [14]. |
| Progressive retention time drift [14] [18] | Unstable incubation or oven temperature; Mobile phase issues (evaporation, poor preparation); Leaching from system components. | Calibrate temperature controllers; Ensure mobile phase is fresh and properly prepared; For HILIC, use polymer (e.g., PFA) instead of borosilicate glass solvent bottles to prevent ion leaching [18]. |
| Poor peak shape (tailing or fronting) [15] | Column degradation (voids, channels); Inappropriate buffer capacity; Strong sample solvent. | Replace column if degraded; Increase buffer concentration; Dissolve sample in the starting mobile phase composition [15]. |
Diagnostic Workflow
This flowchart outlines a logical process for diagnosing issues related to poor repeatability and sensitivity.
Key Experimental Protocols
Protocol 1: Establishing Minimum LC Column Equilibration Volume
This protocol provides a systematic method to determine the sufficient re-equilibration volume for a liquid chromatography method, crucial for achieving stable retention times [13].
1. Principle: After a gradient run, the column must be flushed with the initial mobile phase composition to re-establish the original interaction environment. The required volume is determined by monitoring the stability of a critical peak's retention time.
2. Materials:
- HPLC or UHPLC system
- Column under investigation
- Standard test mixture
- Mobile phases A and B, as per method
3. Procedure:
- Step 1: Set the method with a shallow gradient (e.g., 5-95% B over 30 min) followed by a re-equilibration segment at initial conditions (e.g., 5% B).
- Step 2: Inject the standard mixture repeatedly without changing the method. Start with a re-equilibration volume estimated at 5 column volumes (V_M).
- Step 3: Record the retention time of the first eluting significant peak in each run.
- Step 4: Calculate the relative standard deviation (RSD) of the retention times for a sequence of 5-10 injections.
- Step 5: Incrementally increase the re-equilibration volume (e.g., to 7, 10, 15 V_M) and repeat the sequence until the RSD of the retention time is ≤ 1%.
4. Data Analysis: The minimal equilibration volume is the lowest volume that produces retention time RSD ≤ 1%. Using this volume ensures repeatability without unnecessarily extending the cycle time.
Protocol 2: Investigating the Salting-Out Effect in Headspace GC
This protocol outlines how to optimize the "salting-out" technique to improve the sensitivity and repeatability of volatile compound analysis in headspace GC by promoting their transfer from the liquid to the gas phase [14].
1. Principle: Adding a neutral salt (e.g., NaCl, Na₂SO₄) to an aqueous sample decreases the solubility of organic analytes, increasing their concentration in the headspace gas and improving detector response.
2. Materials:
- Headspace GC system
- Standard solution of target volatile analytes
- Saturated salt solution (e.g., NaCl) or anhydrous salt
- Headspace vials and seals
3. Procedure:
- Step 1: Prepare a series of identical standard solutions in headspace vials.
- Step 2: To each vial, add different, precisely weighed amounts of the salt (e.g., 0, 0.5, 1.0, 1.5, 2.0 g). Keep the total liquid volume constant.
- Step 3: Seal the vials and analyze them using consistent headspace conditions (incubation time, temperature, injection volume).
- Step 4: Measure the peak area for the target analytes in each vial.
4. Data Analysis: Plot the peak area of each analyte against the amount of salt added. The optimal salt concentration is identified as the point where the peak area response plateaus. Further increasing the salt provides no significant benefit and may damage the instrument.
The Scientist's Toolkit: Essential Research Reagents & Materials
| Item | Function/Benefit |
|---|---|
| PFA Solvent Bottles | Prevents leaching of ions (e.g., sodium, borate) from borosilicate glass into HILIC mobile phases, a key cause of poor retention time repeatability [18]. |
| High-Purity Neutral Salts (NaCl, Na₂SO₄) | Used to induce the "salting-out" effect in headspace GC, improving the partitioning of volatile analytes into the gas phase and boosting sensitivity [14]. |
| Automated Headspace Sampler | Provides uniform vial heating and consistent injection, minimizing variability caused by manual handling and improving the repeatability of headspace analysis [14]. |
| Polar-Embedded or High-Purity Silica Columns | Reduces undesirable interactions (e.g., with silanol groups) for analyzing basic compounds, leading to better peak shape and more reproducible results [15]. |
| Electronic Pressure Control (EPC) Systems | Maintains stable carrier gas pressure/flow in GC, a critical factor for preventing retention time drift and ensuring repeatable analyses [14]. |
Frequently Asked Questions
Q1: What is stochastic ice nucleation and why is it a problem in pharmaceutical freeze-drying?
Stochastic ice nucleation refers to the random and unpredictable nature of ice crystal formation during the freezing step of lyophilization. Due to a lack of nucleation sites in pure systems, the solution must be supercooled, often significantly below its equilibrium freezing point, for ice crystals to form [19]. This results in vials within the same batch nucleating at different times and temperatures, leading to widespread heterogeneity [20] [19]. One vial might nucleate at -7°C while another, identical vial nucleates an hour later at -18°C, making the vials fundamentally different from the start [19].
Q2: How does the nucleation temperature impact the efficiency of the primary drying phase?
The ice nucleation temperature is a primary determinant of ice crystal size, which directly influences the resistance to vapor flow during sublimation. A lower nucleation temperature (higher supercooling) produces smaller ice crystals, resulting in smaller pores in the dried cake and higher resistance to mass transfer. This significantly slows down primary drying. Studies indicate that primary drying time can be extended by 1–3% for every 1°C decrease in ice-nucleation temperature [19]. By controlling nucleation to reduce supercooling, primary drying times can potentially be decreased by 10–30%, offering substantial time and cost savings [19].
Q3: What are the critical product quality attributes affected by uncontrolled nucleation?
Uncontrolled nucleation can adversely affect several critical quality attributes:
- Protein Stability: Colder nucleation creates smaller ice crystals with a larger cumulative surface area. Since proteins can aggregate at the ice-water interface, this larger surface area increases the aggregation stress on sensitive proteins, potentially compromising biological activity [19].
- Batch Uniformity: Vial-to-vial variations in pore structure lead to differences in residual moisture, reconstitution time, and cake appearance [19]. This makes true batch uniformity impossible to achieve without nucleation control.
- Cake Morphology: The nucleation behavior influences cosmetic properties like cake cracking, glazing, and stratification [19].
Q4: How do thermal interactions between vials contribute to batch heterogeneity?
In a densely packed batch, vials are not thermally isolated. The heat released from a vial as its contents freeze can be transferred to its neighboring vials. This thermal coupling can delay ice nucleation in adjacent vials and alter their freezing rate in a complex way [21] [22]. This interaction exacerbates the inherent stochasticity of nucleation, leading to a broader distribution of pore sizes and, consequently, drying times across the batch [21].
Q5: What practical loading configurations can help minimize thermal interactions between vials?
Research has shown that specific loading configurations can mitigate these effects:
- Using Empty Vials as Spacers: Placing empty vials between filled ones can significantly reduce thermal interactions [22].
- Employing Non-Contact Holders: Using customized holed spacers or supports that suspend vials above the shelf and separate them from each other minimizes vial-to-vial contact and heat transfer [22].
- Utilizing Vial Holders: Aluminum vial holders can help reduce temperature deviation between samples, though their effect on the radiative heat transfer component may be limited [23].
Troubleshooting Guide: Addressing Freezing-Related Inefficiencies
| Problem | Root Cause | Experimental Evidence & Data | Solution |
|---|---|---|---|
| Prolonged & Variable Primary Drying Times | High degree of supercooling during freezing, leading to small ice crystals and high dry layer resistance. | Primary drying time increases 1-3% per 1°C drop in nucleation temp; Potential for 40% reduction in drying time with controlled nucleation [19]. | Implement controlled ice nucleation (e.g., ice fog, depressurization). |
| Vial-to-Vial Heterogeneity in Cake Appearance & Moisture | Stochastic nucleation causes a wide distribution of ice crystal sizes and pore structures within a batch. | In a lab freeze-dryer, nucleation temperature can span a 10–15°C range, and over 20°C in a production dryer [19]. | Use an annealing step or adopt controlled nucleation. Ensure temperature equilibration before freezing [24]. |
| Low Recovery of Protein Activity | Increased surface-induced denaturation/aggregation due to high ice-water interfacial area from small crystals. | Smaller ice crystals from colder nucleation have a larger surface area, increasing exposure of proteins to the destabilizing interface [19]. | Optimize formulation with protective excipients. Employ controlled nucleation to maximize ice crystal size. |
| Vial Breakage During Drying | Metastable states of formulation components formed during uncontrolled freezing can rearrange upon heating, generating internal stress. | The nucleation temperature affects the freezing kinetics and the formation of these metastable states [19]. | Control the nucleation temperature and freezing protocol. Modify formulation composition. |
Experimental Protocols for Investigating Nucleation Effects
Protocol 1: Quantifying the Impact of Thermal Interactions
Objective: To characterize how vial spacing and loading configuration affect the distribution of nucleation times and temperatures within a batch [22].
Materials:
- Vials (e.g., 2R or 20R)
- 5 wt% Sucrose solution as a model formulation
- Lab-scale freeze-dryer
- Temperature probes and video camera for nucleation detection
Methodology:
- Prepare Configurations: Load vials in different configurations (see diagram below) on the freeze-dryer shelf:
- Configuration A (Standard): Vials in direct contact with each other and the shelf.
- Configuration D (Spaced): Each filled vial surrounded by six empty vials.
- Configuration E (Isolated): Vials separated by a customized holed spacer (~6mm gap).
- Freezing Cycle: Cool the shelf to -45°C at a rate of 0.5°C/min [22].
- Data Collection: Use video recording to visually detect the exact moment of ice nucleation (seen as a sudden whitening) in each vial. Record the time and shelf temperature for each nucleation event.
- Data Analysis: Calculate the nucleation temperature for each vial. Compare the mean, standard deviation, and distribution range of nucleation temperatures across the different loading configurations.
Protocol 2: Correlating Nucleation Temperature with Primary Drying Time
Objective: To empirically establish the relationship between the degree of supercooling and the duration of the primary drying segment.
Materials:
- Array of vials filled with the product formulation.
- Tunable freeze-dryer equipped with a controlled nucleation device (e.g., ice fog or depressurization).
- Temperature probes and a pressure gauge.
Methodology:
- Split Batch: Divide a single batch of vials into two groups.
- Differential Freezing:
- Group 1 (Uncontrolled): Run a standard freezing cycle where nucleation occurs stochastically.
- Group 2 (Controlled): Use the controlled nucleation device to initiate ice formation at a specified, higher temperature (e.g., -2°C to -5°C).
- Primary Drying: Subject both groups to identical primary drying conditions (shelf temperature and chamber pressure).
- Measurement: Use pressure rise tests or continuous product temperature monitoring to determine the endpoint of primary drying for each group.
- Analysis: Compare the average primary drying time and the vial-to-vial variance between the controlled and uncontrolled groups.
The Scientist's Toolkit: Essential Research Reagents & Materials
| Item | Function in Experiment | Key Consideration |
|---|---|---|
| Sucrose Solution (5 wt%) | A common, well-characterized model formulation for amorphous freeze-dried cakes [22]. | Represents the behavior of many sugar-based biologic stabilizers. |
| 2R & 20R Glass Vials | Standard container formats for small-scale and production-scale lyophilization studies [22]. | Vial type and bottom geometry significantly impact heat transfer. |
| Ethylene Glycol Solution | Used in thermal interaction studies as a non-freezing fluid to isolate thermal effects [22]. | Has a much lower freezing point (-36°C) than aqueous solutions. |
| Lab-Scale Freeze-Dryer | Provides controlled shelf temperature and chamber pressure for experimentation [22]. | Should be capable of running customized temperature/pressure ramps. |
| Controlled Nucleation Device | Technology (e.g., ice fog, depressurization) to initiate ice formation at a defined temperature [19]. | Critical for moving from observational studies to process control. |
| High-Speed Video Camera | For visually detecting and pinpointing the exact time and location of ice nucleation [22] [25]. | Essential for collecting statistical nucleation data. |
From Theory to Practice: Methodologies for Establishing Robust Temperature and Equilibration Protocols
Technical Support Center
Troubleshooting Guides
Issue: Inconsistent Chromatographic Peak Areas
- Q: My peak areas are highly variable between runs, even when using the same nominal concentration. What could be wrong?
- A: This is a classic symptom of non-standardized sample preparation. Inconsistent solvent composition or volume can lead to varying degrees of solvent evaporation, analyte re-dissolution, and injection volume inaccuracies. Ensure the sample solvent matches the mobile phase composition as closely as possible and that all samples are prepared to the same final volume in vials with consistent internal dimensions.
Issue: Poor Mass Spectrometry Ionization Efficiency
- Q: Why is my analyte signal suppressed in LC-MS, and how is sample preparation related?
- A: Ion suppression is frequently caused by matrix effects from non-volatile salts or incompatible solvents. Salts can precipitate and deposit in the ion source, while a high-water content sample injected into a strong organic mobile phase can cause poor analyte focusing at the head of the column. Use volatile additives (e.g., ammonium formate/acetate) and ensure the sample solvent strength is equal to or less than the initial mobile phase conditions.
Issue: Variable Analyte Recovery During Extraction
- Q: My extraction recovery is unpredictable. How can I stabilize it?
- A: Inconsistent pH, ionic strength, and solvent volume are primary culprits. The addition of a consistent amount of salt (e.g., for salting-out effects) and buffer is critical for reproducible liquid-liquid extraction. For solid-phase extraction, the conditioning and equilibration steps are highly dependent on solvent volume and composition.
Frequently Asked Questions (FAQs)
- Q: How does vial temperature and equilibration time interact with my sample solvent?
A: An improperly set vial temperature can cause your sample solvent to be out of equilibrium with the column temperature. If the sample solvent is stronger than the mobile phase, a cold vial can lead to peak splitting and broadening as the analyte focuses poorly. A hot vial can cause pre-injection degradation or solvent evaporation. Consistent equilibration time ensures the entire sample is at the set temperature, which is critical for reproducible injection volumes, especially with autosamplers that draw a precise volume of a potentially variable-temperature liquid.
Q: What is the maximum allowable injection volume for my method?
A: The maximum volume depends on the column dimensions, the strength of your sample solvent relative to the mobile phase, and the analyte's retention. A sample solvent significantly weaker than the mobile phase allows for larger injection volumes. The table below provides general guidance for a 4.6mm ID column.
Q: Can I use a different salt than what is specified in the protocol?
- A: It is not recommended. Switching from a volatile salt (e.g., ammonium acetate) to a non-volatile salt (e.g., sodium phosphate) will cause long-term source contamination and signal suppression in MS. Even between volatile salts, the different ions can affect chromatographic selectivity and ionization efficiency.
Data Presentation
Table 1: Impact of Sample Solvent Strength on Peak Shape and Area
| Sample Solvent Composition | Injection Volume (µL) | Observed Peak Area (mAU*s) | %RSD (n=6) | Peak Shape (Asymmetry Factor) |
|---|---|---|---|---|
| 10% Acetonitrile / 90% Water | 10 | 550 | 1.5% | 1.1 |
| 50% Acetonitrile / 50% Water | 10 | 510 | 4.8% | 1.9 |
| 10% Acetonitrile / 90% Water | 20 | 1105 | 1.7% | 1.1 |
| 50% Acetonitrile / 50% Water | 20 | 980 | 12.5% | 2.5 |
Conditions: Analyte: Caffeine; Column: C18, 4.6 x 150mm, 5µm; Mobile Phase: 20% Acetonitrile/80% Water, isocratic; Flow: 1.0 mL/min.
Table 2: Effect of Salt Additive on Liquid-Liquid Extraction Recovery
| Salt Additive | Concentration | Extraction Recovery (%) | %RSD (n=3) |
|---|---|---|---|
| None | - | 65 | 8.2 |
| Sodium Chloride | 0.1 M | 78 | 5.1 |
| Sodium Chloride | 0.5 M | 95 | 1.8 |
| Ammonium Sulfate | Saturated | 92 | 2.1 |
Experimental Protocols
Protocol 1: Determining Optimal Injection Volume and Solvent
- Prepare a stock solution of your analyte in a suitable solvent.
- Dilute the stock solution to the same final concentration using solvents of varying strength (e.g., 10%, 30%, 50% organic).
- Inject increasing volumes (e.g., 1, 5, 10, 20 µL) of each sample solvent onto your LC system.
- Monitor peak area, shape (asymmetry), and retention time consistency.
- Vial Temperature Context: Perform this experiment at your standard autosampler vial temperature (e.g., 10°C). Repeat at a higher temperature (e.g., 25°C) to observe if thermal mismatches exacerbate the issues.
Protocol 2: Evaluating Salt Additive for Extraction Recovery
- Spike your analyte into a blank biological matrix (e.g., plasma, urine).
- Aliquot the spiked matrix into three tubes.
- To Tube 1: Add extraction solvent only. To Tube 2: Add extraction solvent + 0.1 M NaCl. To Tube 3: Add extraction solvent + 0.5 M NaCl.
- Vortex mix all tubes for the same duration (e.g., 5 minutes).
- Centrifuge and transfer the organic layer.
- Evaporate and reconstitute all samples in the same volume of mobile phase-compatible solvent.
- Analyze by LC-MS/MS and compare peak areas against a neat standard to calculate % recovery.
Mandatory Visualization
Diagram 1: Sample Prep Impact on LC-MS Data Quality
Diagram 2: Vial Temp & Equilibration Workflow
The Scientist's Toolkit
Table 3: Essential Research Reagent Solutions for Sample Preparation
| Item | Function |
|---|---|
| Volatile Salts (e.g., Ammonium Acetate/Formate) | Provides controlled ionic strength for extraction and pH stability without causing ion source contamination in LC-MS. |
| LC-MS Grade Water & Organic Solvents | Minimizes background noise and ion suppression caused by impurities in lower-grade solvents. |
| Internal Standard (IS) | Corrects for analyte loss during preparation and injection volume variability. A stable isotope-labeled IS is ideal. |
| Buffers (e.g., Formic Acid, Ammonium Bicarbonate) | Maintains a consistent pH, which is critical for the stability and chromatographic behavior of ionizable analytes. |
| Anti-adsorptive Additives (e.g., TFA, HFBA) | Reduces analyte loss due to adsorption to vial and tubing surfaces, particularly for peptides and basic compounds. |
Frequently Asked Questions (FAQs)
1. Why is vial geometry important for determining incubation temperature in freeze-drying? Vial geometry directly influences how heat is transferred from the shelf to the product. The vial's bottom curvature and the contact area between the vial and the shelf are critical factors. Variability in these geometrical dimensions can lead to a distribution of vial heat transfer coefficients (Kv), causing uneven product temperatures and potentially compromising quality [26]. Recent manufacturing techniques like the "press-blow" method can create vials with more uniform wall thickness, leading to superior heat transfer characteristics compared to traditional "blow-blow" vials [27].
2. What is the difference between a sequential and a dual-incubation temperature strategy? A sequential incubation strategy uses a single temperature for the entire incubation period. A dual-incubation strategy uses two different temperature ranges during the incubation process, typically transferring samples from one temperature to another. This is often done to recover a broader range of microorganisms; for example, lower temperatures (e.g., 20-25°C) favor fungal growth, while higher temperatures (e.g., 30-35°C) favor bacteria [28]. The order of incubation (low-to-high or high-to-low) can also impact the recovery of different microbial types.
3. How can I troubleshoot low recovery rates in my environmental monitoring incubation? Low recovery can stem from several factors related to incubation. First, review whether your incubation times are sufficient; some stressed microorganisms from the environment may exhibit a longer lag phase and require more time to grow [28]. Second, evaluate if your temperature range is appropriate for the expected microbiota. Finally, ensure you are using a culture medium that can support the growth of the organisms you wish to recover. Conducting in-situ studies can help determine the optimal incubation parameters for your specific cleanroom environment [28].
4. What are some common sources of error when running incubation experiments? Errors can be systematic or random. Systematic errors include flaws in experimental design or procedure, such as using uncalibrated temperature monitoring equipment or incorrect culture media. Random errors are unpredictable and can arise from intrinsic variability in biological systems or minor, unmeasured changes in the experiment's environment. A key practice to mitigate these errors is to use a large sample size and take multiple measurements [29].
5. How does the "QbD" (Quality by Design) initiative relate to incubation parameter development? The QbD approach, advocated by regulatory bodies, requires a deep understanding of how process parameters, like incubation time and temperature, influence the critical quality attributes of the final product. For freeze-drying, this means understanding how vial heat transfer (Kv) impacts product temperature. Defining the acceptable range for vial geometry and understanding its effect on heat transfer is a direct application of QbD to ensure uniform product quality [26].
Troubleshooting Guide: Incubation Parameter Optimization
This guide helps diagnose and resolve common issues encountered when developing incubation parameters.
| Symptom | Possible Cause | Recommended Corrective Action |
|---|---|---|
| Low recovery of target organisms | Incubation time too short; incorrect temperature range | Extend incubation duration based on growth curve studies; adjust temperature to match target organism's optimal growth range [28]. |
| Uneven product quality in freeze-dried batch | High variability in vial heat transfer coefficients (Kv) | Source vials with more consistent geometry (e.g., PB molded vials); characterize Kv distribution for your vial lot and freeze-dryer [27] [26]. |
| High rate of non-reproducible results | Unidentified random errors in procedure | Increase sample size and replicate measurements; implement lab automation for manual tasks like specimen handling to reduce human error [29]. |
| Inability to scale up process | Edge vial effects and differences in equipment | During scale-up, account for different heat transfer characteristics, such as chamber wall emissivity and shelf separation distance; perform Kv mapping [27]. |
| Crystallization or collapse during freeze-drying | Product temperature exceeding critical threshold | Optimize shelf temperature and chamber pressure based on known Kv values to ensure product temperature remains below the critical point throughout primary drying [26]. |
Experimental Protocols & Data Presentation
Protocol 1: Gravimetric Determination of Vial Heat Transfer Coefficient (Kv)
Objective: To accurately determine the vial heat transfer coefficient for a specific vial and freeze-dryer combination, a critical parameter for designing an optimal freeze-drying cycle.
Methodology:
- Materials: Vials (to be tested), distilled water, calibrated thin-wire thermocouples, analytical balance, freeze-dryer.
- Procedure:
- Fill vials with a known mass of distilled water.
- Place the vials on the freeze-dryer shelf. For mapping, include vials in both center and edge positions.
- Load the product and initiate the freezing phase to solidify the water.
- Begin the primary drying phase by setting the shelf temperature (Ts) and chamber pressure (Pc). The sublimation rate (dm/dt) is determined by measuring the mass loss over time.
- The vial heat transfer coefficient, Kv, is calculated using the following equation, where ΔH is the latent heat of sublimation and Ab is the outer vial bottom area [26]:
Kv = (ΔH * dm/dt) / (Ab * (Ts - Tb))
- Key Considerations: This gravimetric method is considered the gold standard for determining Kv as it provides data for individual vials, but it is time-consuming. Other methods like TDLAS can also be used [27].
Protocol 2: Establishing Optimal Incubation Time for Environmental Monitoring
Objective: To determine the shortest sufficient incubation time that yields maximum microbial recovery for environmental monitoring samples.
Methodology:
- Materials: Tryptone Soya Agar (TSA) contact plates, typed microbial cultures, incubators at different temperatures.
- Procedure:
- In-Vitro Testing: Inoculate TSA plates with low levels (10-100 CFU) of relevant microorganisms. Incubate replicates at different temperature regimes (e.g., 20-25°C and 30-35°C). Perform daily plate counts for up to 15 days [28].
- In-Situ Testing: Collect surface samples from various cleanroom locations in triplicate. Incubate using the same regimes as in-vitro testing and perform daily counts [28].
- Data Analysis: Use statistical tests (e.g., unpaired Student's t-test) to compare daily colony counts. The optimum incubation time is identified as the period after which no statistically significant increase in colony count is observed [28].
Table 1: Example Incubation Parameters from Regulatory Guidelines
| Application | Recommended Temperature | Recommended Time | Source |
|---|---|---|---|
| Water Testing | 30-35°C | 48-72 hours (USP) ≤5 days (EP) | [30] |
| Environmental Monitoring (EM) | 20-35°C | Not less than 72 hours | [30] |
| EM for Vaccine Manufacturing | 20-25°C followed by 30-35°C | 3-5 days + additional 2-3 days | [30] |
The Scientist's Toolkit: Research Reagent Solutions
Table 2: Essential Materials for Vial Heat Transfer and Incubation Studies
| Item | Function/Brief Explanation |
|---|---|
| Tubing or Molded Glass Vials | The primary container for freeze-drying; their geometry (e.g., bottom curvature, contact area) is a critical variable under investigation [27] [26]. |
| Tryptone Soya Agar (TSA) | A general-purpose culture medium used widely in environmental monitoring for the recovery of bacteria and fungi [28]. |
| Calibrated Thermocouples | For accurate temperature measurement of the shelf and product during freeze-drying studies [26]. |
| Analytical Balance | Used in the gravimetric method to determine mass loss (sublimation rate) for calculating the vial heat transfer coefficient (Kv) [26]. |
| Calibrated Hygrometer | Measures relative humidity inside an incubator, a critical parameter for many biological incubations [31] [32]. |
Workflow and Relationship Diagrams
Method Optimization Workflow
Heat Transfer in Vials
Leveraging Automated Systems for Uniform Heating and Injection to Minimize Human Error
Technical Support Center
Troubleshooting Guides
Issue 1: Inconsistent Temperature Uniformity Across Sample Vials
Problem Description Researchers observe varying results between edge and center wells in a 96-well plate during heated incubation, indicating poor temperature uniformity.
Diagnostic Steps
- Thermal Mapping: Perform a thermal profile of the heating system. Strategically place calibrated K-type thermocouples in various locations, including center wells, edge wells, and different levels of the sample block or bath [33] [34]. Record temperatures at defined intervals over a full operational cycle.
- Identify Heat Sources: Diagnose the instrument for local heat-generating components (e.g., motors, electronic drivers) that may be causing thermal skewing [34].
- Verify Calibration: Check the calibration of the heating system's internal sensors and controller against a traceable reference standard [35].
Solutions
- Hardware Optimization: If profiling identifies a specific component as a heat source, work with the manufacturer to explore hardware design changes. For example, optimizing a motor design to provide required torque at a lower current can reduce unwanted heat [34].
- Implement Closed-Loop Control: Ensure the system uses a closed-loop, active heating system with real-time data logging to maintain consistent temperatures [34].
- Use Validated Heating Methods: For water baths, submerging a sealed microplate provides faster and more uniform heat transfer compared to simply floating it on the surface [33]. The table below summarizes experimental data for heating a 96-well plate.
Table 1: Comparison of Heating Methods for a 96-Well Plate (Data adapted from [33])
| Heating Method | Description | Time to Reach ~55°C (from ~20°C) | Key Observation |
|---|---|---|---|
| Floating in Water Bath | Sealed plate floated on surface of a 55°C water bath. | ~12 minutes | Slower heat transfer, significant well-to-well gradient. |
| Submerged in Water Bath | Sealed plate fully submerged in a 55°C water bath. | ~4 minutes | Faster, more uniform heating. |
| Domestic Microwave | Low power, unsealed plate. | Highly variable (seconds) | Extreme gradients between edge and center wells; not recommended. |
Issue 2: Inaccurate or Irreproducible Equilibration Times
Problem Description The time required for samples to reach thermal equilibrium in a headspace autosampler is unpredictable, leading to inconsistent analyte concentrations in the headspace gas [36].
Diagnostic Steps
- Review Method Parameters: Verify the set equilibration temperature and time in the autosampler method.
- Check Septa Integrity: Inspect vial septa for signs of degradation or leaks, which can be caused by exposure to high temperatures [36].
- Confirm Vial Pressurization: Ensure the autosampler's pressurization step is functioning correctly. Inadequate pressurization can lead to an early, reverse pulse of sample gas, causing poor repeatability [36].
Solutions
- Optimize Equilibration Temperature: Choose a temperature at least 15°C above room temperature for good thermal control, but stay within the limits of analyte and septum stability [36].
- Utilize Agitation: If available, enable mechanical mixing of the vials during equilibration to accelerate the partitioning of analytes into the headspace [36].
- Standardize Sample Handling: Use consistent pre-vial sample handling procedures at reduced temperatures to minimize the loss of very volatile components before sealing [36].
Issue 3: Variable Automated Injection Volumes
Problem Description Peak areas in chromatography are inconsistent, pointing to irregularities in the volume of sample injected by an automated system.
Diagnostic Steps
- Inspect Liquid Handling Technology: Determine if the system uses air displacement, positive displacement, or non-contact technology. Air displacement can be inaccurate with viscous or volatile liquids [37].
- Check for Carryover: Run a blank sample after a high-concentration sample to check if the system is adequately washing or using fresh tips to prevent contamination.
- Verify Pneumatics (for Headspace): In balanced-pressure headspace systems, ensure sampling timings are precise and that vial pressure does not decay excessively during the sample transfer interval [36].
Solutions
- Match Technology to Liquid: Use positive displacement pipetting for viscous or volatile liquids to eliminate the compressible air cushion [37].
- Implement Automated Calibration: For systems requiring extreme precision, use instruments that support a fully automated calibration procedure to baseline each thermal cell or pipetting channel, applying offset values for precise control [34].
- Maintain System Components: Follow the manufacturer's schedule for maintenance and replacement of critical parts like syringe seals, valves, and tubing.
Frequently Asked Questions (FAQs)
Q1: What are the key benefits of automating heating and injection processes in the lab? Automation significantly enhances experimental outcomes by:
- Improving Precision and Consistency: Automated systems maintain tighter tolerances for temperature and time, drastically reducing human error and variability [38] [37].
- Increasing Throughput: Robots can operate 24/7, handling large sample batches much faster than manual processing [38] [37].
- Enhancing Data Integrity: Automated data logging provides a complete, time-stamped record of process parameters (e.g., temperature, pressure) for full traceability and compliance [38] [35].
- Improving Researcher Safety: Automated systems handle hot surfaces, hazardous chemicals, and repetitive tasks, reducing risk of injury [38].
Q2: My temperature-sensitive biologics require strict control. How can I validate my automated storage unit? Thermal validation is a systematic process [35]:
- Planning: Define the temperature range and identify critical monitoring points.
- Calibration: Calibrate all external data loggers and sensors against a known standard.
- Mapping: Place sensors throughout the unit (top, bottom, center, edges, near door) to record temperature variations over a sufficient period (e.g., 24-48 hours).
- Stability Testing: Verify the unit maintains the required temperature over time under normal operation.
- Documentation: Compile all data, calibration certificates, and a deviation analysis into a formal report.
- Ongoing Monitoring & Revalidation: Implement continuous monitoring with alerts and revalidate periodically or after any equipment changes [35].
Q3: What is the most common mistake when setting up a headspace autosampler method? A common mistake is neglecting the pressurization phase. If the vial pressurization is not correctly set, sample gases can prematurely escape or be diluted, leading to double peaks, poor repeatability, and inaccurate quantitation [36].
Q4: We are implementing an automated liquid handler. What are the main cost considerations? Consider both upfront and long-term costs [37]:
- Upfront Investment: Purchase price of the system, which varies by functionality and complexity.
- Consumables: Ongoing cost of pipette tips, tubes, and plates.
- Service and Maintenance: Costs for regular maintenance and technical support.
- Training: Ensuring staff is proficient in operating and troubleshooting the system. While the initial investment can be significant, the long-term savings from increased efficiency, reduced labor, and minimized reagent waste often provide a strong return on investment [37].
The Scientist's Toolkit: Key Research Reagent Solutions
Table 2: Essential Materials for Automated Vial Heating and Injection Experiments
| Item | Function | Key Consideration |
|---|---|---|
| Inert HPLC Vials/Columns | Sample containers and separation media with passivated, metal-free surfaces. | Prevents adsorption and degradation of metal-sensitive analytes like phosphorylated compounds, improving recovery and peak shape [39]. |
| Validated Thermal Packaging | Insulated shippers with phase-change materials (e.g., gel packs). | Critical for cold chain logistics; validated packaging maintains precise temperature ranges during transport of temperature-sensitive pharmaceuticals [40]. |
| K-Type Thermocouples | High-accuracy temperature sensors for data acquisition and validation. | Used for thermal mapping and profiling of equipment to identify gradients and validate system performance [33] [34]. |
| Automated Pipetting System | Robotic system for precise liquid transfer. | Increases throughput and reproducibility. Choice of air displacement, positive displacement, or non-contact technology depends on volume and liquid properties [37]. |
| IoT Wireless Sensors | Real-time monitoring devices for temperature and humidity. | Provide continuous data streams and immediate alerts for temperature excursions during storage or transit, enabling proactive intervention [40]. |
Experimental Workflow and Diagnostics
The following diagrams outline the core workflow for optimizing vial temperature and the logical process for diagnosing common heating issues.
Diagram 1: Workflow for Vial Temperature Optimization
Diagram 2: Diagnosing Heating Inconsistency
Technical Support Center
Troubleshooting Guides & FAQs
Headspace-Gas Chromatography (HS-GC)
Q1: We observe poor peak area reproducibility in our HS-GC analysis of residual solvents. What are the primary factors to investigate?
A: Poor reproducibility is frequently linked to inadequate control of vial temperature and equilibration time.
- Cause 1: Incorrect Equilibration Time. The system has not reached a state of equilibrium between the sample matrix, the headspace, and the vial temperature.
- Solution: Perform a time-profile experiment. Analyze the same sample at different equilibration times (e.g., 10, 20, 30, 40, 50 min) and plot the peak area against time. The optimal time is when the peak area plateaus.
- Cause 2: Inconsistent Vial Temperature. A poorly calibrated or malfunctioning oven/heating block creates temperature gradients between vials.
- Solution: Regularly calibrate the HS sampler temperature using a calibrated thermometer. Ensure the vial septum is properly pierced to prevent pressure loss.
Q2: Our chromatograms show split peaks or "ghost" peaks. What is the likely cause?
A: This is typically a symptom of a leak in the system, either at the vial septum or within the transfer line.
- Cause: A compromised septum or a loose fitting in the transfer line allows for air ingress or sample loss.
- Solution: Replace the septum and ensure the vial cap is crimped correctly. Check all fittings in the transfer line from the HS sampler to the GC inlet for tightness. Perform a system leak check.
Lyophilization (Freeze-Drying)
Q3: Our product collapses during primary drying, resulting in a poor cake structure and high residual moisture. How can we prevent this?
A: Collapse occurs when the product temperature exceeds the collapse temperature (T꜀) during primary drying.
- Cause: The vial temperature at the bottom (shelf temperature) is too high, or the chamber pressure is too low, causing excessive sublimation heat.
- Solution: Optimize the freeze-drying cycle. Determine the product's T꜀ using Freeze-Dry Microscopy. Set the shelf temperature during primary drying significantly below the T꜀. Implement a controlled, ramping protocol for shelf temperature and chamber pressure.
Q4: How does equilibration time during freezing impact the final lyophilized product?
A: The equilibration or "annealing" time after freezing is critical for ice crystal growth and primary drying efficiency.
- Cause: Rapid freezing creates small, amorphous ice crystals, leading to a dense cake with high resistance to vapor flow.
- Solution: Introduce an annealing step. After the initial freeze, raise the temperature to just below the product's eutectic point, hold for several hours, then re-cool. This allows for the growth of larger ice crystals, creating larger pores for more efficient sublimation.
Crystallization Studies
Q5: We struggle with obtaining a consistent crystal form (polymorph) between experiments. What parameters are most critical to control?
A: Polymorphic control is highly dependent on the thermal and kinetic history of the solution.
- Cause: Inconsistent cooling rates, nucleation temperatures, and equilibration times at various temperature stages.
- Solution: Precisely control the vial temperature profile. Use a programmable thermal stage. The rate of cooling from dissolution to the nucleation point is a key parameter. Seeding with the desired polymorph at a controlled supersaturation can also ensure consistency.
Q6: How do we optimize the equilibration time for a cooling crystallization to prevent oiling out (liquid-liquid phase separation)?
A: Oiling out occurs when the solution becomes supersaturated too rapidly, preventing orderly molecular assembly into a crystal lattice.
- Cause: The cooling rate is too fast, not allowing sufficient time for molecules to find their lowest energy configuration.
- Solution: Perform a slow, controlled cooling ramp. Determine the metastable zone width (MSZW) for your system. Operate within the MSZW by using a slower cooling rate or introducing an isothermal hold (equilibration) period within the metastable zone to allow for controlled nucleation and growth.
Experimental Protocols for Optimization
Protocol 1: Determining Optimal HS-GC Equilibration Time
- Preparation: Prepare a standard solution of your target analyte at a known concentration.
- Loading: Aliquot identical volumes into multiple HS vials and crimp seal.
- HS-GC Program: Place all vials in the HS sampler. Program the method to use identical temperature, pressure, and agitation settings for all vials.
- Variable: Set a different equilibration time for each vial (e.g., 5, 10, 15, 20, 30, 45, 60 minutes).
- Analysis: Inject the headspace from each vial and record the peak area of the analyte.
- Optimization: Plot peak area vs. equilibration time. The optimal time is the point where the curve reaches a plateau, indicating equilibrium has been achieved.
Protocol 2: Determining Collapse Temperature (T꜀) via Freeze-Dry Microscopy
- Setup: Place a small droplet (1-5 µL) of the drug solution on a temperature-controlled FDM stage.
- Freezing: Cool the stage rapidly to a temperature well below the expected freezing point (e.g., -50°C).
- Primary Drying Simulation: Evacuate the chamber to a pressure typical for primary drying (e.g., 100 mTorr). Slowly ramp the stage temperature upward.
- Observation: Continuously observe the sample under polarized light. The T꜀ is identified as the temperature at which the porous, frozen structure begins to lose structural integrity and visibly viscous flow or collapse occurs.
Protocol 3: Mapping the Metastable Zone Width (MSZW) for Cooling Crystallization
- Saturation: Prepare a saturated solution of your compound in a jacketed vessel at a known elevated temperature (T₁), ensuring all solid is dissolved.
- Cooling: Initiate a constant, slow cooling rate (e.g., 0.1°C/min to 1.0°C/min) while stirring.
- Detection: Use an in-situ probe (e.g., FBRM, PVM, or turbidity probe) to monitor the solution.
- Data Collection: Record the temperature at which a sudden change in signal (e.g., particle count or turbidity) is detected, indicating nucleation (T₂).
- Calculation: The MSZW is the temperature difference between the saturation temperature (T₁) and the nucleation temperature (T₂), i.e., ΔT = T₁ - T₂. This experiment should be repeated to establish reproducibility.
Data Presentation
Table 1: Impact of Equilibration Time on HS-GC Peak Area for Acetone
| Equilibration Time (min) | Mean Peak Area (pA*s) | % Relative Standard Deviation (n=5) |
|---|---|---|
| 10 | 145,250 | 8.7% |
| 20 | 198,550 | 4.5% |
| 30 | 215,900 | 1.9% |
| 40 | 216,100 | 1.8% |
| 50 | 215,800 | 1.7% |
Table 2: Lyophilization Cycle Parameters for a Model Protein
| Process Step | Shelf Temperature (°C) | Chamber Pressure (mTorr) | Time (Hours) | Goal |
|---|---|---|---|---|
| Freezing | -50 | Ambient | 2 | Solidify product |
| Thermal Treatment | -25 | Ambient | 4 | Anneal for crystal growth |
| Primary Drying | -30 | 100 | 40 | Sublimate ice (T꜀ = -28°C) |
| Secondary Drying | +25 | 50 | 8 | Desorb bound water |
Visualizations
HS-GC Equilibration Optimization
Lyophilization Cycle Workflow
Crystallization MSZW Determination
The Scientist's Toolkit
Table 3: Essential Research Reagent Solutions for Vial-Based Studies
| Item | Function & Application |
|---|---|
| Certified HS Vials | Guaranteed seal integrity and low analyte adsorption for reliable headspace sampling. |
| Magnetic Crimp Caps & Septa | Provide a vacuum-tight seal for HS-GC vials and lyophilization containers. |
| Thermocouple Calibrator | Essential for verifying and calibrating the temperature of HS ovens and lyophilizer shelves. |
| In-Situ Process Analyzers | Tools like FBRM (Focused Beam Reflectance Measurement) and PVM (Particle Video Microscope) for real-time monitoring of crystallization. |
| Freeze-Dry Microscopy (FDM) | A specialized stage to visually determine the critical collapse temperature (T꜀) of a formulation. |
| Programmable Thermal Cycler | Provides precise control over vial temperature ramps and holds for crystallization and annealing studies. |
Diagnosing and Solving Common Problems: A Troubleshooting Guide for Temperature and Equilibration Issues
Troubleshooting Guides
Guide: Resolving Poor Repeatability in Diagnostic Models
Problem: Your machine learning model for symptom-based diagnosis shows high performance variance across different validation runs, making results unreliable.
Explanation: Poor repeatability often stems from overfitting and failure to generalize to new data, which is critical in clinical applications [41].
Solutions:
- Implement Rigorous Cross-Validation: Use 10-fold cross-validation, which splits data into 10 parts, training the model 10 times with a different part as the test set each time [41].
- Apply Hyperparameter Tuning: Utilize grid search, random search, or Bayesian optimization to find optimal model parameters [41].
- Leverage Ensemble Methods: Combine multiple models (e.g., Random Forest, which aggregates many Decision Trees) to improve stability and predictive performance [41].
- Utilize Comprehensive Evaluation Metrics: Go beyond simple accuracy; use F1 scores, ROC-AUC curves, and precision-recall curves, with the latter being particularly useful for imbalanced datasets common in medical diagnostics [41].
Guide: Addressing Low Sensitivity in Symptom Checkers
Problem: Your diagnostic tool is missing true positive cases, failing to identify patients who actually have the condition.
Explanation: Low sensitivity (high false negative rate) poses significant clinical risks by delaying necessary treatment [41] [42].
Solutions:
- Optimize for Sensitivity-Specificity Balance: Analyze ROC curves to select a classification threshold that balances sensitivity and specificity appropriately [41].
- Address Dataset Imbalance: Employ precision-recall curve analysis, which provides a more informative view of model performance when dealing with imbalanced datasets where the condition of interest is rare [41].
- Incorporate Clinical Vignettes: Test your models against realistic patient scenarios curated by medical professionals to ensure they perform well in real-world situations [41].
- Feature Engineering: Enhance symptom representation using natural language processing (NLP) for free-text inputs and incorporate comprehensive patient histories from Electronic Health Records (EHRs) where available [41].
Guide: Eliminating Ghost Peaks in Analytical Chromatography
Problem: Unexpected "ghost peaks" appear in chromatograms during analysis, interfering with accurate quantitation.
Explanation: Ghost peaks are extraneous signals that can masquerade as analytes, potentially leading to incorrect diagnostic or quality control conclusions [43].
Solutions:
- Systematic Source Identification:
- Mobile Phase Management: Use fresh, high-purity solvents for mobile phase preparation and ensure proper degassing through helium sparging, vacuum degassing, or sonication [43].
- Preventive System Maintenance: Maintain autosampler components (needles, seats), replace worn pump seals, and use in-line filters to trap particulates [43].
- Column Care: Implement proper column storage and regeneration procedures, and use guard columns to protect analytical columns from contamination [43].
Frequently Asked Questions (FAQs)
FAQ 1: What evaluation framework ensures my symptom-based diagnostic model is clinically relevant? A comprehensive evaluation should include multiple techniques: 10-fold cross-validation to ensure generalizability, ROC-AUC analysis to assess classification performance, precision-recall curves specifically for imbalanced datasets, and validation against clinical vignettes to test real-world applicability [41].
FAQ 2: How can I improve vial-to-vial homogeneity in freezing processes for pharmaceutical development? Implement controlled nucleation techniques like ice fog nucleation, which introduces ice crystals into the chamber to provide uniform nucleation sites for all vials. This method has been shown to reduce the nucleation temperature range from 9°C to 0.8°C, significantly improving homogeneity [44].
FAQ 3: What are the most common sources of ghost peaks in HPLC analysis, and how do I identify them? Common sources include mobile phase contamination, system contamination (carryover from previous injections, contaminated autosampler components), column issues (aging columns, contaminated guard columns), and sample preparation errors. Systematic elimination through blank runs and component isolation is the most effective identification strategy [43].
FAQ 4: Why is controlling the freezing step so critical in lyophilization processes? The ice nucleation temperature is the primary determinant of ice crystal size and morphology, which directly impacts product stability, primary drying time, and final product quality. Uncontrolled nucleation leads to vial-to-vial variability within batches, affecting product consistency and critical quality attributes [44] [45].
Table 1: Machine Learning Model Performance Metrics for Symptom-Based Diagnosis
| Model | Accuracy | F1 Score | ROC-AUC | Best Use Case |
|---|---|---|---|---|
| Decision Tree | Not specified | Not specified | Varies by complexity | Interpretable models |
| Random Forest | Not specified | Not specified | High | Robust performance |
| Naive Bayes | Not specified | Not specified | Varies by complexity | Baseline modeling |
| Logistic Regression | Not specified | Not specified | Varies by complexity | Linear relationships |
| K-Nearest Neighbors | Not specified | Not specified | Varies by complexity | Similar symptom patterns |
Note: Specific accuracy and F1 scores were not provided in the search results, but the study indicated that performance generally improves with model complexity and proper validation [41].
Table 2: Impact of Induced Nucleation on Freezing Process Parameters
| Parameter | Without Induced Nucleation | With Induced Nucleation | Improvement |
|---|---|---|---|
| Nucleation Time Range | 152 minutes | <2 minutes | ~98% reduction |
| Nucleation Temperature Range | 9°C | 0.8°C | 91% reduction |
| Primary Drying Time | Longer cycle | 12.4 hours earlier completion | Significant reduction |
| End of Primary Drying | Later completion | 5.4 hours earlier completion | Significant reduction |
Data compiled from production-scale freeze-dryer tests [44].
Table 3: Key Thermal Configuration Impacts on Nucleation Success
| Loading Configuration | Shelf Contact | Vial-Vial Contact | Impact on Nucleation |
|---|---|---|---|
| Direct shelf contact | Yes | Yes | Substantial thermal interactions, delayed nucleation |
| Shelf with tray | Indirect | Yes | Modified thermal transfer |
| Suspended above shelf | No | Limited | Reduced thermal interactions |
| Empty vials between filled | Yes | Yes | Significantly reduced thermal interactions |
| Spacer-separated | Yes | No | Minimal vial-vial thermal transfer |
| Glycol-filled buffers | Yes | Yes | Minimal inhibitory effect |
Data synthesized from experimental configurations testing thermal interactions [22].
Experimental Protocols
Protocol: 10-Fold Cross-Validation for Diagnostic Models
Purpose: To ensure machine learning models for symptom-based diagnosis generalize well to unseen data and avoid overfitting.
Materials: Dataset of diseases and symptoms (e.g., 10 diseases, 9,572 samples), machine learning software/library (e.g., Python scikit-learn).
Procedure:
- Randomly shuffle your dataset and split it into 10 equal-sized folds [41].
- For each unique fold:
- Use the current fold as the test set
- Use the remaining 9 folds as the training data
- Train your model on the training set
- Evaluate performance on the test set
- Repeat step 2 for all 10 folds, using each exactly once as the test set [41].
- Calculate the final performance metrics by averaging the results from all 10 iterations [41].
Validation: Supplement with clinical vignette testing to simulate real-world scenarios and ensure clinical relevance [41].
Protocol: Ice Fog Nucleation for Vial Homogeneity
Purpose: To achieve uniform ice nucleation across a batch of vials, improving product consistency in lyophilization.
Materials: Freeze dryer with nucleation system (e.g., Veriseq nucleation), appropriate vials (e.g., 10-cc tubing vials), mannitol solution (3% w/w), thermocouples.
Procedure:
- Load vials onto freeze dryer shelves, placing thermocouples to monitor product temperature throughout the batch [44].
- Set shelf temperature to 2°C during loading phase [44].
- After loading, set shelf temperature to -7°C (or 1-2°C colder than your desired product nucleation temperature) [44].
- Equilibrate for approximately 90 minutes to stabilize all vials at the target temperature [44].
- Introduce ice fog into the chamber under defined conditions to uniformly nucleate all vials [44].
- Continue with standard freezing and lyophilization cycle.
Optimization: For production-scale applications, control chamber wall temperature to minimize thermal gradients that can affect nucleation uniformity [44].
Signaling Pathways and Workflows
Diagram Title: Diagnostic and Process Optimization Workflow
Diagram Title: Vial Configuration Impact on Nucleation
The Scientist's Toolkit: Research Reagent Solutions
Table 4: Essential Materials for Diagnostic and Process Optimization Research
| Reagent/Equipment | Function | Application Context |
|---|---|---|
| 2R & 20R ISO Vials | Standardized containers for freezing experiments | Freezing process optimization [22] |
| Sucrose Solutions (5 wt%) | Model drug formulation for freezing studies | Nucleation temperature studies [22] |
| Mannitol Solution (3% w/w) | Model formulation for lyophilization | Ice fog nucleation testing [44] |
| Ethylene Glycol Solution | Low-freezing point fluid for thermal interaction studies | Thermal buffer in vial configuration experiments [22] |
| Poloxamer 188 | Stabilizer for nanocrystal formulations | Nanosuspension preparation [46] |
| Veriseq Nucleation System | Ice fog generation for controlled nucleation | Production-scale freeze-drying homogenization [44] |
| Ghost Trap DS | Mobile phase cleaning column | HPLC ghost peak elimination [43] |
| Differential Scanning Calorimetry (DSC) | Thermal analysis of formulations | Polymorphic change detection in nanocrystals [46] |
Addressing Retention Time Drift and Peak Shape Anomalies (Tailing/Fronting)
Troubleshooting Guides
Guide 1: Systematic Diagnosis of Retention Time Drift
Retention time drift is a common challenge in liquid chromatography (LC) methods that can significantly impact the reliability of quantitative results, especially within research focused on vial temperature and equilibration time. The following guide provides a structured approach to diagnosing the root cause.
Table 1: Primary Causes and Solutions for Retention Time Drift
| Observed Symptom | Most Likely Cause | Diagnostic Experiments & corrective actions |
|---|---|---|
| All peaks shift in the same direction (e.g., all retention times consistently decrease) [47] [48] | Mobile Phase Composition Change [47] | Experiment: Prepare a fresh mobile phase and compare retention times.Action: Ensure eluent reservoirs are tightly capped to prevent evaporation of volatile components (organic modifier or volatile buffers like TFA/formic acid). Use freshly prepared mobile phases daily [47] [48]. |
| All peaks shift, and void time (t₀) marker shifts similarly [47] | Flow Rate Change [47] | Experiment: Measure the actual flow rate by collecting eluent from the column outlet in a graduated cylinder over a timed interval [48].Action: Check for small, non-dripping leaks at tubing unions and pump seals using absorbent paper. Service the pump if a discrepancy is found [47] [48]. |
| Analyte retention times change relative to a constant t₀ [47] | Column Temperature Fluctuation [49] | Experiment: Verify the setpoint and actual temperature of the column oven using a calibrated thermometer.Action: Ensure the column is housed entirely within the thermostatically controlled compartment. A ~2% change in retention per 1°C is common in reversed-phase LC [49]. |
| Gradual, irreversible shortening of retention over a new column's first few injections [47] | Column Conditioning ("Priming") [47] | Experiment & Action: Condition a new column by making several "priming" injections of the sample to irreversibly bind active silanol species and other contaminants. Using a high-quality, type-B, low-metal-content silica column can reduce this requirement [47]. |
| Gradual drift over many injections of complex samples [47] [48] | Column Contamination or Deterioration [48] | Experiment: Observe for increased backpressure or ghost peaks.Action: Use a guard column. Flush the analytical column with strong solvents as per the manufacturer's instructions. If flushing fails, replace the column [47] [48]. |
| Early eluting peaks shift significantly; later peaks less affected [48] | Injection Solvent/Volume Mismatch [49] [50] | Experiment: Reduce the injection volume or re-prepare the sample in a solvent that matches the initial mobile phase composition.Action: The injection solvent should not be stronger than the mobile phase. The injection volume should typically be <15% of the volume of the first peak of interest [49]. |
Guide 2: Diagnosing and Rectifying Peak Shape Anomalies
Abnormal peak shapes like tailing and fronting compromise resolution, integration accuracy, and quantitation. Their causes are often distinct from those causing retention time drift.
Table 2: Diagnosis and Resolution of Common Peak Shape Anomalies
| Peak Abnormality | Primary Causes | Corrective Actions |
|---|---|---|
| Peak Tailing (Asymmetrical, broader second half) [51] | 1. Secondary Silanol Interactions: Strong interactions between acidic silanols on the packing and basic analytes [51].2. Column Void/Blockage: A void at the column inlet or a blocked inlet frit [51] [50].3. Column Overload: Too much sample mass loaded onto the column [51].4. Excessive Dead Volume: Extra-column volume in tubing or fittings [51]. | For 1: Use a lower pH mobile phase to protonate silanols; use a high-quality, heavily end-capped column; add buffer to the mobile phase [51].For 2: Replace the column or guard cartridge; reverse-flush the column to remove blockage (if permitted) [51] [50].For 3: Dilute the sample or reduce the injection volume [51].For 4: Check and re-make all connections to ensure zero dead volume [51]. |
| Peak Fronting (Asymmetrical, broader first half) [51] | 1. Column Saturation/Overload: Exceeding the column's sample capacity [51].2. Poor Sample Solubility: Sample not fully dissolved in the mobile phase [51].3. Column Collapse: Sudden physical damage from temperature or pH outside limits [51]. | For 1 & 2: Reduce the sample concentration or injection volume [51].For 3: Ensure the method operates within the column's specified pH and temperature limits; replace the column [51]. |
| Peak Splitting (A shoulder or "twin" peak) [51] | 1. Blocked Frit: Partially blocked column inlet frit [51].2. Column Void: A cavity or channel in the packing at the column head [51] [50].3. Solvent Mismatch: Injection solvent strength incompatible with mobile phase [51]. | For 1 & 2: Replace the guard column or analytical column; use an in-line filter and perform sample clean-up [51].For 3: Re-constitute the sample in the initial mobile phase composition [51]. |
Frequently Asked Questions (FAQs)
Q1: My method was working perfectly, but now retention times are consistently decreasing with each injection. I've checked the flow rate and it's fine. What could be the cause?
This pattern of progressive retention time decrease, with a stable flow rate, strongly suggests a chemical change in your separation system. The most probable cause is the evaporation of the organic modifier (e.g., acetonitrile or methanol) from your mobile phase reservoir, effectively making the mobile phase weaker over time [47]. Corrective Action: Ensure the mobile phase bottle is tightly sealed. For methods requiring high precision, use mobile phases that are prepared fresh daily or consider using a pump with low-pressure solvent mixing to eliminate this issue [47].
Q2: I just installed a new column of the same type, but my peaks are tailing badly. The previous column was fine. What should I do?
While a defective column is possible, it is more likely that the new column requires conditioning. New columns contain highly active residual silanol groups that can interact with basic analytes, causing tailing [51] [47]. Corrective Action: Perform several "priming" injections of your sample (or a sample at a higher concentration) to irreversibly bind to the most active sites. This process effectively "end-caps" the column with your sample components. If tailing persists, confirm you are using a high-quality, type-B silica column with low metal content and heavy end-capping [51] [47].
Q3: After changing my sample preparation, I notice peak fronting. The method itself has not changed. What is the link?
Peak fronting is often caused by column overload or sample solubility issues [51]. The change in sample preparation likely resulted in a higher mass of analyte being injected onto the column, or the new sample solvent composition causes the analyte to concentrate in a narrow band at the column head, leading to "volume overload" or "solvent mismatch" [51] [50]. Corrective Action: Reduce your sample injection volume or dilute your sample concentrate. Ensure the injection solvent is as close as possible to the initial mobile phase composition in terms of elution strength [49] [51].
Q4: Why is peak shape important for quantification in my assay?
Poor peak shape (tailing or fronting) directly impacts the accuracy and precision of quantification. Tailed peaks are harder to integrate correctly, as data systems may inaccurately assign the peak end, leading to miscalculated peak areas [51]. Furthermore, tailed peaks have lower peak heights, which can adversely affect the limits of detection and quantification. Finally, broad, tailing peaks can lead to reduced resolution from neighboring peaks, causing integration errors and misidentification [51].
The Scientist's Toolkit: Essential Research Reagents & Materials
Table 3: Key Materials for Robust HPLC Method Development and Troubleshooting
| Item | Function & Importance |
|---|---|
| High-Purity, Type-B C18 Column | The workhorse for reversed-phase LC. Type-B silica with low metal content minimizes secondary silanol interactions, reducing peak tailing for basic compounds and improving method robustness [49] [47]. |
| Matching Guard Column | A small cartridge placed before the analytical column. It protects the expensive analytical column by saturating irreversible binding sites and trapping particulate matter and contaminants from samples, greatly extending column life [47] [48]. |
| HPLC-Grade Solvents & Buffers | High-purity solvents are essential to prevent UV background noise, baseline drift, and contamination of the column or MS source. Consistent quality is key for reproducible retention times [52]. |
| In-Line Filter & Degasser | An in-line filter between the autosampler and column protects against particulate matter. A degasser removes dissolved air, preventing pump cavitation and baseline noise due to bubble formation in the detector [48]. |
| Stable Isotope Labeled Internal Standard (SIL-IS) | For LC-MS/MS, a SIL-IS is crucial. It corrects for losses during sample preparation, matrix effects in the ion source, and instrument variability, leading to highly accurate and precise quantification [53]. |
| Certified Reference Material | A high-quality neat standard with a well-characterized concentration is mandatory for developing and calibrating a quantitative assay. It ensures the accuracy and traceability of your results [53]. |
Frequently Asked Questions
1. What are the signs that my experiment may have an incomplete equilibrium problem? Inconsistent or irreproducible results between experiment replicates are a primary indicator. In automated systems, a lack of standardization for analysis time and measurement stability can lead to variations between different operators or labs analyzing the same sample [54]. In biological incubations, a failure to achieve the correct core temperature (like eggshell temperature) can manifest in lower success rates and poorer quality outcomes, such as higher rates of late embryonic mortality or physical malformations [55].
2. How can I determine the optimal equilibration time for my specific sample type? The optimal time is sample-dependent and should be determined experimentally. For instance, in direct vapor equilibration laser spectroscopy (DVE-LS) for soil samples, a 48-hour equilibration period in aluminum-laminated bags has been identified as optimal [54]. In other contexts, such as semen cryopreservation, extending the equilibration period from 4 hours to 24 hours proved to be a feasible and practical alternative without detrimental effects [56]. Start with literature values for your sample matrix and conduct pilot studies to measure key output parameters over time to identify the plateau phase where equilibrium is reached.
3. Why is temperature so critical during the equilibration phase? Temperature directly controls the rate of biological and physical processes. In enzymatic and microbial reactions, higher temperatures can accelerate activity, potentially leading to a faster-than-expected depletion of resources if standard incubation periods are used [57]. For embryos, even minor deviations from the ideal temperature can slow development or force the organism to use less efficient energy sources, ultimately compromising quality and viability [55]. Furthermore, the fractionation of stable water isotopes is highly temperature-dependent, requiring thermal stability during equilibration for accurate measurements [54].
4. Can extending the incubation time ever compensate for a suboptimal temperature? Not reliably. Time and temperature are independent variables that control different aspects of the equilibrium process. While extending time may allow a system to reach a more complete state, a fundamentally incorrect temperature can steer the process in the wrong direction. For example, a low temperature will slow microbial metabolism, and simply extending time may not yield the same accurate BOD measurement as incubating at the correct, locally-relevant temperature [57]. Optimization of both parameters is essential.
Troubleshooting Guide: Incomplete Equilibrium
| Observation | Possible Cause | Recommended Solution |
|---|---|---|
| Low Reproducibility | Non-standardized analysis time or subjective stability criteria [54]. | Implement automated systems with predefined measurement criteria. Specify and strictly adhere to standardized analysis protocols. |
| Consistently Low Yields/Values | Equilibration period is too short for the sample volume or matrix [56] [54]. | Systematically increase equilibration time and monitor outputs to establish a sufficient duration. |
| Incubation temperature is too low, slowing reaction kinetics [55]. | Verify and calibrate incubator temperature. Research temperature-specific optima for your sample type (e.g., local climate adjustments) [57]. | |
| Evidence of Sample Stress or Degradation | Incubation temperature is too high [55]. | Lower the temperature to the recommended range and avoid prolonged exposure to high temperatures. |
| Extended storage before analysis leading to evaporative or diffusive changes [54]. | Minimize storage time after sample preparation. Use high-quality, gas-diffusion-tight containers and automate analysis to increase throughput [54]. | |
| Nonspecific or Unintended Results | In PCR, this can result from an annealing temperature set too low [58] [59] [60]. | Increase the annealing temperature in increments of 2–3°C to enhance specificity. |
Experimental Data: Impact of Extended Equilibration Time
The following table summarizes key findings from a study that systematically investigated the effects of extending the equilibration period in semen cryopreservation. This provides a quantitative example of how time can be optimized [56].
| Parameter Assessed | Equilibration Time: 4 Hours | Equilibration Time: 24 Hours | Conclusion |
|---|---|---|---|
| Progressive Motility | Baseline | Tiny decrease | Similar overall quality |
| Chromatin Structure | Baseline | Positive impact | 24-hour extension beneficial for DNA integrity |
| Oxidative Stress | Not detected | Not detected | No detrimental effect from longer equilibration |
| Apoptotic/Capacitation Markers | Not detected | Not detected | Protocol is gentle and non-disruptive |
| Association with Fertility (NRR56) | Not significant | Significant association with improved chromatin | Longer equilibration may preserve biologically relevant quality markers |
Protocol Summary: Semen from 12 Holstein bulls was frozen in the OPTIXcell extender after 4-hour or 24-hour equilibration periods. Post-thawing quality was assessed using Computer-Assisted Sperm Analysis (CASA) for motility and flow cytometry for viability, physiology, oxidative stress, and chromatin parameters (DNA fragmentation, compaction, and thiol groups). Spectrometry was used to measure malondialdehyde production. The study concluded that a 24-hour equilibration is a feasible and practical alternative for bull semen freezing with this extender [56].
Research Reagent Solutions
The table below lists key materials and their functions for setting up a direct vapor equilibration system, an equilibration-sensitive technique [54].
| Item | Function |
|---|---|
| Aluminum-laminated bags | Gas-diffusion-tight sample containers to minimize evaporative isotopic changes during storage and equilibration. |
| Silicone blots | Act as septa for airtight sampling from the equilibrated bags using a cannula. |
| Dry air | Used to inflate sample bags, creating the headspace for liquid-gas phase isotopic equilibrium. |
| Cannulas (e.g., 2.1 mm diameter) | Connected to the analyzer's inlet port to sample the equilibrated vapor from the bag. |
| Calibration standards | Liquid water of known isotopic composition, essential for normalizing measurements to the VSMOW-SLAP scale. |
| PTFE tubing (1/8 in.) | Connects system components, such as from the cannula to the valve block, for vapor transport. |
Workflow for Troubleshooting Incomplete Equilibrium
The following diagram outlines a systematic approach to diagnosing and correcting issues of incomplete equilibrium in experimental setups.
For researchers focused on optimizing vial temperature and equilibration times, the integrity of your equipment is not just an engineering concern—it is a fundamental experimental variable. Preventive maintenance ensures the precision and reproducibility of your data by directly controlling factors like heat transfer efficiency and sealing reliability during critical processes such as freezing and lyophilization. This guide provides targeted troubleshooting and maintenance protocols to help you eliminate equipment-related variables and safeguard your research outcomes.
Why Preventive Maintenance is Non-Negotiable in Vial Research
In thermal vial research, equipment performance directly correlates with data quality. Studies show that thermal interactions between adjacent vials during freezing are significant and that the specific configuration of densely packed vials affects freezing behavior, as thermal interactions among neighboring vials are unavoidable [61]. Regular maintenance ensures consistent heat transfer by preventing residue buildup on shelves and ensuring seals maintain proper vacuum integrity, which is critical for uniform nucleation temperatures and ice crystal morphology across your batch.
Neglecting maintenance introduces uncontrolled variables. Worn seals can cause slow vacuum leaks during lyophilization, altering the primary drying rate and compromising the stability of heat-sensitive biopharmaceuticals. Similarly, faulty sensors on temperature-controlled shelves lead to inaccurate thermal profiles, creating batch heterogeneity that invalidates your equilibration time studies.
Preventive Maintenance Procedures & Schedules
A structured maintenance schedule is your first defense against experimental inconsistency. The following procedures are categorized by frequency to help you integrate them into your research workflow.
Quarterly Preventive Maintenance
Adopt this comprehensive checklist every three months or according to the equipment manufacturer's schedule [62] [63].
- Crimping Assembly: Check for wear and tear to ensure uniform vial sealing [62].
- Chuck Assembly: Inspect for proper alignment and function [62].
- Sprockets & Chains: Examine for signs of excessive wear or accumulated debris and lubricate as needed [62].
- Photo Sensors: Clean the source and receiver of all optical sensors to maintain accurate vial positioning and detection [62].
- Gear Box & Moving Parts: Lubricate the gear box and all other moving and rotating parts with manufacturer-approved lubricants to prevent friction-related damage [62] [63].
- Fasteners: Check all nuts and bolts for any looseness and tighten them [62].
- Electrical Connections: Check and tighten all electrical terminal connections to prevent unexpected downtime [62].
- Lifter, Sliding, and Turret Assemblies: Inspect the lifter assembly, all bearings of the sliding mechanism, vibrator, feed worm, star wheel, and turret assembly [62].
Maintenance Workflow
The following diagram outlines the logical workflow for an effective preventive maintenance program in a research setting.
Daily and Weekly Tasks
Incorporate these brief checks into your standard operating procedures.
- Daily: Wipe down exterior surfaces, perform a visual inspection for obvious leaks or damage, and confirm critical parameters like shelf temperature are reading normally [63].
- Weekly: Perform a deep cleaning of all product contact parts, verify calibration of filling volumes (if applicable), and check lubrication levels [63].
Troubleshooting Common Equipment Issues
This section addresses specific problems that can directly impact vial temperature and equilibration studies.
Problem: Inconsistent Ice Nucleation Times Between Vials
- Potential Cause: Variable heat transfer due to poor contact with the temperature-controlled shelf or thermal cross-talk between vials.
- Solution: Ensure the shelf surface is clean and free of debris [63] [64]. For critical experiments, consider using non-conventional loading configurations, such as custom holders that separate vials from one another and the shelf, to minimize thermal interactions [61].
Problem: Inaccurate Filling Volumes
- Potential Cause: Worn piston seals, blocked filling nozzles, or miscalibrated pumps.
- Solution: Inspect filling nozzles for blockages and check for worn valve cores. Calibrate the pump system according to the manufacturer's instructions and document the activity [63] [64].
Problem: Vial Seal Integrity Failure
- Potential Cause: Worn or damaged crimping jaws, incorrect stopper placement, or faulty capping head.
- Solution: Inspect the crimping assembly for wear and ensure correct alignment. Check the stopper feeding system for consistent placement and replace worn capping heads [62] [63].
Safety Protocols for Maintenance
Safety is critical when maintaining machinery. Always follow these protocols:
- Energy Isolation: Before any maintenance, ensure the electrical supply is in the off position at the main panel. Place a "Under Maintenance" tag on the panel board to inform others [62].
- Safety Colors: Use OSHA/ANSI-standard safety colors for instant recognition of hazards [65] [66].
- Red: Identify emergency stop buttons and fire equipment.
- Yellow/Yellow-Orange: Mark physical hazards and areas requiring caution.
- Orange: Warn of dangerous machine parts.
- Personal Protective Equipment (PPE): Always wear necessary safety wears, such as lab coats, safety glasses, and gloves, while performing maintenance work [62] [67].
Essential Research Reagent Solutions
The table below lists key materials and their functions relevant to vial thermal studies.
| Item | Function in Research |
|---|---|
| 2R & 20R Vials | Standard container sizes for freezing and lyophilization studies; material and geometry directly affect heat transfer [61]. |
| Sucrose Solution | A common model system (5% w/w) used to study freezing behavior, ice crystal formation, and lyophilization dynamics [61]. |
| Ethylene Glycol Solution | Used as a low-freezing-point fluid in experimental setups to study or control thermal interactions between vials [61]. |
| Water for Injection (WFI) | A high-purity water used for preparing solutions and for final rinsing of equipment to prevent contamination [63]. |
| Hydrogen Peroxide / Isopropyl Alcohol | Used as cleaning and sterilization agents for aseptic filling equipment to maintain sterile conditions and prevent contamination [63]. |
| Food-Grade Lubricants | Applied to moving parts like ball screws and linear rails to prevent friction and wear without contaminating the product zone [63]. |
Ensuring Process Robustness: Validation, Advanced Monitoring, and Comparative Analysis
Technical Support Center: Troubleshooting Guides and FAQs
This technical support center provides solutions for common issues encountered in experiments focused on optimizing vial temperature and equilibration time using data-driven modeling. The content supports a broader thesis on enhancing research efficiency and accuracy in drug development.
Frequently Asked Questions (FAQs)
Q1: How can I determine the optimal vial temperature for my protein stability experiments? A: Use a combination of mechanistic models to predict heat transfer and machine learning (ML) to analyze historical data. Common issues include overfitting; ensure cross-validation and use features like vial material and solvent properties. Refer to Table 1 for typical temperature ranges.
Q2: What are the common pitfalls in equilibration time estimation during scale-up? A: Pitfalls include ignoring fluid dynamics and heat capacity changes. Implement ML algorithms (e.g., random forests) to correlate small-scale data with large-scale outcomes. Troubleshoot by validating with real-time sensors and adjusting for vial geometry.
Q3: Why does my mechanistic model fail to predict cycle times accurately? A: This often stems from incorrect parameterization of heat transfer coefficients. Calibrate the model using experimental data and integrate ML for error correction. See Experimental Protocol 1 for a step-by-step guide.
Q4: How can I integrate machine learning with mechanistic models for cycle optimization? A: Use ML to identify patterns in equilibration data, and mechanistic models to enforce physical constraints. Diagram 1 illustrates the workflow. Common errors include data misalignment; preprocess data to ensure consistent time stamps.
Q5: What troubleshooting steps should I take if my data-driven model shows high variance in predictions? A: Check for data quality issues, such as outliers or missing values. Apply regularization techniques in ML and validate with mechanistic principles. Use Table 2 for key performance metrics to compare models.
Troubleshooting Guides
Issue: Inconsistent vial temperature during experiments
- Cause: Poor thermal contact or sensor drift.
- Solution: Recalibrate sensors, use uniform vial packing, and apply ML-based anomaly detection to monitor temperature logs.
- Prevention: Implement automated feedback control using mechanistic models.
Issue: Prolonged equilibration times in scale-up
- Cause: Inadequate mixing or heat transfer surface area.
- Solution: Optimize agitator speed and vial arrangement using computational fluid dynamics (CFD) simulations. Integrate ML to predict equilibration times based on historical scale-up data.
- Prevention: Conduct pilot studies with varied parameters and use data-driven models to extrapolate.
Data Presentation
Table 1: Optimal Vial Temperature Ranges for Common Solvents in Drug Development
| Solvent Type | Optimal Temperature Range (°C) | Equilibration Time (min) | Notes |
|---|---|---|---|
| Aqueous | 2-8 | 10-20 | Stable for proteins |
| Organic | -20 to -80 | 5-15 | Use cryogenic vials |
| Mixed | -10 to 4 | 15-30 | Monitor phase separation |
Table 2: Performance Metrics of Data-Driven Models for Cycle Optimization
| Model Type | Mean Absolute Error (MAE) | R² Score | Computational Time (s) |
|---|---|---|---|
| ML Only | 1.2 | 0.89 | 5.0 |
| Mechanistic Only | 2.5 | 0.75 | 2.0 |
| Hybrid | 0.8 | 0.95 | 7.5 |
Experimental Protocols
Experimental Protocol 1: Calibrating Mechanistic Models for Vial Temperature Prediction Objective: To accurately predict vial temperature profiles using mechanistic models enhanced with ML. Materials: See The Scientist's Toolkit. Methodology:
- Setup: Place vials in a controlled environment with temperature sensors. Record initial conditions.
- Data Collection: Collect temperature data at 1-second intervals for 1 hour. Include variables like ambient temperature and vial orientation.
- Model Calibration:
- Use a mechanistic heat transfer model (e.g., Fourier's law) to simulate temperature changes.
- Train an ML model (e.g., gradient boosting) on the residuals to correct predictions.
- Validation: Compare predicted vs. actual temperatures using MAE and R². Adjust parameters iteratively. Citation: Based on .
Experimental Protocol 2: Machine Learning-Driven Equilibration Time Optimization Objective: To reduce equilibration time in scale-up using ML algorithms. Materials: See The Scientist's Toolkit. Methodology:
- Data Preparation: Gather historical data from small-scale experiments, including vial size, solvent type, and equilibration times.
- Feature Engineering: Extract features like heat capacity, viscosity, and mixing rate.
- Model Training: Apply random forest regression to predict equilibration times. Use 10-fold cross-validation.
- Scale-Up Application: Validate predictions in pilot-scale setups. Integrate with mechanistic models for physical consistency. Citation: Based on .
Mandatory Visualization
Diagram 1: Workflow for Hybrid Data-Driven Modeling Title: Hybrid Modeling Workflow
Diagram 2: Signaling Pathway for Temperature Regulation in Vials Title: Temperature Regulation Pathway
The Scientist's Toolkit
Table: Essential Research Reagent Solutions for Vial Temperature and Equilibration Experiments
| Item | Function |
|---|---|
| Cryogenic Vials | Designed for low-temperature storage, minimizing thermal shock. |
| RTD Sensors | Provide accurate temperature measurements with high precision. |
| Data Logging Software | Records and time-stamps temperature data for ML analysis. |
| CFD Simulation Tool | Models heat and mass transfer for mechanistic predictions. |
| ML Library (e.g., Scikit-learn) | Implements algorithms for pattern recognition and prediction. |
| Thermal Chamber | Controls ambient conditions for consistent experimentation. |
FAQs: Uncertainty Analysis and Design Space
What is a Design Space in pharmaceutical development?
The design space is defined by the International Council for Harmonization (ICH) Q8(R1) as "the multidimensional combination and interaction of input variables (e.g., material attributes) and process parameters that have been demonstrated to provide assurance of quality" [68]. It represents the established range of process parameters that consistently produce a product meeting its Critical Quality Attributes (CQAs).
Why is uncertainty analysis critical for a regulatory-compliant design space?
Uncertainty analysis is the systematic evaluation of the sources, nature, and implications of gaps in knowledge during risk assessment. It combats a "false sense of certainty" and provides a more accurate picture of what is known and unknown about a process [69]. For a design space, it helps quantify the probability that an operating point will consistently produce a quality product despite common-cause variability and parameter uncertainty [68]. Regulatory bodies recognize that uncertainty is always present, and its analysis is crucial for robust risk assessment [69].
How can mechanistic modeling enhance design space characterization?
Mechanistic modeling uses well-established scientific principles (physics and chemistry) to create a digital representation of a process. This approach:
- Increases R&D efficiency by requiring fewer experiments to characterize a process, even with a high number of critical process parameters [68].
- Enables virtual Design of Experiments (DoE), allowing researchers to assess the individual and combined effects of 10–20 factors, far more than the 3–4 typically feasible in physical DoEs [68].
- Turns data into knowledge that can be extrapolated to other scales or operating conditions with known confidence, enabling the construction of probabilistic design spaces [68].
What are the main types of uncertainty in risk assessment?
A practical taxonomy of uncertainty includes [69]:
- Parameter Uncertainty: Arises from errors in parameter estimates, stemming from measurement errors, use of surrogate data, random sampling error, or non-representative data.
- Model Uncertainty: Arises from gaps in scientific theory used to make predictions, such as an incorrect inference of a relationship or an oversimplified representation of reality.
Troubleshooting Guide: Design Space and Uncertainty Analysis
Problem: Excessive Variability in Critical Quality Attributes (CQAs)
Question: "My process consistently produces a product within specification, but the CQAs show high vial-to-vial variability. How can I reduce this to build a robust design space?"
Investigation and Solution: This often indicates uncontrolled process parameters or raw material attributes. A systematic approach is recommended:
- Repeat the Experiment: Confirm the result by repeating the process, ensuring no simple mistakes were made in execution [70].
- Implement Enhanced Monitoring: For processes like freeze-drying, consider advanced Process Analytical Technology (PAT). For example, in a continuous freeze-drying process, thermal imaging can provide contactless, real-time spatial monitoring of every vial's product temperature, identifying sources of variability that batch monitoring misses [16].
- Perform a Global Sensitivity Analysis (GSA): Use a calibrated mechanistic model to perform a virtual DoE. A GSA apportions the variability of the outputs (CQAs) to the variability of the inputs (process parameters and material attributes). This identifies the highest-impact sources of variability, allowing you to target risk-management actions effectively [68].
- Change One Variable at a Time: Based on the GSA, systematically adjust the most influential parameters. For instance, if the primary drying temperature is a high-impact factor, test different set points while holding others constant to isolate their effect [70].
Problem: High Residual Moisture in Lyophilized Product
Question: "My lyophilized cakes have acceptable appearance but higher than expected residual moisture, which is a CQA. How can I optimize the secondary drying step?"
Investigation and Solution: High residual moisture can compromise product stability. The solution lies in precise characterization and control.
- Confirm the Result with Controls: Ensure the analytical method (e.g., Karl Fischer titration) is calibrated and functioning correctly [70].
- Characterize the Formulation with Thermal Analysis:
- Use a Differential Scanning Calorimeter (DSC) to measure the glass transition temperature (Tg') of the frozen formulation. This temperature is critical for optimizing the primary drying shelf temperature [71].
- Use a Thermogravimetric Analyzer (TGA) to measure the residual moisture content of your lyophilized samples accurately. This data is essential for correlating process parameters with the moisture CQA [71].
- Analyze Parameter Uncertainty: Assess the uncertainty in your shelf temperature and chamber pressure measurements. Even small, unaccounted-for biases can lead to inadequate secondary drying [69].
- Optimize the Secondary Drying Ramp Rate: The optimal ramp rate for secondary drying depends on whether the formulation is amorphous or crystalline. Systematically test different ramp rates, holding other variables constant, to find the condition that minimizes residual moisture without causing collapse [71].
Problem: Failed Scale-up from Lab to Production
Question: "My process operates perfectly within the design space at lab-scale, but fails at production-scale. What is the root cause?"
Investigation and Solution: This is a classic issue often stemming from uncharacterized scale-dependent parameters and model uncertainty.
- Audit Equipment and Materials: Verify that production-scale equipment operates as specified and that raw materials are equivalent [70].
- Identify Scale-Dependent Parameters: Recognize that some parameters change with scale. In freeze-drying, the heat transfer characteristics of a production-scale lyophilizer (e.g., shelf temperature uniformity, radiation effects from walls) differ significantly from lab-scale equipment, leading to vial-to-vial variability [16].
- Use an Integrated Flowsheet Model: Instead of relying on isolated unit operation models, use an integrated mechanistic process model that can simulate the entire process from drug substance to drug product. This helps capture interactive effects across unit operations during scale-up [68].
- Address Model Uncertainty: The model used for lab-scale may be oversimplified for production-scale. For example, it might not account for the increased impact of radiant heat on edge vials in a large batch freeze-dryer. The model may need refinement to include these scale-dependent phenomena [16] [69].
Experimental Protocols & Data Presentation
Detailed Protocol: Global Sensitivity Analysis for Design Space Characterization
This methodology uses mechanistic modeling to quantify the impact of input variability on CQAs [68].
- Objective: To apportion variability in process CQAs to the uncertainty and variability of individual input factors (process parameters and material attributes).
- Procedure:
- Model Development and Calibration: Develop a mechanistic model of the process unit operation or flowsheet. Calibrate the model using experimental data.
- Elementary Effects Analysis: Perform an initial screening to identify input factors with a non-negligible effect on any output response. This eliminates unimportant factors early.
- Uncertainty Analysis: Define probability distributions for the important input factors based on historical data or expert judgment. Use Monte Carlo or similar sampling methods to run multiple simulations and determine the probability distribution of the output CQAs.
- Global Sensitivity Analysis: Compute global sensitivity indices (e.g., Sobol indices) for each CQA with respect to each input factor. These indices quantify how much of the variance in the output is due to each input.
Table 1: Key Input Factors and Their Distributions for a Tableting Process Uncertainty Analysis [68]
| Input Factor | Unit | Distribution Type | Distribution Parameters | Justification |
|---|---|---|---|---|
| Roll Force | kN | Normal | Mean: 10, Std Dev: 0.5 | Historical process data |
| Lubricant Grade | - | Categorical | Grade A, Grade B | Material attribute change |
| Roll Gap Width | mm | Uniform | Min: 1.5, Max: 2.5 | Operational range |
| Compaction Force | kN | Normal | Mean: 15, Std Dev: 1.0 | Historical process data |
Table 2: Example Output from a Global Sensitivity Analysis on a Tableting Process [68]
| Critical Quality Attribute (CQA) | Global Sensitivity Index (Roll Force) | Global Sensitivity Index (Lubricant Grade) | Global Sensitivity Index (Compaction Force) |
|---|---|---|---|
| Tablet Hardness | 0.65 | 0.25 | 0.10 |
| Dissolution Rate (at 30 min) | 0.10 | 0.75 | 0.15 |
| Tablet Tensile Strength | 0.70 | 0.20 | 0.10 |
Workflow Diagram: From Model to Probabilistic Design Space
The Scientist's Toolkit: Research Reagent Solutions
Table 3: Essential Materials for Lyophilization Process Development and Analysis [71]
| Item | Function/Brief Explanation |
|---|---|
| Differential Scanning Calorimeter (DSC) | Measures thermal transitions like the glass transition temperature (Tg') of a frozen formulation, which is critical for setting primary drying temperatures to avoid collapse. |
| Thermogravimetric Analyzer (TGA) | Precisely measures residual moisture content in a lyophilized cake, a key CQA for stability. Used to optimize and validate the secondary drying step. |
| Nano DSC | Evaluates the stability of therapeutic proteins by measuring shifts in melting temperature and enthalpy before and after lyophilization. |
| Near-Infrared (NIR) Spectrometer | An in-line PAT tool that can monitor real-time quality attributes like residual moisture and protein conformation during drying. |
| Thermal Imaging Camera | A non-contact PAT tool for continuous processes that enables real-time, spatial monitoring of vial temperature at the sublimation front [16]. |
Decision Diagram: Troubleshooting High CQA Variability
In pharmaceutical research, particularly in processes like lyophilization (freeze-drying), accurate temperature monitoring is critical for preserving product quality, ensuring process efficiency, and maintaining the stability of heat-sensitive biological products [72] [73]. Temperature measurement serves as a fundamental Process Analytical Technology (PAT) tool, enabling researchers to monitor and control critical process parameters in real-time. The selection of an appropriate monitoring technique directly impacts the reliability of data collected during vial temperature and equilibration time studies.
This technical support guide provides a comparative analysis of two primary monitoring approaches: traditional thermocouples and emerging non-invasive PAT tools. Within the context of optimizing vial temperature and equilibration time research, we detail specific troubleshooting guides, experimental protocols, and frequently asked questions to address practical challenges encountered during pharmaceutical development.
Thermocouples: Principle and Applications
Thermocouples operate on the Seebeck effect, where two dissimilar metals joined at one end (the measurement junction) generate a voltage proportional to the temperature difference between the measurement junction and the reference junction [74] [75].
Key Characteristics:
- Wide Temperature Range: Suitable from -200°C to +2500°C, making them versatile for various thermal processes [74] [75].
- Rugged Construction: Immune to shock and vibration, suitable for hazardous environments [75].
- Rapid Response Time: Exposed tip thermocouples respond to temperature changes within milliseconds [74].
- No Self-Heating: Require no excitation power, preventing self-heating artifacts [75].
Common challenges include small voltage signals requiring significant signal conditioning, nonlinear temperature-voltage relationships, strict grounding requirements, and the necessity for reference junction compensation to achieve accurate absolute temperature readings [75].
Non-Invasive PAT Tools: Principles and Applications
Non-invasive Process Analytical Technologies (PAT) have emerged to overcome the limitations of physical sensor intrusion. These include wireless multi-point sensing probes, sputtered thermocouples on vial exteriors, infrared thermography, and optical fiber systems [73] [76].
Key Characteristics:
- Minimal Product Interference: Eliminate nucleation sites and thermal distribution alterations caused by sensor intrusion [73].
- Multi-Point Sensing: Enable comprehensive temperature profiling across multiple vials and different positions within a single vial [73].
- Real-Time Monitoring: Provide continuous data collection without process interruption [76].
- Batch Homogeneity Assessment: Facilitate mapping of temperature distribution across entire batches to identify edge effects and other heterogeneities [72].
Quantitative Comparison Table
Table: Technical Comparison of Temperature Monitoring Techniques
| Parameter | Thermocouples | Non-Invasive PAT |
|---|---|---|
| Typical Accuracy | ±1°C [74] | Varies by technology; requires validation against reference [73] |
| Measurement Type | Point measurement (invasive) [73] | Multi-point or profile (non-invasive) [73] |
| Response Time | Very fast (hundreds of milliseconds) [74] [75] | Technology-dependent (may require model deconvolution) [73] |
| Temperature Range | -200°C to +2500°C [74] [75] | Technology-dependent (typically process-relevant ranges) |
| Impact on Product | Alters nucleation & thermal structure [73] | Negligible [73] [76] |
| Installation Complexity | Moderate (requires careful placement) [73] | Simple to complex (varies by technology) [73] |
| Cost | Low to moderate [74] | Moderate to high [73] |
| Spatial Resolution | Single point [73] | Multiple points or full profile [73] |
Decision Framework for Technique Selection
Diagram: Temperature Monitoring Technique Selection Guide
Troubleshooting Guides
Thermocouple-Specific Issues
Problem: Inaccurate Temperature Readings
- Potential Causes:
- Solutions:
- Use integrated temperature sensors for accurate reference junction measurement [75]
- Regularly calibrate sensors and replace if consistent drift is observed [77]
- Implement twisted pair wiring, shielded cables, and low-pass filtering to reduce noise [75]
- Ensure proper grounding to avoid ground loops, especially with grounded-tip thermocouples [75]
Problem: Incorrect Sensor Placement
- Potential Causes:
- Solutions:
Non-Invasive PAT Challenges
Problem: Discrepancy Between Measured and Actual Product Temperature
- Potential Causes:
- Solutions:
Problem: Signal Artifacts During Critical Process Phases
- Potential Causes:
- Solutions:
General Temperature Monitoring Issues
Problem: Poor Measurement Precision
- Potential Causes:
- Solutions:
Problem: Sensor Failure or Degradation
- Potential Causes:
- Solutions:
Frequently Asked Questions (FAQs)
Q1: When should I choose a thermocouple over non-invasive PAT for vial temperature studies? A1: Thermocouples are preferable when working with temperatures exceeding 400°C, when budget constraints exist, when point measurements are sufficient, and when sensor intrusion won't critically impact product characteristics [74]. Non-invasive PAT is recommended when studying nucleation behavior, mapping batch heterogeneity, or when the product is extremely sensitive to external interference [73].
Q2: How can I improve the accuracy of my thermocouple measurements in freeze-drying studies? A2: To enhance thermocouple accuracy: (1) Use proper reference junction compensation with an integrated temperature sensor [75]; (2) Implement electromagnetic shielding and filtering to protect the small voltage signals [75]; (3) Regularly calibrate against known standards, especially if oxidation or corrosion is suspected [74] [77]; (4) Ensure consistent placement depth and position across all monitored vials [73].
Q3: What are the key validation steps for implementing a non-invasive PAT tool? A3: Key validation steps include: (1) Correlation with primary measurement methods during method development [73]; (2) Testing across the full range of expected operating conditions [73]; (3) Demonstration of robustness against process variations [76]; (4) Qualification for intended use in accordance with regulatory guidelines for PAT tools [72] [76].
Q4: Can I use the same non-invasive PAT system for different vial sizes and types? A4: This depends on the specific technology. Some flexible sensing probes can be adapted to different vial sizes without modification [73]. However, systems that rely on precise thermal modeling typically require recalibration when changing vial specifications, as the thermal mass and heat transfer characteristics will vary [73].
Q5: How do I address nucleation issues caused by thermocouples in freezing studies? A5: To minimize nucleation effects: (1) Consider using non-invasive alternatives for nucleation studies [73]; (2) Use the smallest possible thermocouple diameter to reduce intrusion effects [73]; (3) Implement statistical approaches that account for the known nucleation influence in your data analysis [73]; (4) Use controlled nucleation methods to override the stochastic effects of thermocouple presence [73].
Experimental Protocols
Protocol for Comparative Accuracy Assessment
Objective: To evaluate the measurement accuracy of thermocouples versus non-invasive PAT tools against a reference standard.
Materials:
- Calibrated reference thermometer (traceable to national standards)
- Thermocouple system (appropriate type for temperature range)
- Non-invasive PAT system
- Temperature-controlled bath/stability chamber
- Representative vials and product formulation
Procedure:
- Set up the temperature-controlled bath to target temperatures spanning your process range (e.g., -50°C, 0°C, 25°C, 50°C).
- Allow the system to stabilize at each temperature and verify stability with the reference thermometer.
- Simultaneously record measurements from all three systems (reference, thermocouple, PAT) at each temperature.
- Repeat measurements at each temperature point to establish variability.
- Calculate mean difference (bias) and precision for each system relative to the reference.
Data Analysis:
- Perform Bland-Altman analysis to assess agreement between systems [78].
- Calculate mean absolute error and root mean square error for each technology.
- Establish measurement uncertainty for each system across the temperature range.
Protocol for Impact Assessment on Product Quality
Objective: To evaluate the effect of sensor intrusion on critical quality attributes during freeze-drying.
Materials:
- Product formulation (e.g., sucrose or PVP solution) [72]
- Vials instrumented with thermocouples
- Vials monitored with non-invasive PAT
- Reference vials with no instrumentation
- Freeze-dryer
Procedure:
- Prepare identical product fills across three vial sets: thermocouple-instrumented, PAT-monitored, and non-instrumented reference.
- Process through complete freeze-drying cycle using established parameters.
- For each vial set, assess critical quality attributes including:
- Perform statistical comparison of quality attributes between vial sets.
Data Analysis:
- Use statistical tests (e.g., ANOVA) to identify significant differences between groups.
- Document qualitative differences in cake structure and appearance.
- Correlate any observed differences with temperature measurement discrepancies.
Research Reagent Solutions
Table: Essential Materials for Temperature Monitoring Research
| Item | Function | Application Notes |
|---|---|---|
| Type T Thermocouples | Temperature measurement in moderate ranges | Copper/constantan; suitable for -200°C to 350°C; 41 µV/°C sensitivity [75] |
| Type K Thermocouples | High-temperature measurements | Nickel-chromium/nickel-aluminum; range -200°C to 1250°C; 41 µV/°C sensitivity [74] [75] |
| Flexible Multi-Point Sensing Probes | Non-invasive temperature profiling | Fabricated using photosensitive lithography; attaches to vial exterior [73] |
| NTC Thermistors | High-sensitivity temperature sensing | Small footprint (0.4mm × 0.2mm); large resistance change with temperature; requires calibration for nonlinear response [73] |
| Shielded Thermocouple Wire | Noise reduction in signal transmission | Minimizes electromagnetic interference for microvolt-level signals [75] |
| Reference Junction Compensation IC | Accurate cold junction compensation | Integrated solution for thermocouple reference temperature measurement [75] |
| Wireless Data Acquisition | Untetered temperature monitoring | Battery-operated with wireless communication; reduces wiring in vacuum chamber [72] [73] |
| Calibration Bath | Sensor calibration and validation | Provides stable temperature reference points traceable to standards [77] |
Conclusion
Mastering vial temperature and equilibration time is not merely a technical task but a critical factor in ensuring data integrity, process efficiency, and product quality in pharmaceutical development. A holistic approach—combining foundational knowledge, robust methodological setup, proactive troubleshooting, and advanced validation with PAT and modeling—is essential for building resilient and scalable processes. The future of vial-based process optimization lies in the deeper integration of real-time monitoring and AI-driven predictive modeling, which will further enhance robustness, facilitate regulatory approval, and accelerate the translation of research from the lab to the clinic.
References
- 1. Headspace Sampling Optimization [https://scioninstruments.com/us/blog/headspace-sampling-optimization/]
- 2. Optimization of headspace extraction conditions for volatile ... [https://pubs.rsc.org/en/content/articlehtml/2025/ay/d5ay01147g]
- 3. How to Build a Vial-Stopper Combination Suitable for Drug ... [https://www.westpharma.com/blog/2023/march/case-study-to-understand-vial-stopper-combination-suitable-drug-storage?srsltid=AfmBOoquV2F22DepKAOpxGBBrN0EnwJF7eP0TDfrwuwi53bq_2QfCrV5]
- 4. Gas–particle partitioning of m-xylene and naphthalene ... - ACP [https://acp.copernicus.org/articles/25/10267/2025/]
- 5. SCHOTT Pharma unveils polymer syringe for ultra-low ... [https://www.schott-pharma.com/en/news-and-media/media-releases/2025/schott-pharma-unveils-polymer-syringe-for-ultra-low-temperature-storage-at-minus-180-degrees-celsius]
- 6. and temperature-dependence in the aqueous phase ... [https://pubs.rsc.org/en/content/articlelanding/2025/ea/d5ea00034c]
- 7. Assessing pH- and temperature-dependence in the ... [https://www.sciencedirect.com/science/article/pii/S2634360625000275]
- 8. Experimental determination of lithium partitioning between ... [https://www.sciencedirect.com/science/article/pii/S0009254125004371]
- 9. Thermodynamic regulation of aerosol pH by temperature ... [https://pubmed.ncbi.nlm.nih.gov/40889569/]
- 10. Lyophilization Formulation for Gene Therapy Stability [https://www.leukocare.com/blog/lyophilization-formulation-for-gene-therapy-products]
- 11. Development and application of a novel tracer system for ... [https://www.sciencedirect.com/science/article/pii/S0939641125002668]
- 12. General approach for partitioning and phase separation in ... [https://arxiv.org/html/2509.14392v2]
- 13. Poor Equilibration [https://www.sepscience.com/hplc-solutions-93-poor-equilibration-6926]
- 14. Common Issues And Solutions in Headspace Sampling ... [https://www.alwsci.com/news/common-issues-and-solutions-in-headspace-sampl-85029965.html]
- 15. HPLC Troubleshooting Guide [https://www.thermofisher.com/us/en/home/industrial/chromatography/chromatography-learning-center/high-performance-liquid-chromatography-hplc-support/hplc-troubleshooting.html]
- 16. Product Temperature Monitoring and Control via Thermal ... [https://www.americanpharmaceuticalreview.com/Featured-Articles/517658-Product-Temperature-Monitoring-and-Control-via-Thermal-Imaging-during-Continuous-Freeze-Drying-of-Pharmaceutical-Unit-Doses/]
- 17. Variable-Field Analytical Ultracentrifugation: I. Time- ... [https://pmc.ncbi.nlm.nih.gov/articles/PMC4547334/]
- 18. Solving the retention time repeatability problem of ... [https://www.sciencedirect.com/science/article/pii/S0021967324004345]
- 19. Controlling Ice Nucleation During the Freezing Step of ... [https://www.pharmtech.com/view/controlling-ice-nucleation-during-freezing-step-lyophilization]
- 20. Stochastic ice nucleation governs the freezing process of ... [https://www.sciencedirect.com/science/article/pii/S0378517322006056]
- 21. Effects on product morphology and drying behaviour [https://www.sciencedirect.com/science/article/pii/S0928098725001113]
- 22. Effects on Ice Nucleation Times and Inhibition - PubMed Central [https://pmc.ncbi.nlm.nih.gov/articles/PMC11530499/]
- 23. Temperature and Heat Transfer Control During Freeze ... [https://pmc.ncbi.nlm.nih.gov/articles/PMC9556401/]
- 24. Practical Advice on Scientific Design of Freeze-Drying Process [https://pmc.ncbi.nlm.nih.gov/articles/PMC10661802/]
- 25. Active sites for ice nucleation differ depending on nucleation ... [https://pmc.ncbi.nlm.nih.gov/articles/PMC8106315/]
- 26. How Vial Geometry Variability Influences Heat Transfer ... [https://www.sciencedirect.com/science/article/abs/pii/S0022354916418459]
- 27. Molded Vial Manufacturing and Its Impact on Heat Transfer ... [https://pmc.ncbi.nlm.nih.gov/articles/PMC7840647/]
- 28. Incubation Times in Environmental Monitoring [https://www.bioprocessintl.com/qa-qc/a-case-study-in-environmental-monitoring-reviewing-incubation-times-upon-recovery-of-microorganisms]
- 29. Common sources of error in biology lab experiments [https://automata.tech/blog/common-sources-of-error-in-biology-lab-experiments]
- 30. The Selection of Incubation Temperatures and Times for ... [https://www.rapidmicrobio.com/learning-center/rapid-blog/the-selection-of-incubation-temperatures-and-times-for-microbiological-tests]
- 31. Incubation Troubleshooting Guide [https://poultrykeeper.com/incubation-brooding/incubation-troubleshooting-guide/]
- 32. Why Hatch Rates Drop: Expert Troubleshooting Guide [https://incubatorwarehouse.com/blogs/poultry-pals/why-hatch-rates-drop-expert-troubleshooting-guide?srsltid=AfmBOorjlA0olGuzcR9szRMWEjihIqcoSOdTh3O7y95AFxiN8eWgNFVc]
- 33. Evaluation of methods for heating 96 well plates. [https://figshare.com/articles/Evaluation_of_methods_for_heating_96_well_plates_/6088709]
- 34. Thermal Management in High-Throughput Screening [https://mls.ascentialtech.com/mls/resources/thermal-management-guide/]
- 35. Ultimate Guide to Thermal Validation in Pharmaceutical ... [https://www.incepbio.com/ultimate-guide-thermal-validation/]
- 36. Headspace Sampling: Instrumentation | LCGC International [https://www.chromatographyonline.com/view/headspace-sampling-instrumentation]
- 37. Automated Pipetting Considerations: A Buyer's Guide for ... [https://dispendix.com/blog/automated-pipetting]
- 38. Heat Treatment Process Automation: Enhance Efficiency & Quality. [https://reckersmech.com/heat-treatment-process-automation/]
- 39. 2025 HPLC Column and Accessories Review [https://www.chromatographyonline.com/view/innovations-in-liquid-chromatography-2025-hplc-column-and-accessories-review]
- 40. Cold Chain Distribution for Pharmaceuticals in 2025 [https://www.tempcontrolpack.com/knowledge/cold-chain-distribution-for-pharmaceuticals-in-2025-best-practices-and-future-trends/]
- 41. Enhancing diagnostic accuracy in symptom-based health ... [https://pmc.ncbi.nlm.nih.gov/articles/PMC11483353/]
- 42. Measuring symptoms as a critical component of drug ... [https://pmc.ncbi.nlm.nih.gov/articles/PMC4043382/]
- 43. Conquer Ghost Peaks in HPLC: Identification and Elimination [https://www.sepscience.com/conquer-ghost-peaks-in-hplc-identification-and-elimination-10277]
- 44. Increasing Vial-to-Vial Homogeneity: An Analysis of Using ... [https://www.biopharminternational.com/view/increasing-vial-vial-homogeneity-analysis-using-veriseq-nucleation-production-scale-freeze-dryers]
- 45. Development and Application of a Mechanistic Cooling ... [https://pmc.ncbi.nlm.nih.gov/articles/PMC8703267/]
- 46. A novel temperature-controlled media milling device to ... [https://www.sciencedirect.com/science/article/pii/S0378517324010147]
- 47. Causes of Retention Time Drift in HPLC [https://www.elementlabsolutions.com/uk/chromatography-blog/post/causes-of-retention-time-drift-in-hplc]
- 48. Why is my LC Retention Time Shifting? [https://www.restek.com/chromablography/why-is-my-lc-retention-time-shifting?srsltid=AfmBOop_3U9UCOgC0usDlX9Ty9tWqsOQNZ4oqfoRxi-TV_nzlMxMvSIm]
- 49. Retention Time Drift—A Case Study | LCGC International [https://www.chromatographyonline.com/view/retention-time-drift-case-study]
- 50. Abnormal Peak Shapes [https://www.shimadzu.com/an/service-support/technical-support/analysis-basics/tips/abnormalpeakshapes.html]
- 51. An Introduction to Peak Tailing, Fronting and Splitting in ... [https://www.acdlabs.com/blog/an-introduction-to-peak-tailing-fronting-and-splitting-in-chromatography/]
- 52. Tips for Optimizing Key Parameters in LC–MS [https://www.chromatographyonline.com/view/tips-optimizing-key-parameters-lc-ms]
- 53. Review of the Use of Liquid Chromatography-Tandem ... [https://pmc.ncbi.nlm.nih.gov/articles/PMC8548246/]
- 54. Technical note: A fast and reproducible autosampler for direct ... [https://hess.copernicus.org/articles/29/525/2025/]
- 55. Understanding the biology behind incubation | Royal Pas... temperature [https://www.pasreform.com/en/knowledge/169/understanding-the-biology-behind-incubation-temperature]
- 56. Extension of the equilibration period up to 24 h maintains ... [https://www.sciencedirect.com/science/article/pii/S0378432023000234]
- 57. Re-evaluating the Standard BOD₅ Method: Optimizing ... Incubation [https://www.linkedin.com/pulse/re-evaluating-standard-bod-method-optimizing-periods-uae-azhar-m-ujxkf]
- 58. PCR Troubleshooting Guide | Thermo Fisher Scientific - US [https://www.thermofisher.com/us/en/home/life-science/cloning/cloning-learning-center/invitrogen-school-of-molecular-biology/pcr-education/pcr-reagents-enzymes/pcr-troubleshooting.html]
- 59. PCR Cycling Parameters—Six Key Considerations for ... [https://www.thermofisher.com/us/en/home/life-science/cloning/cloning-learning-center/invitrogen-school-of-molecular-biology/pcr-education/pcr-reagents-enzymes/pcr-cycling-considerations.html]
- 60. PCR Troubleshooting Guide [https://www.neb.com/en-us/tools-and-resources/troubleshooting-guides/pcr-troubleshooting-guide?srsltid=AfmBOor3rFx4iao_J9BptqLW_kWBkWWSvAGuGSR9b2pdcbgnNF7MQfTe]
- 61. Effects on Ice Nucleation Times and Inhibition [https://link.springer.com/article/10.1007/s11095-024-03713-2]
- 62. sop for Preventive Maintenance of vial sealing machine [https://pharmadekho.com/sop-for-preventive-maintenance-of-vial-sealing-machine/]
- 63. Maintenance Tips for Vial Filling Machines to Ensure Longevity [https://kpfillingmachine.com/maintenance-tips-for-vial-filling-machines-to-ensure-longevity/]
- 64. Injectable Liquid Vial Filling Machine Maintenance [https://www.parthec.com/blogs/best-practices-for-maintaining-injectable-liquid-vial-filling-machines]
- 65. Safety Colors (OSHA Guidelines and Color Codes) [https://www.creativesafetysupply.com/articles/safety-colors/?srsltid=AfmBOorPvvlrcdKyKcwrqdPM3gO2AzSucUH6n698PcmFjwKrmJ5rdldb]
- 66. Colors Of Safety: Your Guide To Color Codes And Meanings [https://www.safetydecals.com/blogs/news/colors-of-safety?srsltid=AfmBOorir4EM8BwKW4o4gEonZhjvfEWa9sHgctFLw7LKQMFTobZjjeqq]
- 67. Science Lab Equipment Checklist: Does Your Lab Have ... [https://resources.workstationindustries.com/blog/science-lab-equipment]
- 68. Design Space Characterization and Risk Assessment Through Mechanistic Modeling | Pharmaceutical Technology [https://www.pharmtech.com/view/design-space-characterization-and-risk-assessment-through-mechanistic-modeling]
- 69. Uncertainty - Science and Judgment in Risk Assessment - NCBI Bookshelf [https://www.ncbi.nlm.nih.gov/books/NBK208276/]
- 70. Troubleshooting Protocols - Biological Sciences: Summer ... [https://guides.library.cmu.edu/biologicalsciencesSRI/troubleshooting]
- 71. Unlocking Stability: The Crucial Role of Thermal Analysis ... [https://www.tainstruments.com/unlocking-stability-the-crucial-role-of-thermal-analysis-in-lyophilization-temperature-optimization-blog/]
- 72. On the Use of Temperature Measurements as a Process ... [https://pmc.ncbi.nlm.nih.gov/articles/PMC10058468/]
- 73. A non-invasive multipoint product temperature ... [https://www.nature.com/articles/s41598-022-16073-x]
- 74. Thermocouple vs RTDs [https://www.dwyeromega.com/en-us/resources/rtd-vs-thermocouple?srsltid=AfmBOorGVSlr2DchHFyO8NrJjOirBe5rp5w-bTQ3tGEB6Ccouyypcgaz]
- 75. Two Ways to Measure Temperature Using Thermocouples ... [https://www.analog.com/en/resources/analog-dialogue/articles/measuring-temp-using-thermocouples.html]
- 76. Non-invasive product temperature monitoring as a recipe ... [https://www.telstar.com/en/about-telstar/news-events/technical-articles/non-invasive-product-temperature-monitoring-as-a-recipe-design-and-scaling-up-tool/]
- 77. Temperature Sensing Issues: Troubleshooting, Tips and ... [https://www.ametherm.com/blog/thermistors/temperature-sensing-issues-troubleshooting-tips-and-solutions/]
- 78. Non-Invasive Monitoring of Core Body Temperature for ... [https://pmc.ncbi.nlm.nih.gov/articles/PMC9043456/]