Specificity, Linearity, Range, LOD, and LOQ: A Comprehensive Guide to Analytical Method Validation
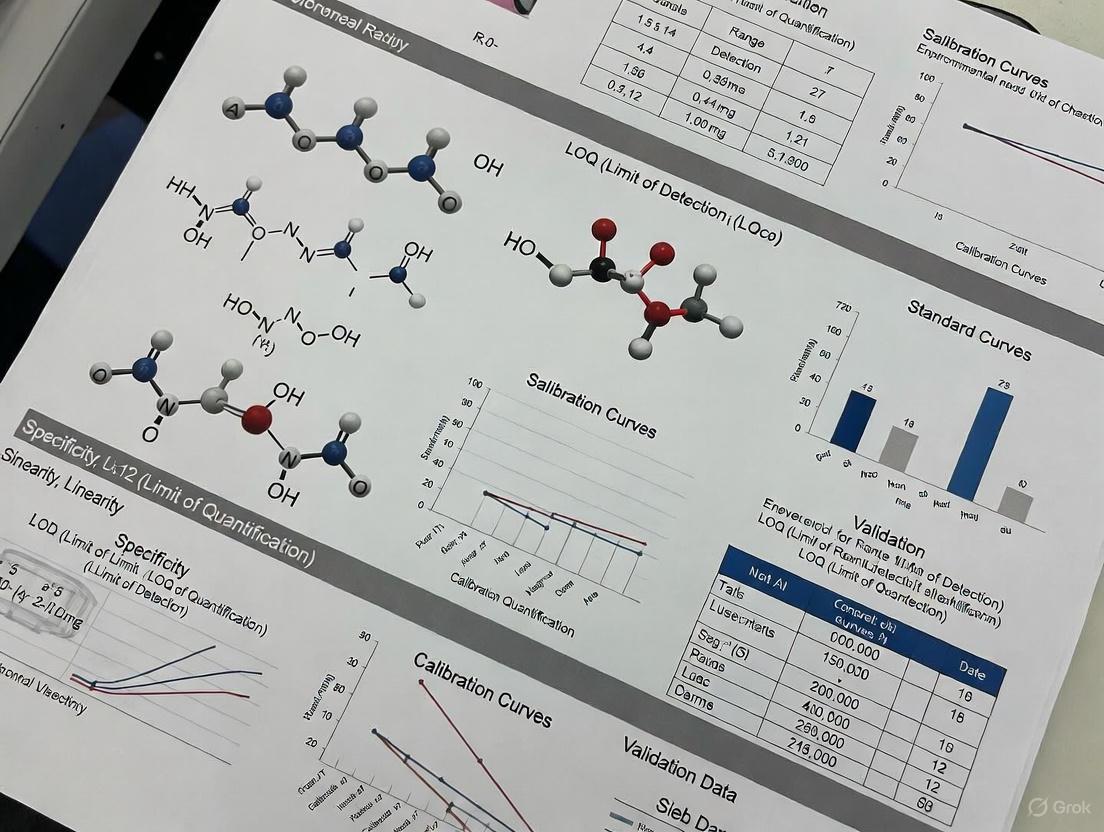
This article provides researchers, scientists, and drug development professionals with a complete framework for validating the key parameters of analytical methods.
Specificity, Linearity, Range, LOD, and LOQ: A Comprehensive Guide to Analytical Method Validation
Abstract
This article provides researchers, scientists, and drug development professionals with a complete framework for validating the key parameters of analytical methods. Covering foundational concepts, practical methodologies, advanced troubleshooting, and regulatory compliance, it offers a step-by-step guide to establishing specificity, linearity, analytical range, Limit of Detection (LOD), and Limit of Quantitation (LOQ) to ensure reliable, accurate, and defensible data in pharmaceutical and clinical research.
Core Principles: Defining Specificity, Linearity, Range, LOD, and LOQ
In pharmaceutical analysis, specificity is the foundational parameter that confirms an analytical method can accurately measure the analyte of interest without interference from other components in a complex matrix. It provides the assurance that the signal measured belongs solely to the target molecule, even when faced with closely related impurities, degradation products, or matrix components. Within the framework of method validation guided by ICH Q2(R1) guidelines, specificity works in concert with other critical parameters including linearity range, limit of detection (LOD), and limit of quantitation (LOQ) to ensure reliable analytical performance [1]. This objective comparison examines how these validation parameters perform across different analytical techniques and complex matrices, providing researchers with experimental data to guide method selection.
Comparative Analysis of Validation Parameters Across Techniques
Table 1: Validation Parameter Comparison Across Analytical Methods
| Analytical Method | Specificity Demonstration | Linearity Range | LOD | LOQ | Matrix Complexity | Key Applications |
|---|---|---|---|---|---|---|
| HPLC-UV [2] | Resolution of mesalamine from degradation products | 10-50 μg/mL | 0.22 μg/mL | 0.68 μg/mL | Pharmaceutical tablets | Stability-indicating methods |
| HPLC-MS/MS [3] | Identification of 3,4-DCQA, 3,5-DCQA, and 4,5-DCQA isomers | 1-50 μg/mL | 0.1 μg/mL | 1 μg/mL | Plant extract (Ligularia fischeri) | Natural product quantification |
| RP-HPLC [2] | Forced degradation studies (acid, base, oxidation, thermal, photolytic) | 20-50 μg/mL (7-point calibration) | - | - | Bulk drug and formulations | Assay validation and impurity profiling |
| HPLC-ESI-MS [4] | Specific identification of calactin in complex plant extract | 1-50 μg/mL | 0.1 μg/mL | 1 μg/mL | Calotropis gigantea stem bark | Bioactive compound quantification |
Table 2: Specificity Challenges in Complex Matrices
| Matrix Type | Specificity Challenges | Experimental Approach for Specificity Demonstration | Resolution Techniques |
|---|---|---|---|
| Pharmaceutical Tablets [2] | Excipients, degradation products, impurities | Forced degradation under stress conditions | Peak purity analysis, resolution factor >2 |
| Herbal Plant Extracts [3] | Structural isomers, co-eluting compounds, polyphenolic interference | HPLC-MS/MS with standard comparison | Isomer separation, mass transition identification |
| Biological Samples [1] | Proteins, metabolites, endogenous compounds | Sample preparation (SPE, precipitation), matrix blank analysis | Selective detection (MS/MS), chromatographic separation |
Experimental Protocols for Specificity Assessment
Protocol 1: HPLC-UV Specificity and Linearity Validation for Pharmaceutical Compounds
This protocol follows ICH Q2(R1) guidelines for validating a stability-indicating method for mesalamine in tablet formulations [2]:
Instrumentation and Conditions:
- HPLC System: Shimadzu UFLC with LC-20AD binary pump
- Column: Reverse-phase C18 (150 mm × 4.6 mm, 5 μm)
- Mobile Phase: Methanol:water (60:40 v/v)
- Flow Rate: 0.8 mL/min
- Detection: UV at 230 nm
- Injection Volume: 20 μL
- Run Time: 10 minutes
Specificity Assessment:
- Prepare sample solutions under forced degradation conditions:
- Acidic degradation: 0.1 N HCl at 25°C for 2 hours, then neutralize with 0.1 N NaOH
- Alkaline degradation: 0.1 N NaOH at 25°C for 2 hours, then neutralize with 0.1 N HCl
- Oxidative degradation: 3% hydrogen peroxide at 25°C for 2 hours
- Thermal degradation: 80°C dry heat for 24 hours
- Photolytic degradation: UV exposure at 254 nm for 24 hours per ICH Q1B
- Inject degraded samples and demonstrate that mesalamine peak is resolved from all degradation products with resolution factor >2.0
- Confirm peak purity using photodiode array detection
Linearity and Range:
- Prepare standard solutions at concentrations of 10, 20, 25, 30, 35, and 50 μg/mL
- Inject each concentration in triplicate
- Plot mean peak area against concentration
- Calculate regression parameters: slope = 173.53, y-intercept = -2435.64, R² = 0.9992
- The range is established as 10-50 μg/mL with R² ≥ 0.999
LOD and LOQ Determination:
- Based on signal-to-noise ratio of 3:1 for LOD and 10:1 for LOQ
- LOD = 0.22 μg/mL, LOQ = 0.68 μg/mL
- Verify LOQ by six replicate injections showing %RSD <2%
Protocol 2: HPLC-MS/MS Specificity for Natural Product Analysis
This protocol details the determination of dicaffeoylquinic acids (DCQAs) in Ligularia fischeri using HPLC-MS/MS [3]:
Sample Preparation:
- Plant material (leaves and stems) washed, cut, and freeze-dried
- Powder (5 g) extracted with 50 mL of solvent (100% DW, 30% EtOH, or 50% EtOH)
- Extraction at 60°C for 72 hours in water bath
- Centrifugation at 3000 rpm for 10 minutes
- Supernatant filtered through Whatman filter paper
- Concentration using rotary evaporator at 45°C
- Final extract filtered through 0.45 μm PVDF syringe filter
HPLC-MS/MS Conditions:
- HPLC System: Shimadzu Nexera Lite LC-40D
- MS System: X500R QTOF LC/MS/MS with ESI in positive mode
- Column: Prontosil C18 (250 mm × 4.6 mm, 5 μm)
- Mobile Phase: Water and acetonitrile with 0.1% formic acid, gradient elution
- Flow Rate: 0.5 mL/min
- Detection: UV-PDA at 284 nm and MS/MS
- MS Conditions: Spray voltage -4.5 kV, desolvation temperature 500°C, mass range m/z 100-2000
Specificity Assurance:
- Confirm absence of interfering substances at retention times of 3,4-DCQA, 3,5-DCQA, and 4,5-DCQA
- Use MS/MS fragmentation patterns to confirm compound identity
- Compare chromatograms with standard substances
- Verify no cross-interference between DCQA isomers
Validation Parameters:
- Linearity: Verified with standard curves for all three DCQAs
- Precision: Intra-day and inter-day %RSD <1%
- Accuracy: Recovery rates 99.05-99.25% (%RSD <0.32%)
- LOD/LOQ: Established per ICH Q2(R1) guidelines
Visualization of Specificity Validation Workflow
Specificity Validation Workflow in Analytical Methods
The Scientist's Toolkit: Essential Research Reagent Solutions
Table 3: Key Reagents and Materials for Specificity Validation
| Reagent/Material | Function in Specificity Validation | Application Examples |
|---|---|---|
| HPLC-MS Grade Solvents [3] | Mobile phase preparation, sample reconstitution | Acetonitrile, methanol, water with 0.1% formic acid for HPLC-MS/MS |
| Reference Standards [3] [2] | Method calibration, peak identification | 3,4-DCQA, 3,5-DCQA, 4,5-DCQA standards; mesalamine API (99.8% purity) |
| Chromatography Columns [2] [4] | Stationary phase for compound separation | C18 columns (150-250 mm length, 4.6 mm ID, 5 μm particle size) |
| Sample Preparation Materials [3] | Extraction, purification, filtration | PVDF syringe filters (0.45 μm), Whatman filter paper, solid phase extraction cartridges |
| Degradation Reagents [2] | Forced degradation studies for specificity | 0.1N HCl, 0.1N NaOH, 3% H₂O₂ for stress testing |
The experimental data presented demonstrates that specificity remains the cornerstone parameter in analytical method validation, directly influencing the reliability of linearity range, LOD, and LOQ determinations. HPLC-UV methods provide robust specificity for pharmaceutical compounds with LOD values around 0.22 μg/mL, while HPLC-MS/MS techniques offer enhanced specificity for complex natural product matrices with improved LOD of 0.1 μg/mL. The consistency in validation approaches across different techniques and matrices—all adhering to ICH Q2(R1) guidelines—provides researchers with a standardized framework for demonstrating method specificity. As analytical challenges grow with increasingly complex matrices, the fundamental requirement remains unchanged: unequivocal demonstration that the measured signal originates solely from the target analyte, free from interference.
In pharmaceutical analysis and clinical diagnostics, the validity of any quantitative result hinges on the demonstrated performance of the analytical method itself. Within the framework of method validation, linearity and range are two fundamental parameters that establish the working boundaries within which an analyte can be accurately and precisely measured [5]. They are the foundation upon which reliable quantification is built.
Linearity refers to the ability of an analytical procedure to obtain test results that are directly proportional to the concentration (or amount) of the analyte in the sample within a given range [6] [7]. It is a measure of the method's accuracy across different concentrations. Range, on the other hand, is the interval between the upper and lower concentration levels of the analyte for which suitable levels of precision, accuracy, and linearity have been demonstrated [5] [7]. Essentially, linearity defines the quality of the proportional relationship, while the range defines the span of concentrations where this relationship holds true and is reliable.
This guide compares the theoretical concepts with practical experimental protocols, providing a clear roadmap for researchers and scientists to establish and verify these critical parameters.
Core concepts: distinguishing linearity from range
While deeply interconnected, linearity and range address distinct aspects of an analytical method's performance. The following table summarizes their key differences.
| Feature | Linearity | Range |
|---|---|---|
| Definition | Ability to produce results directly proportional to analyte concentration [5] [7] | Interval between upper and lower analyte concentrations that demonstrate suitable precision, accuracy, and linearity [5] [7] |
| Primary Focus | Quality of the concentration-response relationship [5] | Usable span of concentrations [5] |
| Demonstrated By | Calibration curve (response vs. concentration) [5] | Successful linearity, accuracy, and precision studies within the interval [7] |
| Key Metrics | Correlation coefficient (R²), slope, y-intercept, residual plots [8] [5] | Numerical interval (e.g., 50-150% of target concentration) [5] |
| Dependence | A property of the method's response | Defined based on linearity, accuracy, and precision data [5] |
A step-by-step experimental protocol
Establishing linearity and range is a systematic process. The workflow below outlines the key stages, from preparation to final determination.
Planning and preparation
The first phase involves careful design and preparation of calibration standards [8].
- Define the Range and Levels: Prepare a minimum of five concentration levels to establish a calibration curve [9] [8]. A common and often sufficient approach is to bracket the expected sample concentrations, typically from 50% to 150% of the target concentration or specification limit [8] [5]. For impurity testing, this might extend from the quantitation limit (QL) to 150% of the specification limit [5].
- Standard Preparation: Prepare standard solutions using calibrated equipment and certified reference materials. To avoid propagating errors, it is good practice to prepare standards independently rather than through serial dilution from a single stock solution [8]. The standards should be prepared in a matrix that matches the sample matrix as closely as possible to account for potential matrix effects [8].
Execution and data acquisition
- Analysis: Analyze each of the prepared concentration levels. To eliminate systematic bias, run the standards in a random order rather than in ascending or descending concentration [8].
- Replication: Analyze each concentration level in triplicate to obtain a measure of repeatability at each point [8].
Analysis and evaluation
This phase involves statistical and visual assessment of the acquired data to judge the method's linearity.
- Regression Analysis: Plot the analytical response (e.g., peak area, absorbance) on the y-axis against the theoretical concentration on the x-axis. Using the least-squares method, perform a linear regression analysis to obtain the line of best fit, characterized by its slope, y-intercept, and coefficient of determination (R²) [8] [5].
- Residual Plot Examination: A critical step often overlooked is the visual inspection of the residual plot (the plot of the difference between the measured value and the value predicted by the regression line against concentration) [8]. A linear method will display residuals randomly scattered around zero. Any observable pattern (e.g., U-shaped curve, funnel shape) indicates a potential lack of linearity that a high R² value might mask [8].
Quantitative data assessment and acceptance criteria
The evaluation of linearity data requires more than just an R² value. The table below presents a typical dataset for an impurity method validation and the corresponding acceptance criteria.
Table: Example Linearity Data for an Impurity (e.g., Impurity A) [5]
| Level | Impurity Value (%) | Concentration (mcg/mL) | Area Response |
|---|---|---|---|
| QL (0.05%) | 0.05% | 0.5 | 15,457 |
| 50% | 0.10% | 1.0 | 31,904 |
| 70% | 0.14% | 1.4 | 43,400 |
| 100% | 0.20% | 2.0 | 61,830 |
| 130% | 0.26% | 2.6 | 80,380 |
| 150% | 0.30% | 3.0 | 92,750 |
| Slope | 30,746 | ||
| R² | 0.9993 |
Key acceptance criteria
- Correlation Coefficient (R²): For many pharmaceutical applications, an R² value of ≥ 0.995 (or often ≥ 0.997) is considered acceptable [8] [5]. However, a high R² alone is not a guarantee of linearity [8] [6].
- Visual Inspection: The calibration curve and, more importantly, the residual plot must be visually inspected for randomness and the absence of systematic patterns [8].
- Accuracy and Precision: For the range to be valid, the method must demonstrate acceptable accuracy (e.g., % recovery) and precision (e.g., %RSD) at the extremes and throughout the range [7]. The range is the interval where all these parameters are met.
In the example above, the R² of 0.9993 exceeds the typical threshold of 0.997, and the data visually forms a straight line (not shown), passing the linearity criteria. The range for this impurity would then be reported as 0.05% (QL) to 0.30% (150% of specification) [5].
The scientist's toolkit: essential research reagents and materials
The following reagents, solutions, and instruments are foundational for conducting linearity and range experiments.
Table: Essential Materials for Linearity and Range Validation
| Item | Function in Validation |
|---|---|
| Certified Reference Material (CRM) | Provides a known quantity of the target analyte with high purity and certainty, used for preparing the primary stock solution to ensure accuracy [8]. |
| Blank Matrix | The analyte-free sample material (e.g., plasma, formulation excipients) used to prepare calibration standards, crucial for identifying and accounting for matrix effects [8]. |
| Linearity/Calibration Standards | A series of samples with known concentrations of the analyte, typically at 5-6 levels spanning the intended range (e.g., 50%, 80%, 100%, 120%, 150%), used to construct the calibration curve [9] [8] [5]. |
| Analytical Balance (Calibrated) | Used for accurate weighing of the reference standard and any other solid components, fundamental to preparing solutions of known concentration. |
| Volumetric Glassware/Pipettes (Calibrated) | Used for precise dilution and transfer of liquids to ensure each linearity standard is prepared at the correct theoretical concentration. |
Advanced considerations and troubleshooting
Even with a well-planned experiment, challenges can arise. Advanced statistical techniques can offer more robust evaluations of linearity, particularly for methods where the traditional R² is misleading [6]. Furthermore, being able to troubleshoot common issues is a critical skill.
- Beyond R²: The ICH Q2(R1) guideline defines linearity based on the proportionality of test results, not the instrumental response function. In techniques that use a non-linear calibration curve (e.g., ELISA, qPCR), assessing "sample dilution linearity" is more appropriate. One advanced method involves a double logarithm transformation; taking the log of both the theoretical and back-calculated concentrations and fitting a line. A slope of 1.00 in this log-log plot indicates perfect proportionality, providing a more direct assessment of the linearity of results [6].
- Common Issues and Solutions:
- Poor R² or Non-Random Residuals: This can be caused by an incorrectly selected concentration range, detector saturation, matrix effects, or chemical interactions. Re-evaluate the working range and consider using weighted regression models if heteroscedasticity (variance changing with concentration) is observed [8] [6].
- Significant Y-Intercept: A large, non-zero intercept suggests a constant systematic error, such as interference from the blank matrix or an instrumental baseline drift. Investigate the blank response and method specificity [8] [7].
- Matrix Effects: If the analyte responds differently in the sample matrix than in a pure solvent, linearity will be compromised. Always prepare calibration standards in the blank matrix or employ a standard addition method to compensate [8].
A thorough understanding and rigorous validation of linearity and range are non-negotiable for generating reliable quantitative data in drug development and clinical science. By moving beyond a sole reliance on R² and implementing a holistic protocol that includes visual residual analysis and stringent acceptance criteria, scientists can ensure their analytical methods are truly fit for purpose. This foundational work, documented with complete transparency, not only satisfies regulatory requirements but also instills confidence in every result the method produces.
In analytical chemistry and bioanalysis, the Limit of Detection (LOD) and Limit of Quantitation (LOQ) are fundamental performance characteristics that define the sensitivity and operational range of an analytical method. The LOD represents the lowest concentration of an analyte that can be reliably distinguished from the analytical background noise, while the LOQ is the lowest concentration that can be quantitatively measured with acceptable precision and accuracy [10]. These parameters are essential for methods intended to detect and measure trace levels of analytes, such as impurities in pharmaceuticals, biomarkers in biological samples, or contaminants in environmental samples [11].
Proper determination of LOD and LOQ is critical for validating analytical methods according to regulatory guidelines such as ICH Q2(R2) and for ensuring data quality in research and development [12]. Without established detection and quantitation limits, researchers cannot confidently interpret low-concentration results, potentially leading to incorrect conclusions in drug development studies, diagnostic test development, and quality control operations [13].
Defining LOD and LOQ Concepts
Fundamental Definitions and Distinctions
The Limit of Detection (LOD), also called Lower Limit of Detection (LLD), is the lowest analyte concentration that can be reliably distinguished from a blank sample but not necessarily quantified as an exact value [10] [14]. It represents the concentration at which detection is feasible, though without guaranteed precision or accuracy. Statistically, it is the point where the analyte signal becomes significantly different from the noise or blank signal with a stated confidence level, typically 99% [14].
The Limit of Quantitation (LOQ), also called Lower Limit of Quantification (LLOQ), is the lowest concentration at which the analyte can not only be detected but also measured with acceptable accuracy and precision [11] [15]. At or above the LOQ, the method can provide quantitative results that meet predefined performance criteria for bias and imprecision. The LOQ is always equal to or higher than the LOD [11].
For methods with a defined quantitative range, the Upper Limit of Quantification (ULOQ) represents the highest concentration that can be accurately measured, defining the upper boundary of the method's quantitative range [14].
Comparative Characteristics of LOD and LOQ
Table 1: Key Characteristics of LOD and LOQ
| Parameter | Limit of Detection (LOD) | Limit of Quantitation (LOQ) |
|---|---|---|
| Definition | Lowest concentration reliably detected | Lowest concentration quantified with acceptable accuracy and precision |
| Primary Function | Qualitative detection | Quantitative measurement |
| Signal-to-Noise Ratio | 3:1 [10] | 10:1 [10] |
| Statistical Confidence | 99% (distinguishable from blank) [14] | Defined by precision and accuracy requirements (typically ≤20% CV) [15] |
| Relative Position | Lower | Always ≥ LOD [11] |
| Typical Use Cases | Screening methods, impurity detection | Quantitative assays, pharmacokinetic studies |
Methodologies for Determining LOD and LOQ
Calculation Approaches and Formulas
Multiple approaches exist for determining LOD and LOQ, each with specific applications depending on the analytical technique and validation requirements.
Table 2: Common Methods for Determining LOD and LOQ
| Method | LOD Calculation | LOQ Calculation | Applications |
|---|---|---|---|
| Signal-to-Noise Ratio | Concentration giving S/N = 3:1 [10] | Concentration giving S/N = 10:1 [10] | Chromatographic methods with baseline noise [10] |
| Standard Deviation of Blank | Meanblank + 1.645(SDblank) [11] | Meanblank + 10(SDblank) (estimated) | Methods with consistent blank measurements |
| Calibration Curve Parameters | 3.3 × σ/S [10] | 10 × σ/S [10] | Instrumental methods where σ = SD of response, S = slope of calibration curve |
| Empirical Based on Precision | Not applicable | Lowest concentration with CV ≤ 20% [15] | Bioanalytical methods (BMV guidelines) |
The CLSI EP17 guideline protocol defines LOD using the formula: LOD = LoB + 1.645(SDlow concentration sample), where LoB (Limit of Blank) is the highest apparent analyte concentration expected when replicates of a blank sample are tested [11]. This approach acknowledges the statistical overlap between blank and low-concentration samples, providing a more reliable detection limit.
Graphical Assessment Approaches
Advanced graphical approaches have been developed to provide more realistic assessments of LOD and LOQ. The accuracy profile and uncertainty profile methods use tolerance intervals and measurement uncertainty to define the valid quantification range [16]. These approaches simultaneously evaluate bias, precision, and total error to determine the lowest concentration where measurement uncertainty falls within acceptable limits [15] [16].
Compared to classical statistical methods, graphical strategies provide more realistic assessments of LOD and LOQ. A 2025 comparative study found that classical statistical approaches often underestimate these limits, while uncertainty profiles provide precise estimates of measurement uncertainty and more reliable detection and quantitation limits [16].
Experimental Protocols for Determination
Sample Preparation and Analysis
The experimental determination of LOD and LOQ requires careful preparation and analysis of specific sample types. For a comprehensive assessment, two different kinds of samples are generally prepared: a "blank" sample containing no analyte, and a "spiked" sample containing a low concentration of the analyte of interest [17]. In some cases, multiple spiked samples at different concentrations may be prepared to bracket the expected detection and quantitation limits.
The blank solution should ideally have the same matrix as regular patient samples to account for matrix effects [17]. For methods validated according to CLSI guidelines, a recommended practice is to measure 60 replicates for establishing these parameters during method development, while 20 replicates may suffice for verification [11]. The samples should be analyzed over different days, using multiple instruments and reagent lots when possible, to capture expected performance under typical laboratory conditions [11].
LOD and LOQ Determination Workflow
Statistical Analysis and Verification
For the signal-to-noise approach, the LOD and LOQ are verified by visually examining chromatograms or spectra and confirming that the average signal at the proposed LOD is at least 3 times the baseline noise, and at the LOQ is at least 10 times the baseline noise [10].
When using the standard deviation and slope method, the residual standard deviation of the regression line or the standard deviation of the y-intercepts of regression lines serves as the measure of variability (σ), while the slope (S) of the calibration curve represents the sensitivity of the method [10]. The calculated LOD and LOQ should then be verified by analyzing samples at these concentrations and confirming that they meet the acceptance criteria.
For the accuracy profile approach, the LOQ is determined as the lowest concentration where the tolerance intervals (accounting for both bias and precision) fall within the acceptability limits [16]. This method simultaneously validates the entire method and establishes the quantification limit based on total error principles.
Advanced Applications and Statistical Considerations
Handling Data Below the LOQ
In practical research settings, analysts frequently encounter measurements that fall below the LOQ, presenting challenges for data interpretation and statistical analysis. Simply replacing sub-LOQ values with a fixed value such as LOQ/2 introduces significant bias in both mean and standard deviation estimates, particularly when a substantial proportion of data is affected [13].
A more statistically sound approach treats sub-LOQ values as left-censored data, acknowledging that the exact value is unknown but falls below a known threshold [13]. Statistical methods such as maximum likelihood estimation (MLE) can then be applied to fit distributions and estimate parameters that account for the censored nature of the data. Simulation studies demonstrate that this censoring approach maintains much better fidelity to the underlying data, providing reasonable estimates of mean and standard deviation even when up to 90% of observations fall below the LOQ [13].
Statistical Handling of Sub-LOQ Data
Case Study: HPLC Method for Sotalol in Plasma
A 2025 study compared different approaches for assessing LOD and LOQ in a bioanalytical method using HPLC for determination of sotalol in plasma [16]. The researchers implemented three strategies: the classical approach based on statistical parameters, the accuracy profile method, and the uncertainty profile approach.
The study found that the classical strategy based on statistical concepts provided underestimated values of LOD and LOQ, potentially leading to overconfidence in the method's capabilities at low concentrations [16]. In contrast, both graphical methods (accuracy and uncertainty profiles) provided more relevant and realistic assessments. The uncertainty profile method was particularly valuable as it provided precise estimates of measurement uncertainty alongside the detection and quantitation limits [16].
This case study demonstrates the importance of selecting appropriate assessment methodologies based on the intended use of the analytical method and the required confidence in low-level measurements.
Essential Research Tools and Reagents
Analytical Method Development Toolkit
Table 3: Essential Research Reagent Solutions for LOD/LOQ Studies
| Reagent/Material | Function | Application Example |
|---|---|---|
| Blank Matrix | Provides analyte-free background for LoB determination | Blank plasma for bioanalytical methods [17] |
| Reference Standards | Precise analyte quantities for spiking experiments | Certified reference materials for calibration [18] |
| Internal Standards | Correction for analytical variability | Stable isotope-labeled analogs in HPLC-MS [16] |
| High-Purity Solvents | Minimize background interference | Traceselect grade for ICP-OES [18] |
| Calibration Solutions | Establish analytical response relationship | TraceCERT multielement standards [18] |
Successful determination of LOD and LOQ requires not only appropriate statistical approaches but also high-quality materials and reagents. The blank matrix should be commutable with actual patient specimens to ensure realistic assessment of background signals [11]. Reference standards with certified purity and concentration are essential for preparing accurate spiked samples at low concentrations near the expected detection and quantitation limits [18].
For chromatographic methods, the selection of appropriate columns and mobile phases significantly impacts method sensitivity. For example, in an RP-HPLC method developed for favipiravir quantification, an Inertsil ODS-3 C18 column with specific mobile phase composition was critical for achieving the necessary sensitivity [19]. Similarly, in ICP-OES methodology for quality assessment of radiopharmaceuticals, high-purity reagents and appropriate buffer systems were essential for accurate determination of trace metal impurities [18].
The Limit of Detection and Limit of Quantitation are critical performance characteristics that define the lower boundaries of an analytical method's capabilities. Appropriate determination of these parameters requires careful experimental design, proper statistical analysis, and verification using independent samples. While classical approaches based on signal-to-noise ratios or standard deviation calculations provide a starting point, advanced graphical methods such as accuracy profiles and uncertainty profiles offer more realistic assessments of method capabilities, particularly for regulated bioanalytical applications.
The choice of methodology should be guided by the intended use of the analytical method, regulatory requirements, and the necessary confidence in low-concentration measurements. Proper establishment and verification of LOD and LOQ ensure that analytical methods are "fit for purpose" and generate reliable data for research and regulatory decision-making. As analytical technologies continue to advance, pushing detection capabilities to increasingly lower levels, the appropriate determination and application of these fundamental method characteristics remains essential for scientific progress in pharmaceutical development and biomedical research.
In the pharmaceutical and clinical laboratory sciences, the reliability of analytical data is paramount to ensuring product quality, patient safety, and public health. This reliability is established through rigorous analytical method validation, a process governed by internationally recognized guidelines. Among these, the International Council for Harmonisation (ICH) Q2(R2), the United States Pharmacopeia (USP), and the Clinical and Laboratory Standards Institute (CLSI) form a foundational triad. While interconnected in their pursuit of data integrity, each organization provides a unique perspective and set of requirements. ICH Q2(R2) offers a broad, harmonized framework for the pharmaceutical industry, focusing on the validation of analytical procedures for drug substances and products [20]. The USP provides legally recognized, enforcable standards for quality, including mandatory and informational general chapters that detail specific testing procedures [21] [22]. CLSI, through its Evaluation Protocol (EP) series, delivers detailed, practical guidance for evaluating the performance of clinical laboratory tests, with a strong emphasis on statistical protocols and metrological traceability [23] [24]. This guide objectively compares these three pivotal frameworks, focusing on their approaches to key validation parameters—Specificity, Linearity Range, Limit of Detection (LOD), and Limit of Quantitation (LOQ)—to equip researchers and drug development professionals with the knowledge to ensure regulatory compliance and scientific excellence.
The following table summarizes the core identity, regulatory standing, and primary audience of each guideline.
Table 1: Foundational Overview of ICH Q2(R2), USP, and CLSI Guidelines
| Feature | ICH Q2(R2) | USP General Chapters | CLSI EP Guidelines |
|---|---|---|---|
| Full Name & Issuer | Q2(R2) Validation of Analytical Procedures; Issued by ICH (adopted by FDA, EMA, etc.) [20] | United States Pharmacopeia General Chapters; Published by USP [21] [22] | Evaluation Protocol (EP) Standards; Published by CLSI [23] [25] |
| Primary Regulatory Scope | Pharmaceutical drug development and manufacturing (Chemical & Biotech) [20] | Pharmaceutical products, dietary supplements, and food ingredients [22] | Clinical laboratory tests (IVDs and LDTs) [23] |
| Regulatory Status | Harmonized guideline for regulatory submissions [20] | Legally recognized standards; chapters can be "required" (enforceable) or "informational" (guidance) [22] | Internationally accepted consensus standards and best practices [23] [25] |
| Core Focus in Validation | Providing a general framework for validating analytical procedures [20] | Providing specific, monograph-referenced testing methods and acceptance criteria [21] [22] | Providing detailed protocols for evaluating method performance characteristics (e.g., precision, accuracy) [23] |
The relationships and applications of these guidelines within the product lifecycle are illustrated below.
Figure 1: Guideline Scope in Product Lifecycle
Comparative Analysis of Key Validation Parameters
This section delves into the specific requirements and methodologies for critical validation parameters as defined by each guideline.
Specificity
Specificity is the ability to assess the analyte unequivocally in the presence of components that may be expected to be present, such as impurities, degradants, or matrix components.
- ICH Q2(R2): This guideline mandates that specificity be demonstrated using stressed samples or samples spiked with potential interferents. The response of the analytical procedure to the analyte in the presence of these materials is compared to the response of the analyte alone. For chromatographic methods, peak purity tests are often critical evidence [20].
- USP: The approach to specificity in USP general chapters is often tightly integrated into specific monographs. A required chapter may describe a general technique, but the acceptance criteria for resolving the analyte from specific impurities are detailed in the individual product monograph, providing a highly specific, product-oriented pass/fail standard [21] [22].
- CLSI: CLSI standards, such as those found in the EP07 (Interference Testing) and EP17 (Limits of Detection and Quantitation) protocols, provide detailed experimental designs for assessing specificity in the context of clinical sample matrices. This includes protocols for testing common interferents like hemolysis, icterus, and lipemia, as well as medications and endogenous substances, using statistical measures to determine clinical significance [23].
Linearity and Range
The linearity of an analytical procedure is its ability to obtain test results that are directly proportional to the concentration of analyte in the sample within a given range.
- ICH Q2(R2): Linearity is typically demonstrated by testing a minimum of five concentrations over the claimed range. The data is treated using statistical methods for linear regression (e.g., y = mx + b), and outputs such as the correlation coefficient, y-intercept, and residual sum of squares are used to confirm linearity. The verified range is established as the interval between the upper and lower concentration levels for which linearity, accuracy, and precision have been demonstrated [20].
- USP: USP general chapters provide procedures and acceptance criteria for verifying the linearity of instruments and methods. The approach is pragmatic and tied to compliance, often referencing standard solutions and specifying the minimum correlation coefficient required for a procedure to be considered acceptable for a given monograph [22].
- CLSI: CLSI guidelines, such as EP06 (Evaluation of Linearity of Quantitative Measurement Procedures), offer a highly detailed and statistically robust protocol. It often involves testing multiple replicates at several concentrations and uses polynomial regression analysis to distinguish between linear and non-linear responses. The guideline provides clear methods for determining the reportable range and establishing the limits of linearity [23].
Limit of Detection (LOD) and Limit of Quantitation (LOQ)
The LOD is the lowest amount of analyte that can be detected, but not necessarily quantified. The LOQ is the lowest amount of analyte that can be quantitatively determined with suitable precision and accuracy.
- ICH Q2(R2): This guideline describes multiple approaches for determining LOD and LOQ. These include a visual evaluation, a signal-to-noise ratio (typically 3:1 for LOD and 10:1 for LOQ), and the standard deviation of the response and the slope of the calibration curve (using the formula LOD = 3.3σ/S and LOQ = 10σ/S, where σ is the standard deviation and S is the slope). The method chosen must be justified and supported by relevant data [20].
- USP: USP chapters often align with the ICH approaches, particularly the signal-to-noise and standard deviation/slope methods. The criteria for what constitutes an acceptable LOD/LOQ may be explicitly stated in specific monographs, especially for impurities and degradation products, ensuring consistency across testing laboratories [22].
- CLSI: CLSI EP17 (Limits of Detection and Quantitation) provides the most comprehensive and granular protocol for this parameter in a clinical setting. It guides laboratories through a multi-stage process involving the preparation of low-concentration samples, repeated measurements, and sophisticated statistical analysis to determine the blank limit, detection limit, and quantitation limit, along with their associated uncertainties [23].
Table 2: Direct Comparison of LOD and LOQ Methodologies
| Guideline | Recommended LOD/LOQ Methods | Typical Experimental Design | Key Outputs & Acceptance |
|---|---|---|---|
| ICH Q2(R2) | 1. Visual Inspection2. Signal-to-Noise3. Standard Deviation of Response & Slope [20] | Analysis of samples with analyte at/near the expected limit. | LOD/LOQ values are reported. The LOQ must be demonstrated with specified precision and accuracy. |
| USP | Similar to ICH; signal-to-noise is commonly referenced. Acceptance may be monograph-specific [22]. | Verification per general chapter, with criteria defined in the specific product monograph. | The LOD/LOQ must meet the criteria set forth in the enforceable monograph. |
| CLSI EP17 | A detailed multi-protocol approach based on the measurement of low-level pools and replicates to characterize the entire detection/quantitation curve [23]. | Extensive replication of low-concentration samples and a blank. Statistical analysis of the resulting data distribution. | Establishes Blank Limit, Detection Limit, Quantitation Limit, and associated measurement uncertainty. |
Experimental Protocols and Data Presentation
To illustrate the application of these guidelines, consider a typical experiment for determining the Linearity Range and LOQ for a new active pharmaceutical ingredient (API).
Detailed Protocol for Linearity and LOQ Determination
1. Sample Preparation:
- Prepare a stock solution of the API of known high purity and concentration.
- From this stock, perform a serial dilution to create a minimum of five standard solutions spanning the expected range (e.g., 50% to 150% of the target assay concentration). The solutions should be prepared in the same matrix as the sample (e.g., dissolution medium, placebo mixture) [20].
2. Instrumental Analysis:
- Analyze each concentration level in triplicate using the developed analytical method (e.g., HPLC with UV detection). The analysis should be performed in a randomized order to minimize the impact of instrumental drift.
3. Data Analysis for Linearity:
- Plot the mean measured response (e.g., peak area) against the theoretical concentration for each level.
- Perform a linear regression analysis to obtain the correlation coefficient (r), slope, y-intercept, and residual sum of squares.
- Calculate the %Bias at each concentration: [(Observed Concentration - Theoretical Concentration) / Theoretical Concentration] * 100.
- The range is considered linear if the correlation coefficient exceeds a pre-defined limit (e.g., r > 0.998), the y-intercept is not statistically significant from zero, and the %Bias at each point is within acceptable limits (e.g., ±2%) [20].
4. Data Analysis for LOQ:
- Identify the lowest concentration level in the linearity study that demonstrated acceptable precision and accuracy.
- Prepare and analyze six independent samples at this concentration level.
- Calculate the precision (as %RSD) and accuracy (as %Recovery) of these six replicates.
- The LOQ is confirmed if the %RSD is ≤ 5% and the %Recovery is within 95-105%. If these criteria are not met, repeat the analysis at a slightly higher concentration until they are satisfied [20].
The workflow for this integrated experiment is as follows:
Figure 2: Linearity & LOQ Validation Workflow
Research Reagent Solutions for Validation
The following table details essential materials and their functions in conducting these validation experiments.
Table 3: Essential Research Reagents and Materials for Method Validation
| Research Reagent / Material | Critical Function in Validation | Application Example |
|---|---|---|
| Certified Reference Material (CRM) | Provides a substance with a certified purity and assigned property value, used to establish trueness and calibration in quantitative analysis. | Used as the primary standard to prepare stock solution for linearity and LOQ/ LOD studies [24]. |
| Commutable Reference Material | A reference material whose properties demonstrate the same interrelationship as patient samples when measured by different analytical platforms. Crucial for ensuring calibration is valid across systems. | Used as a common calibrator to harmonize results across multiple measurement procedures in a laboratory network [24]. |
| Placebo/Blank Matrix | The analyte-free formulation or biological matrix used to prepare standards. Critical for assessing specificity, LOD, and the background signal. | Used in specificity experiments to confirm no interference from excipients or matrix components at the retention time of the analyte. |
| Stability-Indicating Materials | Samples subjected to stress conditions (heat, light, acid/base, oxidation) to generate degradants. Used to prove method specificity and stability-indicating capabilities. | Stressed samples are analyzed to demonstrate the method can accurately quantify the API in the presence of its degradation products. |
The choice and application of ICH Q2(R2), USP, and CLSI guidelines are not mutually exclusive but are dictated by the stage of development, the product's nature, and the intended use of the analytical data. ICH Q2(R2) provides the overarching, science-based principles for validating methods intended for regulatory submissions in the pharmaceutical industry. Its strength lies in its harmonized, flexible framework. The USP offers legally binding, product-specific standards; its strength is in providing explicit, enforceable methods and acceptance criteria for quality control and release testing. CLSI EP guidelines deliver granular, statistically rigorous protocols ideal for developing, verifying, and validating methods in a clinical laboratory setting, with a strong focus on understanding performance in a biological matrix.
For a comprehensive validation strategy, a drug development professional might begin method development using the principles of ICH Q2(R2), then refine the method using CLSI's detailed protocols (e.g., EP06 for linearity, EP17 for LOD/LOQ) to ensure robust statistical performance, and finally, confirm that the method meets the specific, enforceable standards outlined in the relevant USP monographs for product registration and commercial quality control. Understanding the synergies and specific applications of these three foundational pillars is essential for generating reliable, defensible, and regulatory-compliant analytical validation data.
Practical Protocols: How to Determine and Validate Each Parameter
In the rigorous world of pharmaceutical analysis, demonstrating that an analytical method accurately measures the intended analyte without interference from other components is paramount. This property, known as specificity, is a cornerstone of analytical method validation, which also includes linearity, range, LOD, and LOQ [26]. Within this framework, peak purity assessment is a critical technique for confirming specificity, especially for stability-indicating methods. It ensures that the chromatographic peak for the active pharmaceutical ingredient (API) is not compromised by co-elution with impurities, degradants, or excipients. This guide provides a comparative analysis of the primary techniques for peak purity and interference testing, supported by experimental data and detailed protocols.
Core Principles of Peak Purity Assessment
The fundamental goal of peak purity assessment is to demonstrate the spectral homogeneity of a chromatographic peak. A pure peak originates from a single compound, meaning its UV spectrum remains consistent throughout the peak's elution—at the upslope, apex, and downslope. Conversely, a change in the spectral shape across the peak is a strong indicator of co-elution [27].
These assessments are typically performed during forced degradation studies, where drug substances and products are stressed under various conditions (e.g., heat, light, acid/base hydrolysis, and oxidation) to generate potential degradants. A successful specificity test shows that the analytical method can separate and accurately quantify the API in the presence of these degradation products [26] [27].
Comparative Analysis of Peak Purity Techniques
The following table summarizes the key techniques available for peak purity assessment, each with distinct advantages and limitations.
Table 1: Comparison of Major Peak Purity Assessment Techniques
| Technique | Underlying Principle | Detection Capability | Key Strengths | Key Limitations |
|---|---|---|---|---|
| PDA-Facilitated UV PPA | Compares UV spectral shapes across a peak using algorithms (e.g., purity angle vs. threshold) [27]. | Detects co-eluting compounds with differing UV spectra. | - Non-destructive; standard with most HPLC systems [27].- High efficiency and minimal extra cost [27]. | - False negatives if impurities have similar UV spectra or poor UV response [27].- False positives from baseline shifts or suboptimal processing [27]. |
| Mass Spectrometry-Facilitated PPA | Monitors precursor ions, product ions, and/or adducts across a peak in TIC or EIC [27]. | Detects co-eluting compounds with differing mass spectra. | - High sensitivity and selectivity [27].- Provides structural identity of interferents. | - Destructive technique.- Higher instrument cost and operational complexity.- Not always compatible with all mobile phases (e.g., non-volatile buffers). |
| Two-Dimensional Correlation (2D-Corr) Analysis | Applies chemometrics to data from multi-channel detectors (e.g., coulometric array); synchronous/asynchronous maps reveal co-elution [28]. | Detects subtle differences in compound behavior across multiple detection channels. | - Powerful for analyzing complex, overlapping peaks [28].- Can be automated. | - Requires specialized software and chemometric knowledge [28].- Limited to specific multi-channel detectors. |
| Orthogonal Chromatography (2D-LC) | Separates the peak of interest using a second chromatographic dimension with a different separation mechanism. | High-resolution separation of co-eluting compounds. | - Considered a "gold standard" for unambiguous separation. | - Technically complex and time-consuming.- Requires sophisticated instrumentation. |
Supporting Experimental Data
A 2022 study utilizing 2D-corr analysis with a 16-sensor coulometric array detector provides a clear example of this technique's power. The analysis was performed on a peak from a Capsicum chili extract that appeared homogeneous by conventional HPLC. The 2D-corr synchronous and asynchronous contour plots revealed the presence of at least three co-eluting species, which were later identified by mass spectrometry as quinic acid, ascorbic acid, and phenylalanine [28]. This demonstrates how advanced chemometric techniques can uncover interferences missed by one-dimensional analysis.
Experimental Protocols for Key Techniques
Protocol 1: PDA-Facilitated Peak Purity Assessment
This is the most common protocol for establishing specificity in stability-indicating methods [27].
Sample Preparation:
- Forced Degradation: Subject the drug substance and product to relevant stress conditions (e.g., 0.1N HCl and 0.1N NaOH at 60°C for 1 week, 3% H₂O₂ at room temperature for 24 hours, heat at 105°C for 1 week, and light exposure per ICH conditions). Target degradation between 5-20% [26] [27].
- Prepare samples of the unstressed API, placebo (excipients), and stressed samples.
Instrumentation and Data Acquisition:
- Use an HPLC system equipped with a Photodiode Array (PDA) detector.
- Inject the prepared samples and acquire chromatographic data with continuous spectral collection across the peaks of interest. Ensure the signal is within the linear range of the detector.
Data Processing and Analysis:
- Process the data using a Chromatography Data System (CDS) with peak purity algorithm (e.g., Waters Empower, Agilent OpenLab, or Shimadzu LabSolutions).
- The software compares spectra from different time points across the peak (front, apex, tail) against a reference spectrum (usually the apex). It calculates a purity angle and a purity threshold [27].
- Interpretation: A peak is considered spectrally pure if the purity angle is less than the purity threshold [27].
Protocol 2: Mass Spectrometry-Facilitated Peak Purity
This technique is used when higher sensitivity and selectivity are required or when PDA results are inconclusive [27].
Sample Preparation: Follow the same forced degradation and sample preparation as in Protocol 1.
Instrumentation and Data Acquisition:
- Use an HPLC system coupled to a mass spectrometer (e.g., single quadrupole or tandem MS).
- Acquire data in Total Ion Chromatogram (TIC) or Selected Ion Monitoring (SIM) mode. For enhanced specificity, use Multiple Reaction Monitoring (MRM) on a tandem MS.
Data Processing and Analysis:
- Extract ion chromatograms (EICs) for the specific mass-to-charge ratio (m/z) of the API and potential degradants.
- Examine the mass spectra across the API peak (front, apex, tail).
- Interpretation: The peak is considered pure if the mass spectra across the peak show consistent precursor and product ions attributable only to the API. The presence of other ions or changing ratios indicates a co-eluting impurity [27].
Visualizing Workflows and Relationships
The following diagrams illustrate the logical workflow for establishing specificity and the scientific principles behind PDA-based peak purity assessment.
Diagram Title: Specificity Establishment Workflow
Diagram Title: PDA Peak Purity Angle Principle
The Scientist's Toolkit: Essential Research Reagents and Materials
Table 2: Key Materials for Peak Purity and Forced Degradation Studies
| Item | Function / Purpose | Example / Specification |
|---|---|---|
| High-Purity Reference Standards | Serves as the benchmark for identity, retention time, and spectral comparison. | API, known impurities, and degradation products [26]. |
| Chromatography Data System (CDS) | Software for instrument control, data acquisition, processing, and peak purity algorithm calculation. | Waters Empower, Agilent OpenLab, Shimadzu LabSolutions [27]. |
| PDA Detector | Captures full UV-Vis spectra for every data point across a chromatographic peak, enabling spectral comparison. | Standard feature on modern HPLC/UHPLC systems [29]. |
| LC-MS Instrumentation | Provides definitive identification of co-eluting species based on molecular weight and fragmentation pattern. | Single quadrupole MS (e.g., Agilent MSD) or tandem MS systems [27]. |
| Chemometric Software | Enables advanced data analysis techniques like 2D-Corr for complex peak deconvolution. | RStudio with custom scripts, or commercial multivariate analysis packages [28]. |
| Stress Reagents | Used in forced degradation studies to generate potential degradants. | Hydrochloric Acid (HCl), Sodium Hydroxide (NaOH), Hydrogen Peroxide (H₂O₂) [26]. |
Establishing specificity through robust peak purity testing is non-negotiable for developing reliable analytical methods in drug development. While PDA-based PPA is the most widely used and efficient first-line approach, its limitations necessitate a method-dependent strategy. MS-assisted PPA offers superior sensitivity and identification power, while emerging techniques like 2D-corr analysis provide powerful tools for deconvoluting complex co-elutions. The most defensible validation strategy often involves a combination of these techniques, supported by well-designed forced degradation studies, to provide irrefutable evidence that an analytical method is truly stability-indicating and fit for its intended purpose.
Linearity and range are foundational parameters in analytical method validation, ensuring that a method produces results that are directly proportional to the concentration of the analyte in a given sample [30]. These parameters confirm that an analytical procedure will perform reliably across the entire spectrum of expected concentrations, providing assurance that the method is fit-for-purpose for its intended application, whether for drug substance assay, impurity quantification, or other critical quality attribute testing.
The linearity of an analytical procedure is its ability, within a defined range, to obtain test results that are directly proportional to the concentration (amount) of analyte in the sample [7]. This proportional relationship is fundamental for accurate quantification, as it allows for the reliable calculation of unknown concentrations from instrumental responses using a calibration curve. The range of an analytical procedure is the interval between the upper and lower concentrations of analyte (including these concentrations) for which it has been demonstrated that the analytical procedure has a suitable level of precision, accuracy, and linearity [7]. The range is therefore dependent on the established linearity but also incorporates accuracy and precision considerations.
For pharmaceutical analysis, establishing linearity and range is not merely a regulatory formality but a scientific necessity to ensure that product quality and patient safety are not compromised by unreliable analytical measurements. Properly validated methods form the bedrock of quality control systems, process understanding, and product knowledge throughout the drug development lifecycle [31].
Regulatory Framework and Key Definitions
Regulatory Expectations
International regulatory guidelines provide a framework for linearity and range validation, though specific acceptance criteria should be justified based on the method's intended use [31]. The International Council for Harmonisation (ICH) Q2(R1) guideline provides the primary framework for analytical method validation, while the United States Pharmacopeia (USP) chapters <1225> and <1033> offer additional guidance, particularly emphasizing that acceptance criteria should be consistent with the method's intended purpose [31] [7].
The FDA states that "an analytical procedure is developed to test a defined characteristic of the drug substance or drug product against established acceptance criteria for that characteristic" [31]. This underscores the importance of designing validation studies that reflect the actual conditions under which the method will be used, with acceptance criteria that ensure reliable performance.
Distinguishing Linearity from Range
While linearity and range are interrelated, they represent distinct validation characteristics:
Linearity demonstrates the quality of the relationship between concentration and response, indicating how well the method can quantify varying amounts of the analyte [5]. It is evaluated through statistical measures of the calibration curve, including correlation coefficient, slope, and y-intercept.
Range defines the span of usable concentrations where the method performs with suitable precision, accuracy, and linearity [5]. It represents the practical operating interval where the method has been demonstrated to be reliable.
Other related terms include working range (the range where the method gives results with an acceptable uncertainty, potentially wider than the linear range) and calibration range (the interval between upper and lower analyte concentrations that can be determined with demonstrated accuracy, precision, and linearity) [32].
Experimental Design for Linearity and Range Studies
Preparation of Standards
The foundation of a robust linearity study lies in the careful preparation of calibration standards. A minimum of five concentration levels is recommended, with many guidelines suggesting 5-8 levels for adequate characterization of the linear response [9] [8] [7]. These levels should be evenly distributed across the specified range, typically spanning 50% to 150% of the target concentration or the expected working range [8] [32].
For impurity methods, the range should cover from the quantitation limit (QL) to at least 150% of the specification limit [5]. Each concentration level should be prepared independently rather than through serial dilution from a single stock solution to avoid propagating errors [8]. Analyzing each level in triplicate provides essential data for assessing precision across the concentration range and improves the reliability of the statistical evaluation [8].
Concentration Selection and Range Bracketting
Proper selection of concentration levels requires strategic bracketing of the expected sample concentrations. The calibration range should extend beyond the expected sample concentrations to ensure reliable extrapolation, with points distributed evenly across the working range [8]. The table below illustrates recommended concentration spacing for linearity studies:
| Concentration Level | Bracket Selection Criteria | Typical Spacing |
|---|---|---|
| Lower Limit | 50-80% of LLOQ | Tighter spacing |
| Low Range | 1-2× LLOQ | 25-50% intervals |
| Mid Range | Expected sample range | 50-100% intervals |
| High Range | 80-100% of ULOQ | 25-50% intervals |
When designing the range, consider the analyte's physicochemical properties and its behavior across different concentrations. Some compounds exhibit linear responses only within specific ranges due to solubility limitations or detection thresholds [8]. Account for potential matrix effects that may cause non-linearity at concentration extremes, particularly with biological samples where protein binding can affect linearity at higher concentrations [8].
Experimental Workflow
The following diagram illustrates the comprehensive workflow for conducting linearity and range studies, from initial planning through final documentation:
Statistical Evaluation and Acceptance Criteria
Regression Analysis and Residual Evaluation
Statistical evaluation of linearity data requires more than just calculating a correlation coefficient. While the coefficient of determination (R²) is commonly used, with a typical acceptance criterion of ≥0.995 to ≥0.997 [8] [5], this value alone can be misleading as it may mask subtle non-linear patterns [8].
A more comprehensive approach includes visual inspection of residual plots, which provides essential evidence of linearity that numerical values alone might miss [31] [8]. In a properly linear method, residuals should be randomly distributed around zero with no discernible pattern. Systematic patterns in residual plots may indicate issues with the regression model:
- U-shaped curves suggest a quadratic relationship, potentially requiring a non-linear model [8]
- Funnel shapes indicate heteroscedasticity (non-constant variance), possibly necessitating data transformation or weighted regression [8]
- Consistent directional trends may suggest matrix effects or other systematic biases
The use of studentized residuals can further enhance linearity assessment. By establishing limits at ±1.96 (95% confidence level), one can statistically determine the point at which an assay response ceases to be linear [31].
Acceptance Criteria Comparison
Acceptance criteria for linearity and range should be established based on the method's intended use and the analytical technology employed. The table below summarizes typical acceptance criteria for different method types and parameters:
| Validation Parameter | Traditional Criteria | Tolerance-Based Criteria | Application Context |
|---|---|---|---|
| Linearity (R²) | ≥0.995 to ≥0.997 [8] [5] | N/A | Universal |
| Range | 50-150% of target [8] | Covers 80-120% of product specifications [31] | Drug substance/product assay |
| Repeatability | %RSD based on concentration | ≤25% of tolerance (chemical methods) [31] | Relative to specification limits |
| Bias/Accuracy | % recovery based on theoretical | ≤10% of tolerance [31] | Ensures minimal method bias relative to specifications |
For bioassays, which typically exhibit higher variability, more lenient criteria may be appropriate, such as ≤50% of tolerance for repeatability while maintaining ≤10% of tolerance for bias [31].
Tolerance-based criteria are particularly valuable as they evaluate method performance relative to the product specification limits the method is intended to measure [31]. This approach directly addresses the method's impact on out-of-specification (OOS) rates and provides a more meaningful assessment of its fitness for purpose.
Troubleshooting Common Linearity Issues
Identifying and Addressing Non-linearity
When linearity problems occur during method validation, systematic troubleshooting is essential. Common issues and their solutions include:
Detector saturation at high concentrations: This manifests as a flattening of the response curve at higher concentrations. Solutions include sample dilution, reducing injection volume, or using a shorter pathlength in UV detection [8].
Matrix effects causing non-linearity: Particularly problematic in biological samples, where matrix components can interfere with analyte response. Solutions include improved sample cleanup, using matrix-matched calibration standards, or employing the standard addition method [8].
Insufficient detector response at low concentrations: This results in poor linearity at the lower end of the range. Approaches to address this include sample concentration, increasing injection volume, or using a more sensitive detection technique [8].
Inappropriate regression model: Simple linear regression may be inadequate for some analytical responses. When visual inspection of residuals reveals systematic patterns, consider weighted regression (for heteroscedastic data) or polynomial fitting for defined curvilinear relationships [8].
Expanding the Linear Range
For techniques with inherently narrow linear ranges, such as LC-MS, several strategies can extend the usable range:
Employ isotopically labeled internal standards (ILIS): While the signal-concentration dependence for the analyte may not be linear, the ratio of analyte to internal standard signals may exhibit linearity across a wider concentration range [32].
Reduce charge competition in ESI-MS: In LC-ESI-MS, decreasing the flow rate (e.g., using nano-ESI) can reduce charge competition and extend the linear dynamic range [32].
Strategic dilution of samples: For samples with concentrations outside the linear range, appropriate dilution can bring the measurement within the established linear range [32].
Essential Research Reagents and Materials
Successful linearity and range studies require high-quality materials and reagents. The following table outlines essential items and their functions:
| Reagent/Material | Function | Critical Considerations |
|---|---|---|
| Certified Reference Standards | Provides known purity analyte for accurate standard preparation | Should be traceable to certified reference materials |
| Appropriate Solvent/Matrix | Dissolves and stabilizes standards across concentration range | Should match sample matrix to account for matrix effects |
| Blank Matrix | Assesses specificity and establishes baseline response | Must be free of interfering components |
| High-Purity Water | Preparation of mobile phases and aqueous standards | Should be HPLC-grade or equivalent |
| Volumetric Glassware | Accurate preparation and dilution of standards | Class A recommended for highest accuracy |
| Calibrated Pipettes | Precise transfer of solutions during standard preparation | Regular calibration essential for measurement accuracy |
| Stable Internal Standard | Normalizes analytical response (for internal standard methods) | Should be structurally similar but resolvable from analyte |
Documentation and Regulatory Compliance
Meeting Documentation Requirements
Comprehensive documentation is essential for demonstrating regulatory compliance. Documentation should include:
Raw data alongside statistical analysis results, including correlation coefficient, y-intercept, slope, and residual values, with acceptance criteria clearly stated for each parameter [8]
Complete audit trail of data processing steps, including any data points excluded from regression analysis and the scientific rationale for exclusion [8]
Visual representations of calibration curves and residual plots to support numerical statistics [8]
Justification for the selected range based on the method's intended use and the demonstrated linearity, accuracy, and precision across that range [7]
Regulatory authorities expect that "the validation target acceptance criteria should be chosen to minimize the risks inherent in making decisions from bioassay measurements and to be reasonable in terms of the capability of the art" [31]. When product specifications exist, "acceptance criteria can be justified on the basis of the risk that measurements may fall outside of the product specification" [31].
Method Transfer Considerations
When transferring methods between laboratories, additional verification of linearity and range is typically required. Acceptance criteria for method transfer often include:
- R² > 0.995 for linear regression
- Slope ratio of 0.98-1.02 between transferring and receiving laboratories
- Residuals within ±2% across the validated range [8]
These criteria ensure that the method performance remains consistent across different laboratory environments, instruments, and analysts.
Properly conducted linearity and range studies are fundamental to establishing reliable analytical methods that generate meaningful data throughout the drug development lifecycle. By implementing rigorous experimental designs, applying appropriate statistical evaluations with tolerance-based acceptance criteria when possible, and thoroughly documenting the process, researchers can ensure their methods are truly fit-for-purpose. The approaches outlined in this guide provide a framework for developing scientifically sound, regulatory-compliant methods that support the accurate assessment of drug product quality and ultimately contribute to patient safety. As regulatory guidance continues to evolve, particularly with the increasing application of AI and advanced analytical technologies [33] [34], the fundamental principles of proper linearity and range validation remain essential for generating trustworthy analytical data.
In analytical chemistry, the Limit of Detection (LOD) and Limit of Quantification (LOQ) are fundamental parameters that define the sensitivity and applicability of an analytical procedure. The LOD represents the lowest concentration of an analyte that can be reliably detected—but not necessarily quantified—under stated experimental conditions, answering the question, "Is there something there?" [35] [10]. In contrast, the LOQ is the lowest concentration that can be quantified with acceptable precision and accuracy, addressing the question, "How much is there?" [11] [36]. These parameters are essential components of method validation, providing critical information about the capability of any analytical method to determine very low concentrations of analytes, which is particularly crucial in pharmaceutical analysis, food safety testing, and environmental monitoring [10] [37].
The International Council for Harmonisation (ICH) guideline Q2(R2) on the validation of analytical procedures recognizes multiple approaches for determining these limits, including visual evaluation, signal-to-noise ratio, and calibration curve-based methods using standard deviation and slope [35] [38]. However, research has demonstrated that these approaches are far from equivalent, yielding significantly different values and varying degrees of reliability [16] [39] [37]. This comparison guide objectively examines these three established methodologies, providing experimental protocols, comparative data, and practical recommendations to help researchers select the most appropriate approach for their specific analytical needs.
Key Definitions and Regulatory Context
According to ICH Q2(R2), the LOD is "the lowest amount of analyte in a sample which can be detected but not necessarily quantitated as an exact value," while the LOQ is "the lowest amount of analyte in a sample which can be quantitatively determined with suitable precision and accuracy" [38]. These definitions establish the fundamental distinction between detection (confirming presence) and quantification (measuring amount). The clinical and laboratory standards institute (CLSI) further refines this concept by introducing the Limit of Blank (LoB), defined as the highest apparent analyte concentration expected to be found when replicates of a blank sample containing no analyte are tested [11] [36]. This establishes a statistical baseline for distinguishing true analyte signals from background noise.
The ICH guideline explicitly endorses three primary approaches for determining LOD and LOQ [35] [10]:
- Visual Evaluation: Direct assessment by analysis of samples with known concentrations.
- Signal-to-Noise Ratio: Applicable for procedures exhibiting baseline noise.
- Standard Deviation and Slope: Based on the standard deviation of the response and the slope of the calibration curve.
Each method carries distinct assumptions, applications, and limitations, which must be understood to ensure appropriate implementation and interpretation of results.
Decision Workflow for Method Selection
The following diagram illustrates a systematic approach for selecting the most appropriate LOD/LOQ determination method based on analytical requirements and method characteristics:
Comparative Analysis of Methods
Visual Evaluation Method
Experimental Protocol
The visual evaluation method, also referred to as the empirical method, involves the direct analysis of samples with known concentrations of analyte to establish the minimum level at which detection or quantification is feasible [37]. The step-by-step methodology includes:
- Sample Preparation: Prepare a series of blank samples (containing no analyte) and spike samples with known, gradually reduced concentrations of the target analyte in the appropriate matrix [37]. For aflatoxin analysis in hazelnuts, this involved adding 250 μL of a 10-fold diluted stock standard solution to 25g blank samples to achieve 1 μg/kg total aflatoxin concentration [37].
- Analysis: Analyze multiple replicates (typically n=10) of each concentration level using the complete analytical procedure [37].
- Detection Assessment: Determine the lowest concentration where the analyte can be consistently detected by visual inspection of chromatograms or analytical outputs.
- Calculation: For the LOD, use the formula LOD = 3 × SD + B~ave~, where SD is the standard deviation of measurements and B~ave~ is the average concentration of spike samples [37]. For the LOQ, apply LOQ = 10 × SD + B~ave~ [37].
Applications and Limitations
The visual method is particularly valuable for non-instrumental procedures or methods where baseline noise is not easily measurable [10]. Examples include inhibition zone tests for antibiotics or titration endpoints [10]. The primary advantage of this approach is its practical simplicity and direct empirical observation, which often provides realistic, practically relevant limits [37]. However, this method suffers from subjectivity, as it relies on analyst judgment, and may yield less precise values compared to instrumental approaches [35]. It is generally considered more arbitrary than statistical approaches and is often best employed as a confirmatory technique alongside other methods [35].
Signal-to-Noise Ratio Method
Experimental Protocol
The signal-to-noise (S/N) method is exclusively applicable to analytical procedures that exhibit measurable baseline noise, such as chromatographic or spectroscopic techniques [10] [37]. The implementation protocol consists of:
- Blank Analysis: Analyze a sufficient number of blank samples (n≥10) to characterize the baseline noise. The noise can be measured as peak-to-peak variation in a clean region of the chromatogram near the analyte retention time [37].
- Low-Concentration Sample Analysis: Analyze multiple replicates of samples containing known low concentrations of analyte [40].
- Signal-to-Noise Calculation: Compare measured signals from samples with known low concentrations of analyte with those of blank samples [37]. The S/N ratio is calculated by comparing the average peak height values of samples containing the analyte and the noise peak-to-peak average value of blank samples [37].
- Threshold Application: Establish the LOD at a S/N ratio of 3:1 and the LOQ at a S/N ratio of 10:1 [10] [37]. Some regulatory bodies may accept a 2:1 ratio for LOD estimation [10].
Applications and Limitations
The S/N method is widely implemented in chromatographic techniques like HPLC, UPLC, and GC, where baseline noise is readily measurable [10] [41]. Its key advantages include instrument-based objectivity, straightforward implementation, and direct visualization of method performance at low concentrations [35]. However, this approach requires a stable baseline with consistent noise characteristics and may not adequately account for matrix effects or extraction variability [41]. The S/N method also depends on injection volume and chromatographic conditions, making it somewhat less robust for cross-laboratory comparisons without strict protocol standardization [41].
Standard Deviation and Slope Method (Calibration Curve)
Experimental Protocol
The standard deviation and slope method, based on calibration curve parameters, is considered the most statistically rigorous approach by many researchers [35] [16]. The methodology involves:
- Calibration Curve Preparation: Construct a specific calibration curve using samples containing the analyte in the range of the expected LOD and LOQ [35] [37]. The calibration standards should be prepared in the same matrix as the samples and processed through the entire analytical procedure.
- Regression Analysis: Perform linear regression analysis on the calibration data. From the regression output, obtain the slope (S) of the calibration curve and the standard error of the regression or the standard deviation of the y-intercepts [35].
- Calculation: Apply the ICH-recommended formulas: LOD = 3.3 × σ / S and LOQ = 10 × σ / S, where σ represents the standard deviation of the response and S is the slope of the calibration curve [35] [10]. The standard deviation (σ) can be estimated as the standard error of the calibration curve obtained from linear regression analysis [35].
Applications and Limitations
The calibration curve method is particularly valuable for instrumental techniques with linear response in the low concentration range, such as HPLC-UV, LC-MS, and spectrophotometric methods [35] [39]. Its principal advantages include statistical robustness, minimal subjectivity, and comprehensive accounting of method variability through the calibration parameters [35] [16]. However, this approach requires careful preparation of low-concentration standards and assumes linear response in the range of determination [35]. The method may provide underestimated values if the calibration curve exhibits poor linearity at low concentrations or if the standard deviation estimate does not adequately capture all sources of method variability [16].
Comparative Experimental Data
Recent studies have directly compared these three methods, revealing significant differences in calculated LOD and LOQ values. The following table summarizes findings from comparative studies:
Table 1: Comparison of LOD and LOQ Values (μg/kg) for Aflatoxins in Hazelnuts Using Different Calculation Methods [37]
| Aflatoxin Type | Visual Evaluation LOD | Visual Evaluation LOQ | Signal-to-Noise LOD | Signal-to-Noise LOQ | Calibration Curve LOD | Calibration Curve LOQ |
|---|---|---|---|---|---|---|
| AFG1 | 0.27 | 0.49 | 0.13 | 0.42 | 0.36 | 1.10 |
| AFB1 | 0.25 | 0.46 | 0.11 | 0.38 | 0.35 | 1.06 |
| AFG2 | 0.08 | 0.19 | 0.04 | 0.12 | 0.10 | 0.32 |
| AFB2 | 0.07 | 0.18 | 0.03 | 0.11 | 0.09 | 0.29 |
Table 2: Method Comparison for HPLC Analysis of Carbamazepine and Phenytoin [39]
| Drug | Signal-to-Noise LOD | Signal-to-Noise LOQ | Standard Deviation & Slope LOD | Standard Deviation & Slope LOQ |
|---|---|---|---|---|
| Carbamazepine | Lowest values | Lowest values | Highest values | Highest values |
| Phenytoin | Lowest values | Lowest values | Highest values | Highest values |
These comparative studies consistently demonstrate that the signal-to-noise method typically yields the lowest LOD and LOQ values, while the calibration curve approach provides more conservative, higher values [39] [37]. The visual evaluation method generally produces intermediate values that often reflect practical laboratory capabilities [37].
Advanced Approaches and Validation Considerations
Emerging Graphical Tools: Uncertainty and Accuracy Profiles
Recent research has introduced advanced graphical tools for determining LOD and LOQ, including uncertainty profiles and accuracy profiles [16]. These approaches are based on tolerance intervals and provide simultaneous assessment of method validity and measurement uncertainty:
- Uncertainty Profile: This innovative validation approach combines uncertainty intervals with acceptability limits in a single graphic [16]. The method calculates β-content tolerance intervals and compares them to pre-defined acceptance limits. The LOQ is determined as the intersection point of the uncertainty interval and acceptability limits at low concentrations [16].
- Accuracy Profile: Similar to uncertainty profiles, accuracy profiles graphically represent the total error of measurements (combining bias and precision) across the concentration range, with acceptability limits [16].
Comparative studies indicate that these graphical approaches provide more realistic and relevant assessments of LOD and LOQ compared to classical statistical methods, which tend to provide underestimated values [16]. The uncertainty profile method, in particular, offers precise estimation of measurement uncertainty while determining quantification limits [16].
Validation Requirements and Best Practices
Regardless of the calculation method employed, regulatory guidelines require experimental verification of estimated LOD and LOQ values [35]. The validation process should include:
- Experimental Confirmation: Prepare and analyze multiple samples (typically n=6) at the estimated LOD and LOQ concentrations to confirm that they meet detection or quantification criteria [35].
- Precision Assessment: At the LOQ, demonstrate acceptable precision, typically with a coefficient of variation (CV) of ±15% or better [35] [36].
- Signal-to-Noise Verification: For chromatographic methods, confirm that the LOD consistently meets S/N requirements of 3:1 and LOQ meets 10:1 ratio [35].
- Visual Assessment: Verify that proposed limits appear reasonable upon visual inspection of chromatograms or analytical outputs [35].
Essential Research Reagent Solutions
The following table outlines key reagents and materials required for implementing LOD and LOQ determination methods in analytical research:
Table 3: Essential Research Reagent Solutions for LOD/LOQ Studies
| Reagent/Material | Function/Purpose | Application Examples | Critical Considerations |
|---|---|---|---|
| Matrix-Matched Blank Samples | Provides analyte-free background for noise assessment and spike recovery studies | Food matrices (hazelnuts), biological fluids (plasma), environmental samples | Commutability with patient specimens; representative matrix effects [11] [37] |
| Certified Reference Materials | Preparation of calibration standards and spike samples at known concentrations | Aflatoxin analysis, pharmaceutical compounds, clinical biomarkers | Traceability to reference standards; appropriate solvent compatibility [37] |
| Immunoaffinity Columns | Sample cleanup and isolation of analytes from complex matrices | AflatTest-P columns for aflatoxin extraction from food samples [37] | Specificity for target analytes; binding capacity; recovery efficiency |
| Chromatographic Mobile Phases | HPLC/UPLC separation with optimized sensitivity | Water-acetonitrile-methanol mixtures with modifiers [37] | HPLC-grade purity; fluorescence compatibility; minimal background noise |
| Internal Standards | Correction for procedural variability and injection volume inconsistencies | Atenolol as internal standard for sotalol in plasma [16] | Structural similarity to analyte; no interference with detection; stable response |
The comparative analysis of LOD and LOQ determination methods reveals that each approach carries distinct advantages, limitations, and appropriate applications. The signal-to-noise method typically yields the most optimistic sensitivity values but requires stable baseline conditions [39] [37]. The calibration curve approach provides statistically rigorous, conservative estimates suitable for regulatory submissions [35] [16]. The visual evaluation method offers practical, empirically-derived values that often reflect real-world laboratory capabilities [37].
For researchers and method development scientists, the following evidence-based recommendations emerge:
- For regulatory submissions and maximum scientific rigor, employ the calibration curve method using standard deviation and slope, as it aligns with ICH guidelines and provides comprehensive statistical assessment [35] [16].
- For chromatographic methods with stable baselines, the signal-to-noise approach offers practical implementation and direct visualization of method performance [10] [41].
- For non-instrumental methods or initial feasibility assessment, visual evaluation provides straightforward, practically relevant limits [10] [37].
- For comprehensive method characterization, consider implementing emerging graphical tools like uncertainty profiles, which simultaneously assess validity and measurement uncertainty [16].
- Regardless of the calculation method, always perform experimental verification with replicate samples at the proposed limits to demonstrate practical achievable performance [35].
The significant variability in LOD and LOQ values obtained through different calculation methods [39] [37] underscores the necessity of clearly documenting the methodology employed and maintaining consistency throughout method development, validation, and transfer processes. By selecting the appropriate determination method based on analytical requirements, matrix characteristics, and regulatory context, researchers can establish scientifically sound, fit-for-purpose sensitivity limits that reliably support drug development, food safety testing, and clinical research.
Implementing a Robust Calibration Curve Strategy
In analytical chemistry, a calibration curve (also known as a standard curve) is a fundamental tool that establishes the relationship between the analytical response of an instrument and the concentration of an analyte. This strategy is essential for the accurate quantitative measurement of sample composition, allowing researchers to convert instrument readings (e.g., peak area, absorbance) into meaningful concentration values for unknown samples [42]. The robustness of this calibration directly impacts the reliability of all subsequent data, making the choice of calibration model and its proper validation a critical step in methods used by drug development professionals and researchers.
The process typically involves preparing and measuring a series of standard solutions of known concentration. A line or curve is then fitted to this data, and the resulting mathematical equation is used to interpolate the concentrations of unknown samples [42]. A well-executed calibration strategy not only averages random errors from preparing and reading standard solutions but also allows for the detection and compensation of non-linearity in the instrument's response [42]. This guide provides a comparative analysis of prevalent calibration models, supported by experimental data and detailed protocols, framed within the essential context of method validation parameters such as specificity, linearity range, LOD, and LOQ.
Comparative Analysis of Calibration Models
Three primary calibration models are widely employed in analytical laboratories, each with distinct advantages, limitations, and optimal use cases. The choice of model depends on factors such as sample complexity, the availability of a blank matrix, and the required precision.
External Standardization
Description: This is the simplest and most common calibration method. It involves comparing the detector response of unknown samples directly to a calibration curve generated from known standard solutions [43].
- Best For: Methods with simple sample preparation and excellent injection volume precision, such as the analysis of a pharmaceutical tablet that is simply dissolved, filtered, and injected [43].
- Experimental Workflow: A series of calibration standards is prepared to cover the expected sample concentration range. These are injected, and their responses are plotted against concentration to generate a regression line (e.g.,
y = slope * x + intercept). The unknown concentration is calculated by rearranging the equation tox = (y - intercept) / slope[43] [42].
Internal Standardization
Description: This method involves adding a known, constant amount of a second compound (the internal standard) to all samples, blanks, and calibration standards before any sample preparation steps. The calibration curve is then constructed using the ratio of the analyte response to the internal standard response [43].
- Best For: Methods involving extensive sample preparation, potential sample loss, or questionable autosampler precision. The internal standard tracks and corrects for these variances [43].
- Experimental Workflow: A suitable internal standard (not present in the original sample) is selected and added to every sample and calibrator. The analyte-to-internal standard response ratio is calculated for each calibration standard and plotted against the analyte concentration. The resulting curve is used to determine unknowns based on their measured ratio [43].
Standard Additions
Description: This technique is used when it is impossible to obtain an analyte-free blank matrix (e.g., measuring endogenous compounds in blood). A series of calibration standards is added directly to aliquots of the sample itself [43].
- Best For: Situations where a blank matrix is unavailable, and the sample matrix may cause signal suppression or enhancement [43].
- Experimental Workflow: Multiple aliquots of the sample are spiked with known, varying concentrations of the analyte. These are analyzed, and the response is plotted against the added concentration. The regression line is extrapolated to the left until it intercepts the x-axis; the absolute value of this x-intercept represents the original concentration of the analyte in the unknown sample [43].
Table 1: Comparison of Key Calibration Models
| Model | Principle | Best For | Advantages | Limitations |
|---|---|---|---|---|
| External Standardization [43] | Direct comparison of response to external standards. | Simple samples with minimal preparation and high precision. | Simplicity; fewer components needed. | Susceptible to errors from sample loss or injection inaccuracy. |
| Internal Standardization [43] | Normalization of response using an internal standard. | Complex sample preparation; methods with potential volumetric errors. | Corrects for sample loss and injection variability; improved precision. | Requires finding a suitable internal standard; adds complexity. |
| Standard Additions [43] | Spiking analyte into the sample itself. | Analyses where a blank matrix is unavailable. | Compensates for matrix effects. | More labor-intensive; requires more sample material. |
Experimental Protocols for Calibration and Validation
To ensure a calibration strategy is robust, it must be implemented following rigorous experimental protocols and validated against established performance criteria.
Protocol for Internal Standard Method Evaluation
The decision between external and internal standardization can be made empirically [43]:
- Preparation: Prepare calibrators containing an internal standard.
- Analysis: Analyze the samples and process the data using both the external standard and internal standard techniques.
- Back-Calculation: Calculate the theoretical concentration of each calibrator using both calibration curves.
- Error Calculation: Determine the percentage error (residuals) by which each back-calculated point deviates from its true value.
- Comparison: Compare the error profiles. If the internal standard method shows a significant reduction in error (e.g., average absolute error reduced from 2.74% to 1.22%), its use is justified [43].
Protocol for Determining LOD and LOQ via Calibration Curve
The ICH Q2(R1) guideline describes a method for determining the Limit of Detection (LOD) and Limit of Quantification (LOQ) based on the standard deviation of the response and the slope of the calibration curve [35] [44].
- Calibration in Low Range: A specific calibration curve should be studied using samples containing the analyte in the range of the presumed LOD/LOQ. The highest concentration should not exceed 10 times the presumed LOD [44].
- Linear Regression: Perform a linear regression analysis on the calibration data. The key parameters needed are the slope (S) and the standard deviation of the response (σ). The standard deviation can be estimated as:
- Calculation:
- Experimental Verification: The calculated LOD and LOQ values are estimates and must be confirmed experimentally. This is done by injecting multiple samples (e.g., n=6) prepared at the LOD and LOQ concentrations to demonstrate that they meet the required performance (e.g., S/N of ~3:1 for LOD and S/N of 10:1 with acceptable precision for LOQ) [35].
Table 2: Summary of LOD/LOQ Calculation Methods and Results from an Example Dataset [44]
| Experiment | Slope (m) | Standard Deviation (SD) of Y-Intercept | LOD (µg/mL) using SD Y-Intercept | Residual Standard Deviation | LOD (µg/mL) using Residual SD |
|---|---|---|---|---|---|
| 1 | 15878 | 2943 | 0.61 | 3443 | 0.72 |
| 2 | 15814 | 2849 | 0.59 | 3333 | 0.70 |
| 3 | 16562 | 1429 | 0.28 | 1672 | 0.33 |
| 4 | 15844 | 2937 | 0.61 | 3436 | 0.72 |
Visualizing the Calibration and Validation Workflow
The following diagram illustrates the logical workflow for developing and validating a robust calibration strategy, integrating the key concepts of model selection, curve preparation, and computation of validation parameters.
The Scientist's Toolkit: Essential Reagents and Materials
A robust calibration strategy relies on high-quality materials and reagents. The following table details key items essential for implementing the protocols discussed.
Table 3: Essential Research Reagent Solutions for Calibration Experiments
| Item | Function / Description |
|---|---|
| Primary Reference Standard | A highly pure characterized substance used to prepare the stock solution of the analyte, providing the foundation for accuracy [30]. |
| Internal Standard | A compound, chemically similar to the analyte but not found in the sample, added to correct for volumetric and sample preparation variances [43]. |
| Blank Matrix | A sample material (e.g., placebo formulation, drug-free plasma) that is identical to the sample matrix but free of the analyte, used to prepare matrix-matched standards and assess specificity [43] [30]. |
| High-Purity Solvents | Used for dissolving standards and samples. Purity is critical to prevent interference and baseline noise that can affect sensitivity (LOD/LOQ) [35]. |
| Calibration Spreadsheet/Templates | Pre-configured software tools (e.g., in Excel or OpenOffice Calc) that automate the plotting, regression fitting, and concentration calculations, reducing human error [42]. |
Selecting and implementing a robust calibration strategy is not a one-size-fits-all process but a critical, deliberate exercise in analytical science. As demonstrated, the choice between external standardization, internal standardization, and the method of standard additions hinges on the specific sample properties and analytical requirements. Furthermore, a calibration curve's utility is proven only through rigorous validation against key parameters.
The determination of the linearity range, LOD, and LOQ provides the necessary metrics to define the operational scope and limitations of the method. By following the structured comparative approach and experimental protocols outlined in this guide—from empirical model selection to statistical calculation of detection limits—researchers and drug development scientists can ensure their quantitative methods are accurate, precise, and fit-for-purpose, ultimately supporting the integrity of their scientific data and the safety of pharmaceutical products.
Solving Common Challenges in Method Validation
Overcoming Matrix Effects in Specificity and Quantification
In the field of pharmaceutical analysis, matrix effects represent a significant challenge, potentially compromising the specificity, accuracy, and precision of quantitative methods. These effects arise from sample components that co-elute with the analyte, causing suppression or enhancement of the signal and leading to inaccurate quantification. Overcoming these interferences is paramount for developing robust analytical methods, particularly when quantifying multiple active pharmaceutical ingredients (APIs) with divergent physicochemical properties in complex formulations. This guide compares modern analytical techniques for mitigating matrix effects, focusing on a case study involving the simultaneous quantification of metoclopramide hydrochloride (MET) and camylofin dihydrochloride (CAM). The performance of the optimized Reversed-Phase High-Performance Liquid Chromatography (RP-HPLC) method is evaluated against other common techniques, with all supporting experimental data and validation parameters detailed herein [45].
Experimental Protocols & Methodologies
Optimized RP-HPLC Protocol for MET and CAM
The following detailed protocol was established for the concurrent estimation of MET and CAM, leveraging response surface methodology (RSM) for systematic optimization [45].
- Instrumentation: Analysis was performed using a Shimadzu HPLC system (SPD-20A UV–visible detector) [45].
- Chromatographic Column: A phenyl-hexyl column was employed to maximize analyte interaction and resolution [45].
- Mobile Phase: An isocratic elution was used, consisting of a mixture of 20 mM ammonium acetate buffer (pH adjusted to 3.5 with glacial acetic acid) and methanol in a 65:35 (v/v) ratio. The mobile phase was freshly prepared daily, filtered through a 0.45 μm nylon membrane, and degassed prior to use [45].
- Sample Preparation: Standard solutions of MET hydrochloride and CAM dihydrochloride were prepared at a concentration of 1 mg/mL in methanol. Commercial tablet formulations were processed and extracted, with the final solutions filtered through a 0.45 μm PVDF syringe filter before injection [45].
- Validation Parameters: The method was validated per International Council for Harmonisation (ICH) guidelines, assessing specificity, linearity, accuracy, precision, limit of detection (LOD), limit of quantification (LOQ), and robustness [45].
Protocol for HPLC-MS/MS for Complex Matrices
For context and comparison in complex plant matrices, an HPLC-MS/MS protocol for dicaffeoylquinic acids (DCQAs) is summarized below [3].
- Instrumentation: Shimadzu Nexera Lite LC-40D HPLC system coupled with an X500R Ultra Quadrupole Time of Flight LC/MS/MS System [3].
- Chromatographic Column: Prontosil C18 column (250 mm length, 4.6 mm inner diameter, 5 μm particle size) [3].
- Mobile Phase: A gradient elution with solvent A (water with 0.1% formic acid) and solvent B (acetonitrile with 0.1% formic acid) at a flow rate of 0.5 mL/min [3].
- Mass Spectrometry: Operated in positive electrospray ionization (ESI) mode with multiscan between m/z 100–2000. Desolvation temperature was 500 °C, and spray voltage was 5500 V [3].
- Detection: Combined UV and photodiode array (DAD) detectors at 284 nm [3].
Performance Comparison of Analytical Techniques
The following table summarizes the quantitative performance data of the optimized RP-HPLC method for MET and CAM and contrasts it with the general capabilities of other analytical techniques reported in the literature for similar challenges [45].
Table 1: Quantitative Method Performance Comparison
| Parameter | Optimized RP-HPLC (MET) | Optimized RP-HPLC (CAM) | Traditional UV-Spectrophotometry [45] | Gas Chromatography (GC) [45] | Voltammetric Techniques [45] |
|---|---|---|---|---|---|
| Linearity Range (μg/mL) | 0.375 - 2.7 | 0.625 - 4.5 | Varies (often narrower) | Varies | Varies |
| Coefficient (R²) | > 0.999 | > 0.999 | Often < 0.995 (overlapping peaks) | Not Specified | Not Specified |
| LOD (μg/mL) | 0.23 | 0.15 | Higher | Higher | Highly Sensitive |
| LOQ (μg/mL) | 0.35 | 0.42 | Higher | Higher | Highly Sensitive |
| Accuracy (% Recovery) | 98.2 - 101.5 | 98.2 - 101.5 | Lower (due to interference) | Lower | Highly Sensitive |
| Precision (% RSD) | < 2 (Intra- & Inter-day) | < 2 (Intra- & Inter-day) | > 2 (often less robust) | > 2 (often less robust) | Varies |
| Key Advantage | High specificity, accuracy, and precision for both APIs | High specificity, accuracy, and precision for both APIs | Simplicity, low cost | Separation of volatile compounds | Extreme sensitivity |
| Key Limitation for MET/CAM | Requires rigorous optimization | Requires rigorous optimization | Lacks specificity for co-formulated drugs | Requires derivatization; not ideal for thermolabile drugs | Practical drawbacks; not suitable for widespread use |
Visualizing the Workflow: From Sample to Result
The logical flow of the optimized RP-HPLC method development and validation process, from initial challenge to final application, is depicted below.
Figure 1: RP-HPLC Method Development and Validation Workflow
The Scientist's Toolkit: Essential Research Reagents & Materials
Successful method development and validation rely on specific, high-quality materials. The following table lists key reagents and equipment used in the featured RP-HPLC study [45].
Table 2: Essential Research Reagent Solutions for RP-HPLC Method Development
| Item Name | Function / Role in Experiment | Specification / Grade |
|---|---|---|
| Metoclopramide Hydrochloride | Primary Analyte | Pharmaceutical Standard (from TCI or licensed supplier) [45] |
| Camylofin Dihydrochloride | Primary Analyte | Pharmaceutical Standard (from TCI or licensed supplier) [45] |
| Methanol | Mobile Phase Organic Modifier | HPLC Grade (99.0% purity) [45] |
| Ammonium Acetate | Buffer Salt for Mobile Phase | Analytical Grade [45] |
| Glacial Acetic Acid | Mobile Phase pH Adjustment | 99% Purity [45] |
| Phenyl-Hexyl HPLC Column | Stationary Phase for Chromatographic Separation | Specific for moderate and hydrophobic molecules [45] |
| HPLC System with UV Detector | Instrumentation for Separation and Detection | E.g., Shimadzu System [45] |
| Syringe Filters | Sample Clarification before Injection | 0.45 μm PVDF [45] |
This comparison demonstrates that a rigorously optimized RP-HPLC method, utilizing statistical experimental design and a selective phenyl-hexyl stationary phase, effectively overcomes matrix effects and the challenges of quantifying drugs with differing polarities. The validated method for MET and CAM exhibits superior performance in specificity, linearity, sensitivity, accuracy, and precision compared to traditional techniques like UV-spectrophotometry and GC, which suffer from significant limitations for this application. The detailed protocols, performance data, and workflow provided herein offer a reliable framework for researchers and drug development professionals seeking to establish robust, reproducible, and regulatory-compliant analytical methods for complex pharmaceutical formulations.
Strategies for Extending a Narrow Linear Dynamic Range in LC-MS
The linear dynamic range (LDR) is a fundamental parameter in liquid chromatography-mass spectrometry (LC-MS) method validation, defining the concentration interval over which an analytical response is directly proportional to analyte concentration. A narrow LDR poses significant challenges in drug development and bioanalysis, often necessitating repeated sample dilution and reanalysis, which increases time, cost, and labor while consuming precious sample volume [46] [47]. For researchers and scientists working in pharmaceutical development, overcoming this limitation is crucial for accurate pharmacokinetic profiling, especially when analyte concentrations span several orders of magnitude from administration to elimination phases.
This guide objectively compares established and emerging strategies for extending the LDR in LC-MS applications, with particular focus on the innovative use of natural isotopologue transitions. We evaluate these techniques based on experimental data, practical implementation requirements, and their impact on key validation parameters including specificity, linearity, limit of detection (LOD), and limit of quantification (LOQ).
Comparative Strategies for LDR Extension
The most common approaches for addressing a narrow LDR include sample dilution, instrumental adjustments, and advanced data acquisition strategies. The following table summarizes their comparative performance characteristics:
Table 1: Comparison of LDR Extension Strategies for LC-MS
| Strategy | Mechanism of Action | LDR Extension Potential | Impact on Sensitivity (LLOQ) | Implementation Complexity | Key Limitations |
|---|---|---|---|---|---|
| Sample Dilution | Physical reduction of analyte concentration | Unlimited in theory | None (preserved) | Low | Time-consuming, resource-intensive, higher sample volume requirement [47] |
| Detor Saturation Adjustment | Reducing ion transmission or detector voltage | Moderate (2-5x) | Negative impact (increases LLOQ) | Low to Moderate | Compromised sensitivity for low-abundance analytes [46] |
| Multiple Isotopologue Monitoring | Utilizing less abundant natural isotopologues | High (25-50x) | None (preserved) | Moderate | Requires high-resolution MS for optimal implementation [46] [47] |
| LC Method Optimization | Improving chromatographic separation | Moderate (2-10x) | Potential positive impact | Moderate to High | Matrix-dependent, requires extensive method development [48] |
Quantitative Performance Data
The following table presents experimental data from published studies demonstrating the effectiveness of multiple isotopologue monitoring across various analytes:
Table 2: Experimental LDR Extension Using Natural Isotopologues
| Analyte | Instrument Platform | Conventional LDR | Extended LDR with Isotopologues | Fold Extension | Reference |
|---|---|---|---|---|---|
| Diazinon | QTOF MS | Not specified | 25-50x increase in upper LDR limit | 25-50x | [46] |
| Imazapyr | QTOF MS | Not specified | 25-50x increase in upper LDR limit | 25-50x | [46] |
| Molinate | QTOF MS | Not specified | 25-50x increase in upper LDR limit | 25-50x | [46] |
| Thiabendazole | QTOF MS | Not specified | 25-50x increase in upper LDR limit | 25-50x | [46] |
| Flavor Compound X | QTRAP MS | 3-6,000 ng/mL | 3-60,000 ng/mL (combined transitions) | 10x | [47] |
| Ampicillin | Not specified | Not specified | Theoretical 4-5x extension calculated | 4-5x (theoretical) | [47] |
The Natural Isotopologue Approach: Mechanism and Experimental Workflow
Theoretical Foundation
The natural isotopologue strategy leverages the predictable distribution of naturally occurring chemical isotopes in organic compounds. For instance, while 98.9% of carbon exists as ^12^C, approximately 1.1% is naturally occurring ^13^C [47]. This statistical distribution means any population of analyte molecules will contain a mixture of different mass isotopologues: the most abundant (monoisotopic) form containing only ^12^C atoms, and less abundant forms containing one or more ^13^C or other heavy isotopes.
In LC-MS analysis, the most abundant isotopologue typically saturates the detector at high concentrations, causing signal suppression and non-linearity. By simultaneously monitoring less abundant isotopologues (e.g., [+1M+H]^+^ or [+2M+H]^+^ ions), quantitation can continue at higher concentrations because these signals remain within the detector's linear range [46] [47].
Experimental Workflow for Implementation
The following diagram illustrates the systematic workflow for implementing the natural isotopologue approach to extend LDR in LC-MS methods:
Figure 1: Workflow for implementing the natural isotopologue approach to extend LDR in LC-MS methods.
Detailed Experimental Protocol
Based on the methodology described by Zhang et al. (2014) and subsequent implementations, the following protocol details the application of natural isotopologues for LDR extension [46]:
Step 1: Isotopic Distribution Analysis
- Determine the theoretical isotopic distribution of the target compound using online calculators (e.g., https://www.sisweb.com/mstools/isotope.htm) or commercial software [47].
- Classify isotopologues by relative abundance:
- Type A ion: The most abundant isotopologue (100% relative abundance)
- Type B ion: The second most abundant isotopologue (typically 10-50% relative to A)
- Type C ion: The third most abundant isotopologue (typically 1-10% relative to A) [46]
Step 2: Mass Spectrometer Configuration
- For each analyte, program multiple reaction monitoring (MRM) transitions for:
- Type A ion (highest sensitivity, lowest ULDR)
- Type B ion (moderate sensitivity, intermediate ULDR)
- Type C ion (lowest sensitivity, highest ULDR) [46]
- Critical Optimization Note: Instrument parameters must be optimized for each transition individually. As demonstrated in Restek's comparative study, using non-optimized parameters from literature can reduce peak area by 12-45% compared to instrument-specific optimized settings [49].
Step 3: Calibration Curve Construction
- Prepare calibration standards spanning the expected concentration range.
- For each calibration level, integrate peaks from all monitored transitions (A, B, and C types).
- Construct individual calibration curves for each transition type:
Step 4: Method Validation
- Validate linearity, accuracy, and precision for each transition curve according to regulatory guidelines.
- Establish seamless transition points between curves where the higher abundance transition becomes non-linear and the lower abundance transition provides more reliable quantitation [46].
Essential Research Reagents and Materials
Successful implementation of LDR extension strategies requires specific reagents and materials optimized for LC-MS applications:
Table 3: Essential Research Reagents for LC-MS Method Development
| Reagent/Material | Specification | Application in LDR Extension |
|---|---|---|
| LC-MS Grade Solvents | Methanol, Acetonitrile, Water (low UV absorbance, high purity) | Mobile phase preparation to minimize background noise and enhance S/N ratio [48] [50] |
| Mobile Phase Additives | Formic Acid, Ammonium Formate, Ammonium Acetate (LC-MS grade) | Optimization of ionization efficiency and chromatographic separation [48] |
| Solid Phase Extraction Cartridges | C18, Mixed-mode, Polymer-based | Sample clean-up to reduce matrix effects and improve overall method performance [48] [51] |
| Isotopically Labeled Internal Standards | ^13^C, ^15^N, or ^2^H labeled analogs of target analytes | Correction for matrix effects and ionization variability across extended concentration range [51] |
| Quality Control Materials | Certified reference materials, pooled biological matrices | Method validation and ongoing performance monitoring throughout extended LDR [48] |
Extending the LDR through natural isotopologue monitoring directly impacts several key validation parameters:
Specificity: High-resolution mass spectrometers (e.g., TOF, Orbitrap) provide superior separation of isotopologue peaks from potential interferences, enhancing method specificity [46] [52].
Linearity: The approach maintains linearity across a significantly extended concentration range (25-50 fold extension demonstrated) without compromising mass accuracy or resolution [46].
LOD/LOQ: While the isotopologue approach primarily extends the upper limit of quantitation, the lower limit remains determined by the most abundant (Type A) transition, preserving method sensitivity [47].
Precision and Accuracy: Studies demonstrate that precision (RSD < 9%) and accuracy (recoveries of 67-108%) can be maintained throughout the extended range when properly validated [48].
The strategic extension of linear dynamic range in LC-MS represents a critical advancement for quantitative bioanalysis in drug development. Among the available techniques, the use of natural isotopologue transitions offers a particularly powerful approach, demonstrating 25-50 fold extensions in the upper limit of quantitation without compromising sensitivity at the lower end. This method capitalizes on the full-scan data acquisition capabilities of modern high-resolution mass spectrometers and aligns with the growing need for efficient, comprehensive analytical methods in pharmaceutical research.
When implementing this strategy, researchers should prioritize instrument-specific parameter optimization and thorough validation of each isotopologue transition to ensure seamless quantitation across the entire extended range. As LC-MS technology continues to evolve, the integration of innovative approaches like natural isotopologue monitoring will be essential for addressing the complex analytical challenges in modern drug development pipelines.
Troubleshooting High LOB and Its Impact on LOD/LOQ
Core Concepts and Definitions
In analytical chemistry and clinical diagnostics, fully characterizing an assay's performance at low analyte concentrations is crucial to ensure it is "fit for purpose" [11]. This characterization relies on three fundamental parameters: the Limit of Blank (LoB), the Limit of Detection (LoD), and the Limit of Quantitation (LoQ). These terms describe the smallest concentration of an analyte that can be reliably measured, and each has a distinct definition and purpose [11] [53].
- Limit of Blank (LoB): The LoB is defined as the highest apparent analyte concentration expected to be found when replicates of a blank sample (containing no analyte) are tested [11] [36]. It represents the 95th percentile of results from blank samples, accounting for background noise and helping to distinguish a true signal from zero [53] [54]. Statistically, it is calculated as LoB = meanblank + 1.645(SDblank), assuming a Gaussian distribution of the blank signals [11].
- Limit of Detection (LoD): The LoD is the lowest analyte concentration that can be reliably distinguished from the LoB and at which detection is feasible [11] [36]. It is the concentration at which the analyte can be detected 95% of the time, though not necessarily quantified with exact precision [53] [54]. Its calculation incorporates both the LoB and the variability of a low-concentration sample: LoD = LoB + 1.645(SD_low concentration sample) [11].
- Limit of Quantitation (LoQ): The LoQ is the lowest concentration at which the analyte can not only be reliably detected but also quantified with acceptable precision and accuracy (bias) [11] [36]. It is the level at which the test provides a reproducible and accurate result, often defined by an intermediate precision coefficient of variation (CV) of ≤ 20% [53] [54]. The LoQ is always greater than or equal to the LoD [11].
The relationship between these parameters is sequential and interdependent. A sample with a concentration below the LoB is reported as "not detected." A result between the LoB and LoD may suggest the analyte's presence but cannot be confirmed. A concentration between the LoD and LoQ is considered detected but not reliably quantifiable. Only results at or above the LoQ can be reported with a numerical value and trusted for decision-making [54].
Root Causes of a High Limit of Blank (LOB)
A high LoB indicates excessive background signal or noise in the absence of the target analyte. This compromises the fundamental detection capability of an assay. The primary sources of this interference can be categorized as follows:
- Reagent and Assay Chemistry: Non-specific binding (NSB) is a major contributor, particularly in immunoassays. This involves weak, unintended interactions between detector antibodies, capture surfaces, or other assay components [36]. Impurities in reagents, buffers, or substrates can also generate background signal. Furthermore, suboptimal assay conditions, such as incorrect pH, temperature, or incubation times, can exacerbate non-specific interactions.
- Sample Matrix Effects: The sample itself can be a significant source of interference. Components in complex biological matrices like plasma, serum, or cell lysates can cross-react with assay reagents, leading to a false positive background signal. This is particularly challenging when a genuine analyte-free matrix is difficult or impossible to obtain [55].
- Instrumentation and Signal Acquisition: The analytical instrument itself contributes to noise. This can include electronic noise from detectors (e.g., photomultiplier tubes in luminometers or detectors in HPLC systems), fluctuations in light sources for spectrophotometric methods, or high background in chromatographic baselines [40] [7]. Inadequate calibration or maintenance of the instrument can further elevate baseline noise.
The following table summarizes these root causes and their manifestations:
Table 1: Root Causes of a High Limit of Blank
| Category | Specific Cause | Manifestation in the Assay |
|---|---|---|
| Reagent & Assay Chemistry | Non-specific binding | High signal in blank wells with no analyte present [36]. |
| Impure reagents/buffers | Elevated and variable background across replicates. | |
| Suboptimal assay conditions | Inconsistent LoB values between runs or operators. | |
| Sample Matrix | Interfering substances | Higher LoB in a biological matrix compared to a pure buffer. |
| Endogenous analytes | Difficulty obtaining a true blank sample [55]. | |
| Instrumentation | Electronic detector noise | High baseline "noise" in chromatographic or signal traces [40]. |
| Unstable light source | Signal drift in spectrophotometric/colorimetric assays. | |
| Contaminated flow cells | Persistently high background signal. |
Cascading Impact of High LOB on LOD and LOQ
A high LoB has a direct and detrimental cascading effect on an assay's other critical limits, fundamentally degrading its overall performance and utility.
Direct Impact on Limit of Detection (LOD)
The LoD is mathematically derived from the LoB. According to CLSI EP17 guidelines, the formula is LoD = LoB + 1.645(SD_low concentration sample) [11]. A direct consequence is that an increase in LoB forces a proportional increase in LoD. The assay requires a higher concentration of the analyte to produce a signal that can be "reliably distinguished from the LoB" [11] [36]. This directly reduces the analytical sensitivity of the method, meaning it becomes less capable of detecting very low concentrations of the analyte.
Amplified Impact on Limit of Quantitation (LOQ)
The negative impact is amplified at the level of quantitation. The LoQ is the lowest concentration where predefined goals for bias and imprecision are met, often a CV of 20% or less [11] [53]. As the LoD increases due to a high LoB, the concentration required to achieve acceptable precision and bias is pushed even higher. Consequently, the functional sensitivity of the assay is compromised. The assay's dynamic range is effectively truncated at the lower end, limiting its ability to accurately measure clinically or analytically relevant low-level analytes.
The following diagram illustrates this cascading negative effect and the core troubleshooting workflow.
Experimental Protocols for Determination and Verification
Adhering to standardized protocols is essential for accurately determining LoB, LoD, and LoQ, and for troubleshooting a high LoB. The Clinical and Laboratory Standards Institute (CLSI) EP17 guideline provides a robust framework [11] [36].
Protocol for Determining LoB
The LoB is established by repeatedly testing a blank sample.
- Sample Type: A sample containing no analyte, such as a zero calibrator or an appropriate analyte-free matrix [11].
- Replicates: For a full establishment, testing 60 replicates is recommended to capture a reliable estimate of variation. For verification of a manufacturer's claim, 20 replicates may suffice [11].
- Data Analysis: Calculate the mean and standard deviation (SD) of the measured results from the blank samples. The LoB is then computed as the 95th percentile: LoB = meanblank + 1.645(SDblank) (for a one-sided test) [11] [40].
Protocol for Determining LoD
The LoD determination requires testing both blank and low-concentration samples.
- Sample Type: A sample containing a low but known concentration of the analyte, ideally close to the expected LoD [11].
- Replicates: Similar to LoB, 60 replicates are recommended for establishment, and 20 for verification [11].
- Data Analysis: First, determine the LoB as above. Then, calculate the mean and SD of the results from the low-concentration sample. The LoD is derived as: LoD = LoB + 1.645(SD_low concentration sample) [11]. This ensures that 95% of the results from a sample at the LoD concentration will exceed the LoB.
Protocol for Determining LoQ
The LoQ is determined by testing samples at or above the LoD concentration and assessing precision and bias.
- Sample Type: Samples with known concentrations at or above the LoD [11].
- Replicates: Multiple replicates (e.g., 20) over multiple runs or days are needed to evaluate intermediate precision [11] [7].
- Data Analysis: The concentration at which the analytical precision meets a predefined goal (e.g., CV ≤ 20%) is identified as the LoQ. Some approaches also require that the bias (difference from the true value) falls within an acceptable range at this concentration [11] [53] [54]. The LoQ can never be lower than the LoD [11].
Troubleshooting and Mitigation Strategies for High LOB
Addressing a high LoB requires a systematic approach targeting its root causes. The following strategies, summarized in the table below, are essential for restoring and optimizing assay performance.
Table 2: Troubleshooting Strategies for a High Limit of Blank
| Strategy Category | Specific Actions | Expected Outcome |
|---|---|---|
| Optimize Reagents & Assay Conditions | Use high-purity antibodies and reagents; implement effective blocking agents (e.g., BSA, proprietary blockers); optimize incubation times, temperatures, and wash stringency [36]. | Reduced non-specific binding, leading to a lower and more stable background signal. |
| Improve Sample Preparation | Introduce sample purification steps such as extraction, precipitation, or chromatography to remove interfering substances; use a commutable matrix for calibration [55]. | Reduction of matrix effects, resulting in a LoB closer to that observed in a pure buffer. |
| Refine Detection System | For HPLC/LC-MS, optimize chromatographic separation to resolve analyte from matrix interferences; tune instrument parameters for a better signal-to-noise ratio [55] [7]. | Lower baseline noise and a cleaner signal for the analyte, directly lowering LoB and LoD. |
| Statistical & Validation Practices | Follow CLSI EP17 guidelines for determination; use sufficient replicates (n=60 for establishment); validate across multiple instrument and reagent lots [11] [36]. | A statistically robust and reliable estimate of LoB that reflects true method performance. |
The Scientist's Toolkit: Essential Reagents and Materials
Successful troubleshooting and validation of low-end assay limits require specific materials and reagents. This toolkit is critical for implementing the strategies outlined above.
Table 3: Essential Research Reagent Solutions for LOB/LOQ Studies
| Reagent/Material | Function in Validation & Troubleshooting |
|---|---|
| High-Purity Antibodies | Minimize non-specific binding, which is a primary cause of high background noise [36]. |
| Analyte-Free Matrix | Serves as the "blank" sample for LoB determination. It should be commutable with real patient samples to give realistic results [11] [55]. |
| Reference Standard | A known concentration of the pure analyte used to prepare low-concentration samples for LoD/LoQ studies and for accuracy assessments [11]. |
| Effective Blocking Agents | Proteins (e.g., BSA) or commercial blockers used to coat unused binding sites on surfaces, preventing non-specific attachment of detection reagents [36]. |
| Stringent Wash Buffers | Buffers with detergents (e.g., Tween-20) or adjusted ionic strength to remove weakly bound reagents while retaining specific signal, improving S/N [36]. |
Addressing Stability and Carryover to Maintain Data Integrity
In the rigorous world of pharmaceutical analysis, data integrity is the cornerstone of product quality and patient safety. It ensures that the decisions made during drug development and quality control are based on reliable and accurate information. Within the framework of analytical method validation—encompassing specificity, linearity, range, Limit of Detection (LOD), and Limit of Quantitation (LOQ)—two persistent challenges are carryover and analytical stability. Carryover, the unintended transfer of analyte from one sample to a subsequent one, compromises specificity and accuracy. Instability of the analyte or the analytical system, in turn, can distort results across the validation range, affecting linearity and the reliable determination of LOD and LOQ.
This guide objectively compares modern approaches and technologies designed to mitigate these risks, providing experimental data to illustrate their performance in maintaining the integrity of validation data.
The Impact of Carryover and Instability on Key Validation Parameters
Carryover and instability are not merely operational nuisances; they have a direct and deleterious effect on the fundamental parameters of method validation [2] [1].
Effects on Specificity, LOD, and LOQ
- Specificity: Carryover can manifest as a ghost peak in a blank injection following a high-concentration sample. This false peak can be mistaken for an impurity or interfere with the identification of the target analyte, thereby compromising the method's specificity [2].
- LOD and LOQ: These critical sensitivity parameters are determined based on the signal-to-noise ratio or the standard deviation of the response [39]. Elevated baseline noise caused by carryover or a drifting baseline due to instrumental instability can artificially inflate the calculated LOD and LOQ, making the method appear less sensitive than it truly is [16].
Effects on Linearity, Range, and Accuracy
- Linearity and Range: Analytic instability during the sequence run—such as degradation in the autosampler—can lead to a downward trend in the response of calibration standards. This results in a non-linear response or a curve that does not pass through the origin, invalidating the linearity of the method [2].
- Accuracy: In a bioanalytical method, if a drug is unstable in the plasma matrix under the storage or preparation conditions, the accuracy of the results will be compromised, as the measured concentration will not reflect the true concentration at the time of sampling [16].
Comparative Analysis of Mitigation Strategies
A comparison of common strategies reveals clear differences in their effectiveness and implementation complexity. The following table summarizes key approaches for which experimental data is available.
Table 1: Comparison of Carryover and Stability Mitigation Strategies
| Mitigation Strategy | Experimental Protocol | Key Performance Data & Findings | Impact on Validation Parameters |
|---|---|---|---|
| Enhanced Autosampler Wash Protocols | Injection of a high-concentration standard followed by a blank solvent, using different wash solvent compositions and wash volumes [2] [1]. | A study found that optimizing the wash solvent (e.g., including a stronger solvent like 20% acetonitrile) reduced carryover from >5% to <0.01% [1]. | Directly improves accuracy and specificity by eliminating false positives in blanks. |
| Stability-Indicating Methodologies | Forced degradation studies under acid, base, oxidative, thermal, and photolytic stress, followed by chromatographic analysis to demonstrate separation of degradants from the main peak [2]. | An RP-HPLC method for Mesalamine demonstrated no interference from degradation products, with peak purity tests confirming a pure main peak in all stressed samples [2]. | Confirms specificity and ensures accuracy and linearity are not biased by degradant interference. |
| Uncertainty & Accuracy Profiles | Using a graphical approach based on β-content tolerance intervals to assess the acceptability of results across the concentration range, including near the LOQ [16]. | This approach provides a more realistic and reliable assessment of LOQ and LOD compared to classical statistical methods, which often provide underestimated values [16]. | Provides a precise estimate of measurement uncertainty, offering a realistic assessment of LOD and LOQ. |
| Robustness Testing via DoE | Using Design of Experiments (DoE) to systematically vary method parameters (e.g., pH, temperature, flow rate) and assess their impact on system suitability [1]. | A robustness study for an HPLC method showed that a ±0.2 change in pH was a critical factor affecting peak tailing, a parameter linked to potential carryover [1]. | Identifies method parameters critical to maintaining precision and specificity, ensuring method resilience. |
Experimental Protocols for Assessing Risks
To systematically address these challenges, standardized experimental protocols are essential.
Protocol for Carryover Assessment
The following workflow visualizes the standard process for quantifying and diagnosing carryover in an analytical sequence.
Detailed Steps:
- Establish a Baseline: First, inject a pure diluent or matrix blank (Blank A). This chromatogram establishes the system's baseline noise and should be free of any analyte peak [1].
- Inject High-Concentration Sample: Inject a standard solution at the upper limit of the calibration range (e.g., 100% of the target concentration).
- Inject Post-Blank: Immediately following the high-concentration sample, inject another blank solvent (Blank B).
- Calculation and Acceptance: Integrate any peak observed in Blank B at the retention time of the analyte. Calculate carryover as a percentage:
(Peak Area in Blank B / Peak Area of High Standard) * 100. A common acceptance criterion is carryover < 0.1% [1]. If carryover is detected, the autosampler wash procedure must be investigated and optimized.
Protocol for Analytical Stability Evaluation
Stability must be assessed throughout the analytical process. The diagram below outlines the key phases of stability testing.
Detailed Steps:
- Forced Degradation Studies: As seen in the validation of the Mesalamine method, stress the drug substance under harsh conditions (acid, base, oxidant, heat, light) to generate degradants and prove the method's stability-indicating capability (specificity) [2].
- Autosampler Stability: Prepare a set of QC samples at low and high concentrations and store them in the autosampler under the analytical run conditions. Inject them at intervals over the intended run duration (e.g., 24-48 hours). The mean calculated concentration at each time point should be within ±15% of the nominal concentration, demonstrating the analyte does not degrade during the sequence [2].
- Stock Solution Stability: Compare the response of a freshly prepared stock standard solution against a stock solution stored under defined conditions (e.g., refrigerated) over a set period. This ensures the reference material itself is stable and not contributing to inaccuracy [1].
The Scientist's Toolkit: Essential Reagents and Materials
The following reagents and instruments are fundamental for conducting the experiments described in this guide and for performing robust analytical method validation.
Table 2: Key Research Reagent Solutions and Materials
| Item Name | Function in Experiment | Critical Quality Attributes |
|---|---|---|
| HPLC-MS Grade Solvents | Used as mobile phase components and sample diluents to minimize background noise and contamination [3] [4]. | Low UV cutoff; minimal particulate and chemical impurities. |
| Chemical Standards (e.g., DCQAs, Mesalamine) | Serve as the reference for analyte identification and quantification during method development and validation [3] [2]. | Certified high purity (>98%); supplied with a Certificate of Analysis (CoA). |
| Stable Isotope-Labeled Internal Standards | Used in bioanalytical methods to correct for analyte loss during sample preparation and matrix effects in MS detection [16]. | Isotopic purity; chemical and structural analogy to the analyte. |
| Buffers & pH Adjusters | Control the pH of the mobile phase, which is critical for achieving consistent retention and peak shape for ionizable compounds [2] [1]. | High purity; volatility (for LC-MS); specified pH range and buffer capacity. |
| SPE (Solid-Phase Extraction) Cartridges | Clean up complex biological samples (e.g., plasma) to remove interfering matrix components and pre-concentrate the analyte [16] [1]. | High and reproducible recovery for the target analyte; minimal lot-to-lot variability. |
The integrity of data supporting method validation parameters is non-negotiable. As demonstrated, carryover and instability are significant threats that can undermine specificity, skew linearity, and distort the assessment of LOD and LOQ. A proactive, science-based approach is required for mitigation. The experimental data and protocols presented here show that strategies like optimized wash protocols and comprehensive stability testing are highly effective in controlling these risks. By embedding these practices into the analytical lifecycle—from initial method design to routine use—laboratories can ensure their data remains reliable, defensible, and fully supportive of their product quality and patient safety goals.
Data Integrity and Regulatory Compliance: Assembling the Evidence
Designing a Comprehensive Validation Plan for Regulatory Submission
For drug development professionals, the path to regulatory approval is paved with data that proves a product is safe, effective, and of high quality. A cornerstone of this evidence is the validated analytical method, which generates the crucial data on identity, strength, quality, purity, and potency of a drug substance or product. Validation provides documented evidence that an analytical procedure is fit for its intended purpose, ensuring that every result generated is reliable and reproducible [1]. Regulatory agencies like the FDA and EMA mandate that analytical methods are properly validated, and this validation data is a critical component of submissions such as New Drug Applications (NDAs), Abbreviated New Drug Applications (ANDAs), and Biologics License Applications (BLAs) [56] [1].
Framing this process is a robust regulatory framework, primarily defined by the International Council for Harmonisation (ICH) guidelines. ICH Q2(R2), titled "Validation of Analytical Procedures," is the primary reference, defining the key validation parameters and their required testing [38] [1]. This is complemented by regional guidance from the FDA and standards from the United States Pharmacopeia (USP), particularly USP General Chapter <1225>, which categorizes analytical procedures and specifies unique validation requirements for each category [1]. A comprehensive validation plan is not merely a regulatory checkbox; it is a strategic tool that builds trust with health authorities, reduces the risk of submission delays or rejections, and ensures the consistent quality of pharmaceuticals reaching patients.
Core Validation Parameters: Specificity, Linearity, Range, LOD, and LOQ
A robust validation plan systematically demonstrates that an analytical method performs consistently and reliably. The core parameters—specificity, linearity, range, LOD, and LOQ—form the foundation of this demonstration.
Specificity
Specificity is the ability of a method to assess the analyte unequivocally in the presence of other components that may be expected to be present, such as impurities, degradation products, or matrix components [1]. It establishes that the measured signal is indeed from the target analyte and nothing else. For a chromatographic method, this is typically demonstrated by injecting a placebo (the sample matrix without the analyte) and showing that no interfering peaks appear at the retention time of the analyte. The method should also be able to separate and resolve the analyte from known impurities and degradation products formed under stress conditions (e.g., heat, light, acid, base, oxidation).
Linearity and Range
Linearity refers to the ability of a method to produce results that are directly proportional to the concentration of the analyte in a given sample [57] [58]. It is not about the number of data points but the mathematical relationship between concentration and response. Linearity is typically evaluated by preparing and analyzing a minimum of five concentrations across the declared range of the method [58] [1]. The data is then statistically analyzed, often using a least-squares regression model, and the correlation coefficient (r), coefficient of determination (r²), y-intercept, and slope of the regression line are reported.
The Range of an analytical method is the interval between the upper and lower concentrations of analyte for which it has been demonstrated that the method has a suitable level of accuracy, precision, and linearity [57] [1]. The range is defined by the linearity study and must encompass the entire span of concentrations at which the method will be employed. For an assay of an active ingredient, the range might be from 80% to 120% of the target concentration. For an impurity test, the range would extend from the LOQ to at least 120% of the specification limit [58].
LOD and LOQ
The Limit of Detection (LOD) is the lowest concentration of an analyte that can be detected, but not necessarily quantified, under the stated experimental conditions [57] [1]. It represents the point at which a signal emerges from the background noise. A common approach for determining LOD is based on the signal-to-noise ratio (S/N), where a ratio of 3:1 is generally considered acceptable for detection [57]. It can also be determined statistically using the standard deviation of the response (σ) and the slope of the calibration curve (S), with the formula: LOD = (3.3 * σ) / S [57].
The Limit of Quantitation (LOQ) is the lowest concentration of an analyte that can be quantitatively determined with acceptable accuracy and precision [57] [1]. It is the threshold for reliable numerical measurement. The LOQ is typically set at a signal-to-noise ratio of 10:1 [57]. Similar to the LOD, it can be calculated statistically using the formula: LOQ = (10 * σ) / S [57]. For any impurity reported and quantified, the method must be validated to demonstrate suitable accuracy and precision at the LOQ level [58].
Table 1: Summary of Key Validation Parameters and Their Definitions
| Parameter | Definition | Typical Acceptance Criteria |
|---|---|---|
| Specificity | Ability to measure analyte accurately in the presence of other components. | No interference from placebo, impurities, or degradation products. |
| Linearity | Ability to obtain results directly proportional to analyte concentration. | Correlation coefficient (r) > 0.998; residual sum of squares within limit. |
| Range | The interval between upper and lower analyte concentrations with suitable accuracy, precision, and linearity. | Must encompass all intended concentrations (e.g., 80-120% for assay). |
| LOD | Lowest concentration that can be detected. | Signal-to-Noise Ratio ≥ 3:1. |
| LOQ | Lowest concentration that can be quantified with accuracy and precision. | Signal-to-Noise Ratio ≥ 10:1; Accuracy and Precision within ±20%. |
Experimental Design and Protocol for Validation
A well-defined experimental protocol is essential for generating defensible validation data. The following provides a detailed methodology for establishing the core parameters, with a focus on efficiency.
Sample Preparation and Experimental Workflow
A strategic approach to validation can significantly reduce the required number of samples without compromising data quality. Key parameters can be grouped and demonstrated using shared sample sets [58].
Table 2: Optimized Sample Set for Efficient Validation of Multiple Parameters
| Concentration Level | Purpose | Parameters Demonstrated |
|---|---|---|
| LOQ (e.g., 1 ppm) | Lower range bound | LOD, LOQ, Accuracy/Precision at LOQ, Linearity, Range |
| 50% (e.g., 5 ppm) | Linearity point | Linearity |
| 75% (e.g., 7.5 ppm) | Linearity point | Linearity |
| 100% (e.g., 10 ppm) | Specification level | Accuracy, Precision, Linearity, Range |
| 120% (e.g., 12 ppm) | Upper range bound | Accuracy, Precision, Linearity, Range |
For this sample set, a minimum of three replicates (n=3) per concentration is recommended for accuracy and precision, leading to a total of 15 sample measurements that can generate data for LOD, LOQ, accuracy, precision, linearity, and range [58].
The following workflow diagram illustrates the strategic sequence of experiments in a comprehensive validation plan.
Detailed Experimental Protocols
1. Specificity Protocol:
- Materials: Analyte standard, placebo mixture, known impurity standards, and samples subjected to stress conditions (acid, base, oxidation, heat, light).
- Procedure: Separately inject the placebo, the analyte standard, and the stressed samples into the chromatographic system.
- Analysis: The chromatogram of the placebo should show no peak at the retention time of the analyte. The analyte peak in the standard and stressed samples should be pure, as confirmed by a photodiode array detector (peak purity index), and be baseline resolved from any degradation product peaks.
2. Linearity and Range Protocol:
- Materials: A single stock solution of the analyte, from which a series of dilutions are prepared to create at least five concentration levels (e.g., LOQ, 50%, 75%, 100%, 120% of target).
- Procedure: Inject each concentration level in triplicate. Plot the average response (e.g., peak area) for each level against the corresponding concentration.
- Analysis: Perform linear regression on the data. Report the slope, y-intercept, correlation coefficient (r), and coefficient of determination (r²). The range is validated if the accuracy, precision, and linearity are acceptable across all levels.
3. LOD and LOQ Protocol (Signal-to-Noise Method):
- Materials: A prepared sample at a concentration near the expected LOD/LOQ.
- Procedure: Inject the low-concentration sample and record the chromatogram.
- Analysis: Measure the height of the analyte peak (signal) and the amplitude of the background noise from a blank injection in a region close to the analyte peak. Calculate the S/N ratio. The LOD is confirmed with an S/N ≥ 3:1, and the LOQ with an S/N ≥ 10:1. For the LOQ, additional injections (n=6) should be made to confirm precision (%RSD ≤ 20%) and accuracy (mean recovery of 80-120%).
Comparative Analysis of Validation Strategies
A significant advancement in validation efficiency is the move from a sequential, parameter-by-parameter approach to an integrated, grouped-parameter strategy. The following diagram and table compare these two methodologies.
Table 3: Strategy Comparison for Validating an Impurity Method
| Aspect | Traditional Sequential Strategy | Optimized Grouped Strategy |
|---|---|---|
| Core Principle | Each parameter is validated in a discrete, separate experiment. | Multiple parameters are demonstrated from a single, strategically designed experiment [58]. |
| Experimental Workflow | A linear sequence: Specificity → Linearity → Accuracy → Precision → LOD/LOQ. | An integrated workflow: Specificity → Combined Linearity/Accuracy/Precision/Range/LOQ study. |
| Typical Sample Consumption | High (~42 injections for key parameters) due to redundant sample sets. | Low (18 injections for the same parameters) by reusing data [58]. |
| Data Efficiency | Low; data from one parameter study is rarely reused for another. | High; a single 15-injection linearity set also provides accuracy, precision, and LOQ data [58]. |
| Resource & Time Investment | Higher, requiring more analyst time, instrument time, and materials. | Significantly lower, reducing operational costs and accelerating submission timelines. |
| Regulatory Scrutiny | Well-understood and historically accepted. | Aligns with modern QbD principles; requires clear justification and documentation in the submission. |
The Scientist's Toolkit: Essential Reagents and Materials
The execution of a validation plan requires high-quality materials and instrumentation. The following table details key research reagent solutions and their critical functions.
Table 4: Essential Materials for Analytical Method Validation
| Item / Reagent Solution | Function in Validation | Critical Specifications & Notes |
|---|---|---|
| High-Purity Analytical Reference Standard | Serves as the benchmark for identity, purity, and potency. Used to prepare calibration standards for linearity, accuracy, LOD, and LOQ. | Certified purity and identity; stored under appropriate conditions to ensure stability. |
| Chromatography Column (e.g., C18, HILIC) | The stationary phase responsible for separating the analyte from impurities and matrix components. Critical for demonstrating specificity. | Specified by dimensions (length, internal diameter), particle size, and pore size. Different chemistries may be screened. |
| HPLC/UPLC-Grade Solvents and Buffers | Form the mobile phase that carries the sample through the column. Purity is essential for low background noise and reproducible retention times. | Low UV absorbance; free from particulates. Buffer pH and ionic strength must be precisely prepared for robustness. |
| Placebo/Blank Matrix | The formulation without the active ingredient. Used in specificity experiments to prove the absence of interference at the analyte's retention time. | Must be compositionally identical to the drug product, excluding the analyte. |
| Known Impurity and Degradation Product Standards | Used to challenge the method's ability to separate and resolve the analyte from potential contaminants, proving specificity. | Should be well-characterized and available at qualified purity levels. |
| System Suitability Test (SST) Solution | A mixture of the analyte and critical impurities used to verify that the chromatographic system is performing adequately before validation runs. | Typically assesses parameters like plate count, tailing factor, and resolution. |
Designing a comprehensive validation plan is a critical, strategic exercise that extends far beyond a technical requirement. By deeply understanding the core parameters of specificity, linearity, range, LOD, and LOQ, and by adopting efficient, grouped experimental designs, drug development professionals can generate high-quality, defensible data more rapidly and with fewer resources. This robust validation package, when integrated into the broader regulatory submission—formatted according to eCTD requirements and supported by tools that ensure data integrity—demonstrates a company's commitment to quality and scientific rigor [56] [59] [60]. A well-executed validation plan not only smoothens the regulatory review process but also serves as a foundation for ensuring the ongoing quality and safety of pharmaceutical products throughout their lifecycle.
In the highly regulated world of drug development, documenting validation data represents a critical pathway from initial protocol design to final study report. This process ensures that analytical methods and data management systems consistently produce reliable, high-quality results that regulatory bodies can trust. Validation documentation provides the evidentiary backbone supporting every claim about a drug's identity, strength, quality, purity, and stability [61]. Within the broader context of specificity, linearity, range, LOD (Limit of Detection), and LOQ (Limit of Quantitation) validation research, proper documentation creates a transparent, reproducible framework for assessing analytical method performance [61].
The journey of validation documentation begins with a meticulously designed protocol and culminates in a comprehensive final report that tells the complete story of the method's capabilities and limitations. For researchers, scientists, and drug development professionals, this documentation serves both scientific and regulatory purposes—it not only demonstrates that a method is fit for its intended purpose but also provides the rigorous evidence required by agencies like the FDA and EMA [62]. In an era of increasingly complex therapeutics and sophisticated analytical technologies, the principles outlined in this guide provide a standardized approach for generating validation data that stands up to both scientific scrutiny and regulatory examination.
Core Validation Parameters and Their Documentation
Foundational Performance Characteristics
Analytical method validation relies on assessing specific performance characteristics that collectively demonstrate a method's reliability. According to ICH Q2(R1) and its drafted revision ICH Q2(R2), these characteristics form a comprehensive set of criteria evaluated to determine methodological effectiveness [61]. The validation study must be designed to generate sufficient evidence that the analytical procedure meets its intended objectives, with documentation requirements tailored to each specific parameter.
The table below summarizes the key performance characteristics required for analytical method validation:
Table 1: Essential Performance Characteristics for Analytical Method Validation
| Characteristic | Definition | Documentation Requirements |
|---|---|---|
| Specificity/Selectivity | Ability to measure analyte accurately in the presence of potential interferents | Chromatograms showing resolution from interferents; forced degradation studies |
| Linearity | Ability to obtain results proportional to analyte concentration | Regression analysis data; coefficient of determination (R²) |
| Range | Interval between upper and lower concentration with suitable precision, accuracy, and linearity | Demonstration that method performs acceptably across specified range |
| Accuracy | Closeness of results to true value | Recovery studies at multiple levels; comparison to reference materials |
| Precision | Closeness of agreement between series of measurements | Repeatability, intermediate precision, and reproducibility data |
| Detection Limit (LOD) | Lowest detectable amount of analyte | Signal-to-noise data or statistical calculations based on standard deviation |
| Quantitation Limit (LOQ) | Lowest quantifiable amount with acceptable accuracy and precision | Signal-to-noise data or statistical calculations with accuracy/precision evidence |
| Robustness | Capacity to remain unaffected by small, deliberate variations | Experimental design data examining impact of parameter variations |
Establishing Linearity and Range
Linearity represents an analytical method's capacity to produce results that are directly proportional to the concentration of the analyte within a specified range [61]. Documenting linearity requires testing a minimum of five concentration points appropriately distributed across the entire anticipated working range, though more complex methods may require additional points [61]. The results are typically evaluated using statistical methods such as calculating a regression line using the method of least squares, with the acceptance criteria for the linear regression often requiring R² > 0.95 [61].
The specific range for an analytical method is derived from linearity studies and represents the interval between the upper and lower concentration levels where the method demonstrates acceptable linearity, accuracy, and precision [61]. The appropriate range varies depending on the analytical procedure's intended application:
Table 2: Method-Dependent Acceptable Ranges for Analytical Procedures
| Test Method | Acceptable Range | Documentation Considerations |
|---|---|---|
| Drug substance/product Assay | 80-120% of test concentration | Cover from QL of impurities to 120% of assay |
| Content Uniformity Assay | 70-130% of test concentration | Ensure coverage across dosage unit variations |
| Dissolution Test | ±20% over specification range | Document across entire release profile (e.g., 0-110%) |
| Impurity Assays | Reporting level (QL) to 120% of specification | Extend for toxic impurities to appropriate control levels |
Experimental Protocols for Key Validation Parameters
Accuracy and Precision Assessment Protocols
Accuracy Protocol: Accuracy is defined as the closeness of agreement between test results obtained by the method and the true value [61]. The experimental protocol for demonstrating accuracy varies based on the type of analysis:
- For Drug Substances: Accuracy is typically demonstrated using an analyte of known purity (reference material or well-characterized impurity) to compare experimental concentrations against theoretical concentrations [61]. Alternatively, results can be compared to those from a second, well-defined orthogonal procedure that uses a distinct measurement approach [61].
- For Drug Products: A known quantity of the analyte is introduced to a synthetic matrix containing all components except the analyte, followed by application of the analytical procedure [61]. When complete matrix recreation is difficult, known amounts can be added to the test sample, comparing results from both unspiked and spiked samples [61].
- For Impurity Quantitation: Accuracy should be assessed using samples spiked with known amounts of impurities [61]. When impurity samples are unavailable, comparison to an independent procedure or using the drug substance's response factor is acceptable with proper documentation of calculation methods [61].
Accuracy should be assessed using at least three concentration points covering the reportable range with three replicates for each point, with the complete analytical procedure followed for every replicate [61].
Precision Protocol: Precision represents the closeness of agreement between a series of measurements obtained from multiple sampling of the same homogeneous sample under prescribed conditions [61]. Precision evaluation occurs at three levels:
- Repeatability: Precision under the same operating conditions over a short time interval [61]. Documentation requires a minimum of nine determinations (3 concentrations × 3 replicates) covering the reportable range or a minimum of six determinations at 100% of test concentration [61].
- Intermediate Precision: Expresses variations within laboratories including different days, analysts, equipment, and environmental conditions [61]. The objective is to verify the method will provide consistent results once development concludes [61].
- Reproducibility: Demonstrates the method's ability to reproduce data within predefined precision between different laboratories [61]. This is particularly important for standardization and pharmacopeial methods [61].
Each precision type should be expressed in terms of standard deviation, relative standard deviation (coefficient of variation), and confidence interval [61].
Specificity, LOD, and LOQ Determination Protocols
Specificity Protocol: Specificity (or selectivity) represents the ability to assess unequivocally the analyte in the presence of components that may be expected to be present, such as impurities, degradation products, or matrix components [61]. The experimental protocol involves:
- Analyzing chromatograms or output from samples containing potential interferents
- Conducting forced degradation studies under various stress conditions (acid, base, oxidation, heat, light)
- Demonstrating that the analyte response is resolved from all potential interference peaks
- Providing evidence that the method can accurately quantify the analyte despite the presence of similar compounds
LOD and LOQ Protocol: Detection Limit (DL) is the lowest amount of analyte that can be detected but not necessarily quantified, while Quantitation Limit (QL) is the lowest amount that can be quantified with acceptable accuracy and precision [61]. The experimental protocols include:
- Signal-to-Noise Approach: Suitable for methods with baseline signal, determining the signal by comparing the measured response of an analyte from a sample with known low concentration against a blank sample [61]. A signal-to-noise ratio of 3:1 is acceptable for estimating DL, while at least 10:1 is required for QL [61].
- Standard Deviation and Slope Method: DL can be calculated as (3×σ)/S and QL as (10×σ)/S, where σ represents the standard deviation of the response and S is the slope of the calibration curve [61]. The slope is determined from the regression line of the analyte, while σ is estimated from the calibration curve [61].
Figure 1: LOD and LOQ Determination Workflow
Comparative Analysis of Validation Approaches
Traditional vs. Modern Data Validation Techniques
The landscape of data validation in clinical research and analytical method development has evolved significantly, with modern approaches offering enhanced efficiency while maintaining rigorous standards. This evolution is particularly evident when comparing traditional comprehensive validation with contemporary risk-based approaches:
Table 3: Comparison of Traditional vs. Modern Data Validation Techniques
| Aspect | Traditional Approach | Modern/Risk-Based Approach |
|---|---|---|
| Scope | Comprehensive (100% verification) | Targeted (critical data points only) |
| Efficiency | Resource-intensive | Optimized resource allocation |
| Focus | All data points equally | High-impact data (endpoints, safety) |
| Methodology | Manual checks predominating | Automated validation tools |
| Documentation | Extensive paper trails | Electronic audit trails |
| Regulatory Alignment | ICH-GCP, 21 CFR Part 11 | ICH-GCP, 21 CFR Part 11, FDA guidance |
| Application Example | 100% Source Data Verification (SDV) | Targeted Source Data Verification (tSDV) |
Targeted Source Data Validation (tSDV) represents a strategic approach that verifies the accuracy and reliability of critical data points identified in the Risk-Based Quality Management Plan by comparing them against original source documents [62]. This method enhances efficiency by concentrating validation efforts on high-impact data while minimizing resources spent on less critical information [62]. Implementation involves identifying high-risk data fields such as primary endpoints, adverse events, and key demographic details, then systematically verifying their accuracy through source documentation [62].
Batch Validation for Large-Scale Data Assessment
Batch validation has emerged as a powerful technique for managing large datasets, enabling efficient and systematic validation of data groups simultaneously [62]. This approach is particularly beneficial in large-scale studies where individual data validation would be prohibitively time-consuming and resource-intensive [62].
The advantages of batch validation include:
- Efficiency: Handling large datasets simultaneously reduces time and resources required [62]
- Scalability: Accommodating various study sizes and complexities [62]
- Consistency: Uniform application of validation rules ensures consistent data quality across all batches [62]
- Resource Optimization: Automation of routine tasks allows human resources to focus on complex tasks requiring critical thinking [62]
Automated systems such as Medrio, Medidata, and Veeva can efficiently handle large datasets, applying predefined validation rules to each batch to identify discrepancies or errors [62]. These systems are essential for modern batch validation processes in large-scale clinical trials and analytical studies.
Implementation and Regulatory Compliance
Validation in Practice: From Protocol to Execution
Implementing a robust validation framework requires careful planning and execution across the entire data lifecycle. The process begins with a Data Validation Plan that outlines standardization requirements, specific validation checks, criteria, and procedures [62]. This plan should define clear objectives focusing on data accuracy, completeness, and consistency while specifying the types of data, sources, and subsets to be validated [62].
Key components of successful validation implementation include:
- Technology and Automation: Modern technologies enhance the efficiency and accuracy of data validation through Electronic Data Capture (EDC) systems with built-in validation checks, including range, format, and consistency checks [62]. These systems enable real-time data validation during entry, immediately flagging errors for correction [62].
- Validation Checks: Implementing systematic validation checks including range checks (ensuring values fall within predefined ranges), format checks (verifying correct data format), consistency checks (ensuring related data points align logically), and logic checks (validating adherence to protocol-defined rules) [62].
- Query Management: When discrepancies are identified, queries are generated to flag these issues for review and correction by relevant personnel [62]. Maintaining detailed records of these queries and their resolutions is essential for transparency and traceability [62].
- Corrective Actions: Identifying sources of discrepancies enables implementation of corrective actions such as re-training staff or adjusting data entry protocols to prevent recurrence [62]. Ongoing monitoring ensures prompt identification and resolution of issues [62].
Figure 2: Validation Implementation Workflow
Regulatory Compliance Framework
Compliance with regulatory guidelines during data validation is critical for ensuring data integrity and reliability in clinical trials and analytical studies [62]. Key regulatory frameworks include:
- ICH-GCP: Provides a unified standard emphasizing data integrity and ethical trial conduct [62]
- FDA 21 CFR Part 11: Establishes criteria for electronic records and signatures, ensuring electronic data is trustworthy and equivalent to paper records [62]
- EMA Guidelines: Offer guidance for data management and validation in the European Union [62]
Ensuring compliance requires regular staff training, development of standard operating procedures aligned with regulatory requirements, implementation of validation protocols as outlined in SOPs, continuous monitoring, and maintaining comprehensive records of validation activities [62]. These steps are essential for demonstrating compliance during regulatory inspections and obtaining approval for new treatments [62].
Case Studies and Practical Applications
Real-World Validation Documentation Examples
Large-Scale Clinical Trial with Automated Validation: In a large-scale clinical trial, automated data validation tools were implemented to enhance data quality [62]. The trial utilized Electronic Data Capture (EDC) systems with built-in validation checks, including range, format, and consistency checks [62]. Automated queries were generated for any discrepancies, creating an efficient validation ecosystem that maintained data integrity while optimizing resource allocation [62]. This approach demonstrates how modern validation techniques can be successfully applied in complex research environments.
prescribeR Package for Drug Exposure Quantification: The prescribeR package, developed as an R-based toolset, provides flexible, reusable functions for generating common drug exposure variables based on routinely collected prescribing data [63]. This package implements six main classes of method for quantifying drug exposure: ever use vs. never use, use at a specified time point, daily dose or duration, persistence and discontinuation, adherence, and population level measures [63]. The utility of this package was demonstrated in a study of 5,571 patients with epilepsy, where it was used to quantify persistence to anti-epileptic drugs over the first 365 days of follow-up [63]. The package successfully generated all required persistence measurements, highlighting the efficiency of standardized approaches for generating exposure data across large cohorts and multiple drugs [63].
Impact of Validation Definitions on Research Outcomes
The critical importance of precise validation definitions was highlighted in a study examining the effects of adjusting drug exposure definition on estimated exposure parameters [63]. When researchers investigated the association between levetiracetam exposure and all-cause mortality using a range of time-fixed and time-varying exposure definitions, they observed a wide range of hazard ratios and significance levels across the resulting models [63]. This finding underscores that the selected definition of drug exposure and its validation parameters can potentially have a large impact on research outcomes observed in clinical studies [63].
Essential Research Tools and Reagents
Successful validation documentation relies on specialized tools and reagents that ensure accurate, reproducible results. The following table details key solutions required for comprehensive validation studies:
Table 4: Essential Research Reagent Solutions for Validation Studies
| Tool/Reagent | Function | Application Examples |
|---|---|---|
| Reference Standards | Certified materials with known purity for accuracy determination | Drug substance characterization; impurity quantification |
| Chromatographic Columns | Stationary phases for analyte separation | HPLC/UPLC method development; specificity demonstrations |
| Mass Spectrometry Reagents | Mobile phase additives and ionization aids | LC-MS method development; matrix effect studies |
| Sample Preparation Materials | Extraction media and purification tools | Sample clean-up; concentration adjustment for linearity |
| System Suitability Solutions | Reference mixtures for system performance verification | Daily instrument qualification; method transfer studies |
| Statistical Software | Data analysis tools for validation parameter calculation | Regression analysis; precision calculations; graphical outputs |
| Electronic Data Capture Systems | Digital platforms for data collection and validation | Clinical data management; real-time validation checks |
| Metadata Repositories | Systems for storing data context and characteristics | Audit trails; data lineage documentation |
Statistical analysis tools play a particularly crucial role in validation documentation. SAS (Statistical Analysis System) provides a powerful software suite used in clinical trials for advanced analytics, multivariate analysis, data management validation, and predictive analytics [62]. Similarly, the R programming environment offers specialized capabilities for statistical computing and graphics, enabling complex data manipulations, statistical modeling, and graphical representation of validation data [62]. These tools enable researchers to continuously adapt validation processes based on identified data trends and issues [62].
The journey of documenting validation data from protocol to final report represents a systematic process that transforms methodological development into defensible scientific evidence. By adhering to established frameworks for assessing critical parameters including specificity, linearity, range, LOD, and LOQ, researchers generate the comprehensive documentation required to support analytical claims and regulatory submissions. The comparative data presented in this guide demonstrates that while validation fundamentals remain constant, modern approaches incorporating risk-based principles and automated tools offer significant efficiencies without compromising quality. As the field continues to evolve with advancing technologies and regulatory expectations, the principles of thorough validation documentation remain essential for ensuring data integrity throughout the drug development pipeline.
The process of method validation is a critical component of scientific research and development, ensuring that analytical procedures produce reliable, accurate, and reproducible results. Within accredited laboratories and forensic science service providers (FSSPs), two distinct paradigms have emerged for conducting these validations: the traditional single-laboratory approach and the increasingly adopted collaborative multi-laboratory model. The fundamental distinction between these approaches lies in their execution framework—where single-lab validations are performed independently by individual laboratories, collaborative validations involve multiple laboratories working cooperatively to validate the same method using identical technology and parameters [64].
The importance of method validation extends beyond mere technical compliance, as legal systems often require use of scientific methods that are broadly accepted in the scientific community, applying legal standards such as Frye or Daubert to ensure methodological reliability [64]. For researchers, scientists, and drug development professionals, the choice between validation approaches significantly impacts not only the regulatory acceptance of their methods but also operational efficiency, cost structure, and the overall robustness of the validation data. This comparative analysis examines both approaches within the context of a broader thesis on specificity, linearity range, LOD (Limit of Detection), LOQ (Limit of Quantitation), and validation data research, providing evidence-based guidance for selecting appropriate validation strategies based on specific research objectives and constraints.
Fundamental Principles and Definitions
Core Validation Parameters
Within analytical method validation, specific parameters establish the reliability and capability of an analytical procedure. Specificity refers to the ability of a method to distinguish and quantify the analyte in the presence of other components, while linearity range defines the interval over which the analytical response is directly proportional to analyte concentration. The Limit of Detection (LOD) represents the lowest amount of an analyte that can be detected—though not necessarily quantified—under stated experimental conditions, with the Limit of Quantitation (LOQ) being the lowest concentration that can be quantitatively determined with acceptable precision and accuracy [16] [35].
According to the International Council for Harmonisation (ICH) guidelines, LOD can be calculated as LOD = 3.3σ/S, and LOQ as LOQ = 10σ/S, where σ represents the standard deviation of the response and S is the slope of the calibration curve [35]. These parameters form the foundation for method validation across both single-lab and collaborative approaches, though their determination and verification processes may differ significantly between the two paradigms.
Single-Laboratory Validation Approach
The single-laboratory validation approach represents the traditional model where individual laboratories independently develop and validate methods tailored to their specific needs, equipment, and expertise. This conventional approach typically involves extensive method development work, parameter optimization, and comprehensive validation experiments conducted entirely within one facility [64]. Each laboratory typically tailors validation to their specific needs, frequently modifying parameters and changing procedures prior to completing validation, resulting in different laboratories performing similar techniques with minor differences [64].
In this model, laboratories must invest significant internal resources for method development and validation, which comes at the expense of casework or other productive activities [64]. The process requires determining all validation parameters—including specificity, linearity, LOD, and LOQ—through internal experiments without external verification. While this approach offers complete control over the validation process, it creates significant redundancy across the scientific community as multiple laboratories independently validate similar methods [64].
Collaborative Validation Approach
The collaborative validation model represents a paradigm shift where multiple laboratories work cooperatively to validate methods using shared protocols, parameters, and evaluation criteria. In this approach, FSSPs performing the same task using the same technology work together cooperatively to permit standardization and sharing of common methodology, thereby increasing efficiency for conducting validations and implementation [64].
The collaborative model typically involves an originating laboratory that conducts a comprehensive initial validation and publishes their work in a peer-reviewed journal, allowing other laboratories to conduct a much more abbreviated method validation—a verification—if they adhere strictly to the method parameters provided in the publication [64]. This approach creates a framework for standardization across multiple facilities, with shared data sets and samples that reduce the number of samples necessary to assess instrument and method performance [64]. An added benefit is the availability of comparative data, creating benchmarks to ensure results are optimized across participating laboratories [64].
Experimental Protocols and Methodologies
Single-Lab Validation Protocol
The single-laboratory validation follows a comprehensive, self-contained experimental approach. For the comparison of methods experiment—a key component for assessing systematic error—a minimum of 40 different patient specimens should be tested by both the new and comparative methods [65]. These specimens must be carefully selected to cover the entire working range of the method and represent the spectrum of diseases expected in routine application. The quality of the experiment depends more on obtaining a wide range of test results than a large number of test results, though 100-200 specimens are recommended when assessing method specificity with different chemical reactions or measurement principles [65].
The experimental process involves analyzing specimens within two hours of each other by test and comparative methods to maintain specimen stability, with careful handling controls to ensure differences observed are due to systematic analytical errors rather than specimen handling variables [65]. The data analysis protocol includes graphing the comparison results as a difference plot (test minus comparative results versus comparative result) or comparison plot (test result versus comparison result) to visually identify discrepant results that need confirmation [65]. For quantitative estimation of systematic error, linear regression statistics are preferred for wide analytical ranges, providing slope (b), y-intercept (a), and standard deviation of points about the line (sy/x), while average difference (bias) calculations are more appropriate for narrow analytical ranges [65].
Collaborative Validation Protocol
The collaborative validation protocol emphasizes standardization and shared resources across multiple participating laboratories. The process begins with the originating FSSP planning method validations with the goal of data sharing from the onset, using well-designed, robust validation protocols that incorporate relevant published standards from organizations such as OSAC and SWGDAM [64]. This strategy ensures that all participating laboratories rise to the highest standard simultaneously, meeting or exceeding accreditation and best practice requirements [64].
A key innovation in collaborative validation is the frequent periodic comparability verification method, as demonstrated in a five-year study analyzing 12 clinical chemistry measurements across five instruments [66]. This protocol uses pooled residual patient samples for weekly verifications, with results from any instrument exceeding the allowable verification range versus the comparative instrument reported after applying conversion factors determined via linear regression equations obtained from simplified comparison [66]. The process involves initial comparison using over 40 residual samples according to CLSI guidelines, followed by weekly comparability verification using two pooled serum samples, and simplified comparison with 10-20 non-comparable samples when needed [66].
Figure 1: Collaborative Validation Workflow. This diagram illustrates the structured approach where an originating laboratory develops and distributes a shared validation protocol to multiple participating laboratories, who contribute data to a central repository for harmonized analysis and feedback.
Statistical Approaches for Validation Parameters
Both validation approaches employ specialized statistical methods for determining critical parameters like LOD and LOQ. The uncertainty profile approach has emerged as an innovative validation method based on tolerance intervals and measurement uncertainty [16]. This graphical decision-making tool combines uncertainty intervals and acceptability limits in the same graphic, with a method considered valid when uncertainty limits assessed from tolerance intervals are fully included within the acceptability limits [16]. The β-content tolerance interval is calculated using the formula: [ \stackrel{-}{Y}\pm {k}{tol}{\widehat{\sigma }}{m} ], where ( {\widehat{\sigma }}{m}^{2}={\widehat{\sigma }}{b}^{2}+{\widehat{\sigma }}_{e}^{2} ) represents the estimates of reproducibility variance, between-conditions variance, and within-conditions variance [16].
For HPLC and bioanalytical methods, the calibration curve approach provides a scientifically rigorous method for determining LOD and LOQ [35]. Using linear regression analysis of calibration curve data, LOD is calculated as 3.3 × σ/S and LOQ as 10 × σ/S, where σ is the standard deviation of the response (typically obtained as the standard error from regression analysis) and S is the slope of the calibration curve [35]. These calculated values must then be validated through experimental demonstration by injecting multiple samples (e.g., n = 6) at the LOD and LOQ concentrations to confirm they meet performance requirements [35].
Comparative Performance Analysis
Quantitative Comparison of Outcomes
Empirical evidence from systematic assessments reveals significant differences in outcomes between single-laboratory and collaborative validation approaches. A comprehensive analysis of 16 multilaboratory studies matched to 100 single-lab studies across diverse disease models including stroke, traumatic brain injury, myocardial infarction, and diabetes demonstrated that multilaboratory studies adhered to practices that reduce the risk of bias significantly more often than single lab studies [67]. Importantly, multilaboratory studies also demonstrated significantly smaller effect sizes than single lab studies (DSMD 0.72 [95% confidence interval 0.43-1]), indicating that single-laboratory studies may overestimate treatment effects [67].
The efficiency of collaborative approaches is demonstrated in real-world implementations, such as a five-year clinical chemistry comparability study that maintained within-laboratory comparability across multiple instruments using frequent periodic verification [66]. During this extended study period, 432 weekly inter-instrument comparability verification results were obtained, with approximately 58% of results requiring conversion due to non-comparable verification [66]. After implementing conversion actions based on linear regression analysis, the expected average absolute percent bias and percentage of non-comparable results were substantially reduced, demonstrating the effectiveness of the ongoing collaborative verification process [66].
Table 1: Comparison of Single-Lab vs. Collaborative Validation Approaches
| Parameter | Single-Lab Validation | Collaborative Validation | Key Implications |
|---|---|---|---|
| Effect Size Estimation | Larger effect sizes (DSMD 0.72 higher) [67] | Smaller, more realistic effect sizes [67] | Collaborative approaches reduce effect overestimation |
| Risk of Bias | Higher risk of bias [67] | Significantly lower risk of bias [67] | Collaborative designs enhance methodological rigor |
| Methodological Rigor | Variable adherence to practices reducing bias [67] | Consistent adherence to rigorous practices [67] | Standardized protocols improve quality |
| Resource Requirements | High per-laboratory investment [64] | Shared resource burden across participants [64] | Collaborative model increases efficiency |
| Implementation Timeline | Extended development and validation period [64] | Abbreviated verification for participants [64] | Faster technology adoption |
| Data Comparability | No external benchmarks [64] | Direct cross-comparison between laboratories [64] | Enables ongoing method optimization |
Efficiency and Resource Utilization
The collaborative validation model demonstrates significant advantages in resource efficiency and operational effectiveness. According to business case analyses, the traditional approach where 409 US FSSPs each perform similar techniques with minor differences represents a treminous waste of resources in redundancy, while also missing the opportunity to combine talents and share best practices among FSSPs [64]. The collaborative approach eliminates significant method development work for participating laboratories through its verification-based model, dramatically streamlining technology implementation [64].
For large-scale healthcare applications, collaborative approaches enable maintained comparability across multiple instruments and systems over extended periods. The weekly comparability verification methodology developed for healthcare centers using multiple clinical chemistry instruments from different manufacturers successfully addressed the challenge of providing harmonized results from different instruments despite the technical and environmental challenges of global standardization [66]. This approach proved particularly valuable for measurement procedures lacking technically reasonable or commutable reference materials, where harmonization provides a practical solution for calibration traceability [66].
Generalizability and Transportability
A critical advantage of collaborative validation approaches is the enhanced generalizability and transportability of validated methods across different settings and populations. A multinational COVID-19 study demonstrated that models trained at healthcare systems with larger cohort size largely retain good transportability performance when ported to different sites [68]. This finding is particularly significant for method validation, as it supports the reliability of collaborative models across diverse implementation environments.
The international comparison of laboratory values from the 4CE collaborative to predict COVID-19 mortality revealed that while healthcare system-level differences (both within-healthcare system and between-healthcare system) were greater than country-level differences, the transportability of models did not appear to depend on continent or country [68]. This highlights the potential generalizability of collaborative validation models, suggesting that properly designed collaborative studies can produce methods applicable across international boundaries and healthcare systems.
Table 2: Analytical Parameter Determination in Validation Studies
| Validation Parameter | Calculation Method | Application in Drug Development | Regulatory Reference |
|---|---|---|---|
| Limit of Detection (LOD) | LOD = 3.3σ/S [35] | Determines lowest detectable concentration of active compounds | ICH Q2(R1) [35] [4] |
| Limit of Quantitation (LOQ) | LOQ = 10σ/S [35] | Establishes lowest quantifiable concentration for pharmacokinetics | ICH Q2(R1) [35] [4] |
| Linearity Range | Linear coefficient of determination (R² > 0.998) [4] | Validates analytical response proportionality across expected concentrations | ICH Q2(R1) [4] |
| Specificity | Resolution of analyte peak from impurities [4] | Confirms method selectivity for drug compound in complex matrices | ICH Q2(R1) [4] |
| Precision | Relative Standard Deviation (RSD) [4] | Evaluates method reliability for quality control testing | ICH Q2(R1) [4] |
| Accuracy | Percent recovery of known spikes [4] | Verifies method correctness for potency determinations | ICH Q2(R1) [4] |
Implementation Considerations
Practical Application Framework
Implementing collaborative validation studies requires careful planning and structured coordination. The process begins with originating laboratories planning method validations with the explicit goal of data sharing from the onset, incorporating both method development information and validation data [64]. These laboratories should utilize well-designed, robust validation protocols that incorporate relevant published standards from standards development organizations such as OSAC and SWGDAM [64].
Successful implementation also involves engaging educational institutions with forensic programs, where graduate students can work on method validation as part of thesis requirements [64]. This approach provides valuable practical experience for students while generating validation data under appropriate supervision. Additionally, laboratories should establish working groups for sharing results and monitoring parameters to optimize direct cross-comparability between participating FSSPs [64]. These groups facilitate ongoing method improvement and performance optimization beyond the initial validation.
Figure 2: Decision Framework for Validation Approach Selection. This flowchart outlines the decision-making process for selecting between single-lab and collaborative validation approaches based on method novelty, resource availability, timeline constraints, and generalization requirements.
Resource and Reagent Solutions
Successful validation studies require specific research reagents and materials tailored to the analytical methodology. For HPLC-MS validation, essential components include octadecylsilane columns as stationary phases and acetonitrile-water mixtures with acid modifiers (such as 0.1% formic acid) in gradient systems as mobile phases [4]. These components enable effective separation and detection of target analytes, such as calactin in Calotropis gigantea extracts, with demonstrated LOD of 0.1 μg/mL and LOQ of 1 μg/mL [4].
The selection of appropriate reference materials and calibrators is equally critical, particularly for standardized test items like cholesterol and creatinine where commutable reference materials are essential for accuracy-based proficiency testing [66]. For collaborative studies, the use of pooled residual sera from patient samples has proven effective for weekly comparability verification across multiple instruments, providing commutable materials for ongoing method performance assessment [66].
Table 3: Essential Research Reagent Solutions for Validation Studies
| Reagent/Material | Function in Validation | Application Example | Performance Consideration |
|---|---|---|---|
| Octadecylsilane Column | Stationary phase for compound separation | HPLC-MS analysis of calactin in plant extracts [4] | Impacts resolution, peak shape, and retention |
| Acetonitrile-Water Mobile Phase | Elution solvent for chromatographic separation | Gradient elution of calactin [4] | Affects selectivity and separation efficiency |
| Acid Modifiers (e.g., 0.1% Formic Acid) | Mobile phase additive to improve ionization | ESI-MS detection in negative mode [4] | Enhances MS detection sensitivity |
| Certified Reference Materials | Calibration traceability and accuracy assessment | Standardization of cholesterol and creatinine tests [66] | Provides metrological traceability |
| Pooled Residual Sera | Commutable material for comparability studies | Weekly inter-instrument verification [66] | Enables ongoing performance monitoring |
| Internal Standards (e.g., Atenolol) | Correction for analytical variability | HPLC determination of sotalol in plasma [16] | Improves precision and accuracy |
Challenges and Limitations
Despite their advantages, collaborative validation approaches face several implementation challenges. The initial resource investment required for comprehensive multi-laboratory studies can be substantial, particularly for originating laboratories that bear the primary development burden [64]. Additionally, maintaining strict parameter adherence across participating laboratories is essential for meaningful comparability, requiring careful monitoring and coordination [64].
Another significant challenge involves addressing healthcare system-level heterogeneity in patient populations, clinical practices, and EHR systems, which can create variability in predictiveness of individual tests and locally trained models [68]. Successful collaborative approaches must implement robust quality control procedures at each participating site to address potential imprecision due to site-specific variations in data extraction and incompleteness of datasets [68].
The comparative analysis of single-lab versus collaborative validation approaches reveals distinct advantages and applications for each paradigm. Single-lab validation remains valuable for novel method development, specialized applications, and situations requiring complete control over the validation process. However, this approach carries risks of effect size overestimation, higher bias potential, and significant resource redundancy across the scientific community [64] [67].
The collaborative validation model demonstrates superior performance in methodological rigor, generalizability, and resource efficiency, particularly for standardizable methods with broad applicability [64] [67]. This approach generates more realistic effect size estimates, reduces bias through standardized protocols, and enables direct cross-comparison of data across laboratories [64] [67]. The collaborative framework also facilitates more efficient technology implementation through verification-based adoption of previously validated methods [64].
For researchers and drug development professionals, the selection between validation approaches should be guided by specific research objectives, resource constraints, and intended method applications. Collaborative validation is strongly recommended for methods with potential broad applicability, while single-lab approaches remain appropriate for highly specialized or novel methodologies. Future directions should include expanded collaboration between FSSPs and educational institutions, increased standardization of validation protocols, and development of more sophisticated statistical approaches for parameter determination like the uncertainty profile method [16]. As the scientific community continues to address reproducibility challenges, collaborative validation approaches offer a promising pathway toward more robust, efficient, and generalizable method validation practices.
Implementing Lifecycle Management for Ongoing Method Verification
This guide compares the traditional, static approach to analytical method validation with the modern, dynamic Lifecycle Management approach, focusing on their performance in ensuring method reliability within pharmaceutical development and quality control.
Paradigm Shift: From Static Validation to Dynamic Lifecycle Management
The field of analytical method validation is undergoing a fundamental transformation. The traditional model treats validation as a one-time event to demonstrate compliance, while the modern lifecycle approach frames it as a continuous process to ensure a method remains fit-for-purpose.
The Core Difference: Traditional validation creates an "illusion of control without delivering genuine analytical reliability," where methods that pass initial validation often fail when confronted with real-world variability [69]. In contrast, lifecycle management, through Ongoing Procedure Performance Verification (OPPV), makes an ongoing, testable claim that the method will continue to generate reliable results during routine use [69].
The following diagram illustrates the core stages of the analytical procedure lifecycle, which forms the foundation for modern ongoing verification.
Performance Comparison: Traditional vs. Lifecycle Approach
The choice between these paradigms significantly impacts operational efficiency, regulatory compliance, and the reliability of quality control data. The table below provides a structured comparison.
| Feature | Traditional Validation (Static Approach) | Lifecycle Management (Dynamic Approach) |
|---|---|---|
| Core Philosophy | One-time event; "validate and file" mentality [69]. | Continuous process; part of a perpetual lifecycle [69]. |
| Regulatory Driver | Original ICH Q2(R1); USP <1225>. | ICH Q2(R2), ICH Q14; USP <1220>, <1221> [70] [69]. |
| Focus of Verification | Individual measurements during a validation study [69]. | The Reportable Result used for quality decisions [69]. |
| Post-Validation Strategy | Periodic revalidation, often triggered by events or failures [71]. | Ongoing/Continued Process Verification with statistical control charts [71] [70]. |
| Response to Variability | Reactive; addresses problems only after they cause a deviation [69]. | Proactive; uses data trends to detect process drift and prevent failures [71]. |
| Knowledge Management | Limited reuse of development data; validation is often isolated [69]. | Knowledge from Stage 1 (development) is foundational for all subsequent stages [69]. |
Experimental Protocols for Lifecycle Validation
Implementing a lifecycle approach requires specific experimental strategies that differ from traditional validation. The following protocols are critical for the Ongoing Procedure Performance Verification (OPPV) stage.
Designing a Risk-Based Monitoring Plan
A one-size-fits-all monitoring strategy is inefficient. A risk-based approach prioritizes resources based on the analytical procedure's impact and complexity [70].
- Procedure Categorization: Classify methods based on their impact to patient safety and product quality.
- Indicator Selection: For high-risk procedures, monitor Analytical Procedure Performance Parameters (e.g., precision, accuracy trend over time). For lower-risk methods, Conformity Indicators (e.g., system suitability test pass rates) may suffice [70].
- Establish Alert Limits: Use statistical tools and historical data to set meaningful control limits for each performance indicator [70].
Establishing a Replication Strategy for Validation
Lifecycle validation requires that the replication strategy used during validation (Stage 2) mirrors the routine use of the method to generate a Reportable Result [69].
- Protocol: Instead of simplified replication for experimental convenience, the validation study should include the same number of sample preparations, analysts, and instruments that will be used in routine testing. This ensures the validation study accurately captures the total variability of the reportable result [69].
- Data Analysis: Evaluate the combined accuracy and precision of the final reportable result using statistical intervals, rather than assessing them separately [69].
Protocol for a Comparison of Methods Experiment
When introducing a new method, a comparison of methods experiment is conducted to estimate systematic error (inaccuracy) [65].
- Sample Analysis: A minimum of 40 different patient specimens should be analyzed by both the new method and a comparative method. The specimens should cover the entire working range of the method [65].
- Experimental Period: The experiment should be conducted over a minimum of 5 different days to incorporate routine sources of variation [65].
- Data Analysis: Graph the data using a difference plot or comparison plot. Use linear regression analysis to calculate the slope, y-intercept, and standard error. The systematic error at a critical medical decision concentration (Xc) is calculated as SE = (a + bXc) - Xc [65].
Quantitative Validation Data in Practice
The following table summarizes typical validation data for analytical methods, illustrating the performance standards required in the pharmaceutical industry. These parameters are typically confirmed during Stage 2 (Validation) and monitored during Stage 3 (OPPV).
| Validation Parameter | Experimental Protocol Summary | Typical Acceptance Criteria | Application Example |
|---|---|---|---|
| Linearity & Range | Analyze minimum of 5 concentrations in triplicate [2]. | R² > 0.999 [2] [72]. | Mesalamine assay (10-50 µg/mL) [2]. |
| Accuracy | Spike and recover analyte at 3 levels (e.g., 80%, 100%, 120%) [2]. | Recovery: 95-105% [2] [72]. | Zerumbone in Zingiber ottensii [72]. |
| Precision | Repeatability (multiple injections/intra-day) and Intermediate Precision (different days/analysts) [2]. | %RSD < 1-2% [2] [72]. | Mesalamine intra-day %RSD < 1% [2]. |
| Specificity | Forced degradation studies (acid, base, oxidant, heat, light) [2]. | Baseline separation of analyte from degradants [2]. | Mesalamine stability-indicating method [2]. |
| LOD / LOQ | Signal-to-noise ratio or based on standard deviation of response [2]. | S/N ~3.3 for LOD; ~10 for LOQ [2]. | Mesalamine: LOD 0.22 µg/mL, LOQ 0.68 µg/mL [2]. |
Implementation Workflow for Ongoing Verification
Establishing a successful ongoing verification program is a systematic process. The following workflow outlines the key stages from planning to continuous improvement.
The Scientist's Toolkit: Essential Research Reagent Solutions
Successful method development and validation within a lifecycle framework relies on high-quality materials and reagents. The following table details key solutions and their functions.
| Research Reagent / Solution | Critical Function in Validation |
|---|---|
| HPLC-MS Grade Solvents (Acetonitrile, Methanol, Water) | Ensure low UV background noise, prevent system contamination, and guarantee reproducible chromatographic retention times and mass spec response [3] [2]. |
| Certified Reference Standards | Provide the basis for accurate quantification, method calibration, and establishing the required specificity by confirming the identity of the target analyte peak [3] [2]. |
| Pharmaceutical Active Pharmaceutical Ingredient (API) | Serves as the high-purity material for preparing calibration standards for key parameters like linearity, accuracy, LOD, and LOQ [2]. |
| Stress Testing Reagents (e.g., 0.1N HCl/NaOH, 3% H₂O₂) | Used in forced degradation studies to demonstrate the stability-indicating capability and specificity of the method by intentionally generating degradants [2]. |
| Mobile Phase Additives (e.g., Formic Acid) | Enhance chromatographic peak shape and ionization efficiency in LC-MS/MS analysis, directly impacting the precision and sensitivity (LOD/LOQ) of the method [3]. |
Conclusion
Mastering the validation of specificity, linearity, range, LOD, and LOQ is not a one-time event but a critical component of the entire analytical method lifecycle. A robust validation strategy, grounded in regulatory guidelines and practical troubleshooting, ensures that methods are fit-for-purpose, generate reliable data for clinical decision-making, and stand up to regulatory scrutiny. Future directions point towards greater harmonization of guidelines, the application of advanced data analytics for continuous method verification, and the development of more robust techniques to handle increasingly complex biological matrices, ultimately accelerating drug development and enhancing patient safety.
References
- 1. Analytical Method Development and Validation in ... [https://resolvemass.ca/analytical-method-development-and-validation-in-pharmaceuticals/]
- 2. Design and validation of a robust stability-indicating reversed ... [https://pmc.ncbi.nlm.nih.gov/articles/PMC12619242/]
- 3. Validation and standardization of the content of three di- ... [https://www.nature.com/articles/s41598-025-10636-4]
- 4. HPLC-MS standardization and validation methods for ... [https://www.sciencedirect.com/science/article/pii/S2405844025003433]
- 5. How To Perform Linearity and Range In Method Validation [https://pharmaguru.co/linearity-and-range-in-method-validation/]
- 6. A linear validation method of analytical procedures based ... [https://www.sciencedirect.com/science/article/abs/pii/S0003267024004963]
- 7. Analytical Method Validation: Back to Basics, Part II [https://www.chromatographyonline.com/view/analytical-method-validation-back-basics-part-ii]
- 8. Ensuring Linearity in Method Validation - A Step-by- ... [https://altabrisagroup.com/linearity-in-method-validation/]
- 9. The Linearity or Reportable Range Experiment [https://www.westgard.com/lessons/basic-method-validation/lesson26.html]
- 10. What is meant by the limit of detection and quantification (LOD ... [https://mpl.loesungsfabrik.de/en/english-blog/method-validation/limit-of-detection-quantifcation]
- 11. Limit of Blank, Limit of Detection and Limit of Quantitation [https://pmc.ncbi.nlm.nih.gov/articles/PMC2556583/]
- 12. What are the differences and key steps in Analytical ... [https://resources.eirgenix.com/blog/method_dev_qual_validation]
- 13. Driving Below the LOQ: Statistical Analysis of ... [https://www.quantics.co.uk/blog/loq/]
- 14. An Explanation of Sensitivity and the LLD, LLOQ, and ... [https://www.quansysbio.com/support/explanation-of-sensitivity-lld-lloq-and-uloq/]
- 15. Limit of Quantitation - an overview [https://www.sciencedirect.com/topics/nursing-and-health-professions/limit-of-quantitation]
- 16. Comparison of approaches for assessing detection and ... [https://www.nature.com/articles/s41598-024-83474-5]
- 17. The Detection Limit Experiment [https://www.westgard.com/lessons/basic-method-validation/lesson29.html]
- 18. Validation of ICP-OES and γ-spectrometry methodologies ... [https://link.springer.com/article/10.1007/s10967-025-10270-4]
- 19. Development and validation of a novel isocratic RP-HPLC ... [https://www.sciencedirect.com/science/article/pii/S092809872500274X]
- 20. Q2(R2) Validation of Analytical Procedures March 2024 [https://www.fda.gov/regulatory-information/search-fda-guidance-documents/q2r2-validation-analytical-procedures]
- 21. General Chapters | HMC [https://hmc.usp.org/about/general-chapters]
- 22. US Pharmacopeia Overview: General Chapters Categories - [https://pharmuni.com/2024/12/02/us-pharmacopeia-in-the-pharmaceutical-industry-general-chapters-categories/]
- 23. Method Evaluation | Areas of Focus [https://clsi.org/standards-development/specialty-areas/method-evaluation/]
- 24. EP30 | Characterization and Qualification of Commutable ... [https://clsi.org/shop/standards/ep30/]
- 25. CLSI: Clinical & Laboratory Standards Institute [https://clsi.org/]
- 26. Analytical method validation | PPT [https://www.slideshare.net/slideshow/analytical-method-validation-98875680/98875680]
- 27. Liquid Chromatographic Peak Purity Assessments in ... [https://www.chromatographyonline.com/view/liquid-chromatographic-peak-purity-assessments-in-forced-degradation-studies---an-industry-perspective]
- 28. Determination of Peak Purity in HPLC by Coupling ... [https://pmc.ncbi.nlm.nih.gov/articles/PMC8914781/]
- 29. New HPLC, MS, and CDS Products from 2024–2025 [https://www.chromatographyonline.com/view/new-hplc-ms-and-cds-products-from-2024-2025-a-brief-review]
- 30. The 6 Key Aspects of Analytical Method Validation [https://www.elementlabsolutions.com/uk/chromatography-blog/post/6-key-aspects-of-analytical-method-validation]
- 31. Establishing Acceptance Criteria for Analytical Methods [https://www.biopharminternational.com/view/establishing-acceptance-criteria-analytical-methods]
- 32. 3.3. Estimating the linear range [https://sisu.ut.ee/lcms_method_validation/33-estimating-linear-range/]
- 33. AI in Drug Development: Clinical Validation and ... [https://globalforum.diaglobal.org/issue/june-2025/ai-in-drug-development-clinical-validation-and-regulatory-innovation-are-dual-imperatives/]
- 34. Artificial Intelligence for Drug Development [https://www.fda.gov/about-fda/center-drug-evaluation-and-research-cder/artificial-intelligence-drug-development]
- 35. Determining LOD and LOQ Based on the Calibration Curve [https://www.sepscience.com/hplc-solutions-126-chromatographic-measurements-part-5-determining-lod-and-loq-based-on-the-calibration-curve-6959]
- 36. Approaches to Assay Characterization and Validation: Part 1 [https://www.quanterix.com/approaches-to-assay-characterization-and-validation-part-1-limit-of-detection-and-lower-limit-of-quantitation/]
- 37. Comparing determination methods of detection and ... [https://pmc.ncbi.nlm.nih.gov/articles/PMC9345422/]
- 38. ICH Q2(R2) Validation of analytical procedures [https://www.ema.europa.eu/en/ich-q2r2-validation-analytical-procedures-scientific-guideline]
- 39. Comparison of Different Approaches for Calculating LOD ... [https://ps.tbzmed.ac.ir/Article/ps-40452]
- 40. Method Validation Essentials, Limit of Blank ... [https://www.biopharminternational.com/view/method-validation-essentials-limit-blank-limit-detection-and-limit-quantitation]
- 41. Going Low: Understanding Limit of Detection in Gas ... [https://www.chromatographyonline.com/view/going-low-understanding-limit-of-detection-in-gas-chromatography-gc-]
- 42. Worksheet for analytical calibration curve [https://www.terpconnect.umd.edu/~toh/models/CalibrationCurve.html]
- 43. Calibration Curves, Part IV: Choosing the Appropriate Model [https://www.chromatographyonline.com/view/calibration-curves-part-iv-choosing-appropriate-model]
- 44. How to determine the LOD using the calibration curve? [https://mpl.loesungsfabrik.de/en/english-blog/method-validation/calibration-line-procedure]
- 45. Developing and Validating a Robust RP-HPLC Method for ... [https://pmc.ncbi.nlm.nih.gov/articles/PMC12543500/]
- 46. Expanding the linear dynamic range for quantitative liquid ... [https://www.sciencedirect.com/science/article/abs/pii/S0003267014009234]
- 47. Importance of Utilizing Natural Isotopologue Transitions in ... [https://pmc.ncbi.nlm.nih.gov/articles/PMC9018470/]
- 48. Optimization and validation of a rapid LC-MS/MS method ... [https://www.sciencedirect.com/science/article/abs/pii/S0308814625021752]
- 49. Compound optimization in LC-MS/MS—Why does it matter? [https://www.restek.com/chromablography/compound-optimization-in-lc-msms-why-does-it-matter?srsltid=AfmBOorHoGPmIFgRCJsKVu4pj1m25BrLXVFy7SLy54BCdSMhUEjzPcsL]
- 50. Optimization of an LC–MS/MS analytical method for strychnine ... [https://applbiolchem.springeropen.com/articles/10.1186/s13765-025-01021-w]
- 51. Development and validation of an LC-MS/MS method for ... [https://pubmed.ncbi.nlm.nih.gov/40885230/]
- 52. A novel in-vitro expression assay by LC/MS/MS enables ... [https://www.nature.com/articles/s41598-025-94616-8]
- 53. Understanding LoB, LoD, and LoQ in clinical diagnostics [https://www.linkedin.com/posts/drrohitakumar_back-to-basics-lower-limits-of-activity-7329325855082475520-CVc-]
- 54. LOB versus LOD versus LOQ [https://www.anshlabs.com/resources/lob-versus-lod-versus-loq/]
- 55. A tutorial for computing limits of detection and ... [https://www.sciencedirect.com/science/article/abs/pii/S0003267021011685]
- 56. The Ultimate Guide to Regulatory Submissions - [https://pharmuni.com/2025/06/02/the-ultimate-guide-to-regulatory-submissions/]
- 57. LOD, LOQ, Linearity Range Explained: The Ultimate Guide [https://askpro.blog/lod-loq-linearity-range-explained]
- 58. The Key to Optimizing Sample Efficiency in Analytical ... [https://www.mindfulquality.com/post/the-key-to-optimizing-sample-efficiency-in-analytical-method-validation]
- 59. FDA Validation Rules for Submission Data: Avoid Costly ... [https://prorelixresearch.com/fda-validation-rules-for-submission-data/]
- 60. The Complete Guide to Regulatory Submission Software [https://www.freyrsolutions.com/blog/the-complete-guide-to-regulatory-submission-software-for-life-sciences]
- 61. Performance Characteristics In Analytical Method Validation [https://gmpinsiders.com/performance-characteristics-method-validation/]
- 62. Data Validation in Clinical Data Management [https://www.quanticate.com/blog/data-validation-in-clinical-data-management]
- 63. Development and validation of novel data science tools for ... [https://theses.gla.ac.uk/81982/]
- 64. Collaborative versus traditional method validation approach [https://pmc.ncbi.nlm.nih.gov/articles/PMC7452674/]
- 65. The Comparison of Methods Experiment [https://www.westgard.com/lessons/basic-method-validation/lesson23.html]
- 66. Periodic Comparability Verification and Within-Laboratory ... [https://pmc.ncbi.nlm.nih.gov/articles/PMC8548239/]
- 67. A systematic assessment of preclinical multilaboratory studies and... [https://elifesciences.org/articles/76300]
- 68. International comparisons of laboratory values from the ... [https://www.nature.com/articles/s41746-022-00601-0]
- 69. USP <1225> Revised: Aligning Compendial Validation with ... [https://investigationsquality.com/2025/11/13/usp-1225-revised-aligning-compendial-validation-with-ich-q2r2-and-q14s-lifecycle-vision/]
- 70. General Chapter Prospectus: <1221> Ongoing Procedure ... [https://www.uspnf.com/notice/gc-1221-prospectus-20240927]
- 71. Ongoing/Continued Process Verification - The Perspective ... [https://www.gmp-compliance.org/gmp-news/ongoing-continued-process-verification-the-perspective-of-an-european-gmp-inspector]
- 72. Validation of HPLC method for quantitative determination ... [https://www.sciencedirect.com/science/article/pii/S2666831925000086]